Featured materials
17Master class Beginner1 hr1 projectFree
A quick master class on sashiko embroidery: materials and tools, pattern transfer onto fabric, line stitching sequence, 3-to-2 stitch ratio technique, thread fastening without knots, and common beginner mistakes.
Master class Beginner45 minFree
A guide to the duplicate stitch technique for knit fabric: use any cross-stitch chart, matching one knit stitch to one chart square, work with a tapestry needle on the right side of stockinette fabric, start embroidering from the center of the motif, and progress from simple motifs to multicolor charts.
Master class Beginner25 minFree
A tutorial on turning any picture into a cross-stitch chart using the online tools Xfloss and Pic2Pat: choosing a picture, setting up the palette and size, and getting and saving the finished chart.
Master class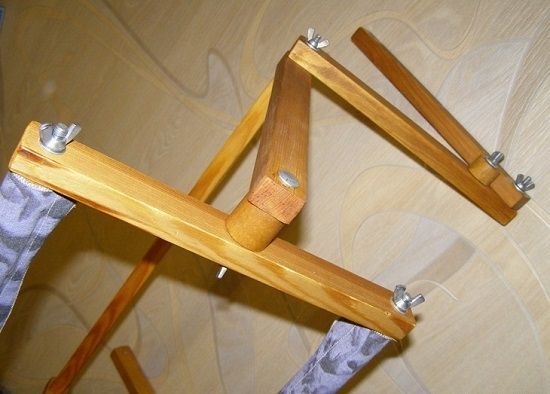 IntermediateFree
A step-by-step tutorial for building a floor embroidery stand: the plan, marking the bars, drilling the holes, spacer dowels, wrapping the frame bars in fabric, M6 hardware, and assembling a structure you can rotate and adjust to work with both hands.
Master class BeginnerFree
A guide to the 'monastery' method of bead embroidery without a hoop: how to position the fabric on the table, check your needle, lay the beads from top to bottom, and secure the thread reliably.
Master class BeginnerFree
A guide to embroidering simple napkins in reversible satin stitch, transferring a design onto fabric, and finishing the edge with fringe, no special tools required.
Master class IntermediateFree
This master class shows how to make a Paisley brooch with Japanese seed beads, a rhinestone-set glass crystal, stiff French wire, and pearls. The main process is shown in the video: preparing the materials, embroidering decorative rows, finishing the openwork edge, and assembling the brooch.
Master class BeginnerFree
The source shows miniature embroidery worked through a button's holes: a green stem and leaves, a bud made with a French knot or bead, and pattern examples. It does not explain whether the button is secure as a functional fastening.
Master class BeginnerFree
Swedish embroidery, also called Swedish weaving, is a simple counted technique based on running stitch. This tutorial explains choosing evenweave fabric, a needle, and threads, then shows how to begin a symmetrical pattern at the center, work without knots, and secure the thread with reverse stitches.
Master class Beginner45 minFree
A tutorial for the spider-web rose in ribbon embroidery: mark out the bud's outline, build a thread "star" base, and weave it with ribbon, embroidery floss, or wool yarn using three different techniques.
Master class BeginnerFree
This material explains 10 basic embroidery stitches for beginners: running stitch, backstitch, split stitch, stem stitch, simple double-sided satin stitch, French knot, chain stitch, lazy daisy, fly stitch, and scattered running stitch. The author recommends not starting with complex projects right away, but first practicing simple, essential foundations of practical embroidery.
Master class BeginnerFree
This master class shows how to embroider a mimosa branch: prepare linen or firm cotton, green embroidery floss for the branch, yellow embroidery thread for the buds, and a fine pencil or disappearing marker. First mark the branch outline on the fabric, using dots for closed buds and circles for open mimosa flowers. Then embroider the branch with green floss in 3 strands using a two-part stitch, add stem stitch where needed, make closed buds with French knots, cut yellow thread into 10 cm lengths for fluffy flowers, tie the bundle with thin thread every 3 cm, cut between the ties, trim the tassels into balls, fluff them with a needle, and sew them onto the marked spots.
Master class IntermediateFree
This master class shows how to make a Heart brooch from beads and crystals: use the measured template, choose materials in one palette, embroider the contour and fill, and review two brooch pin options.
Master class BeginnerFree
This master class shows how to embroider a wisteria branch with satin ribbons: prepare fabric, hoop, needles, scissors, lighter, white 10–12 mm ribbons, lilac-blue 6 mm ribbons, green 10 and 6 mm ribbons, watercolor or batik paints, and brushes. First mark the branches and leaves on the fabric, then embroider the leaves with 10 mm green ribbon using ribbon stitches, make twisted stems and branches with 6 mm green ribbon, embroider open flowers with white and lilac ribbon using straight and ribbon stitches, make buds with straight stitches, connect them with green ribbon, add a side branch, tint the flower with watercolor, and frame the finished work.
Master class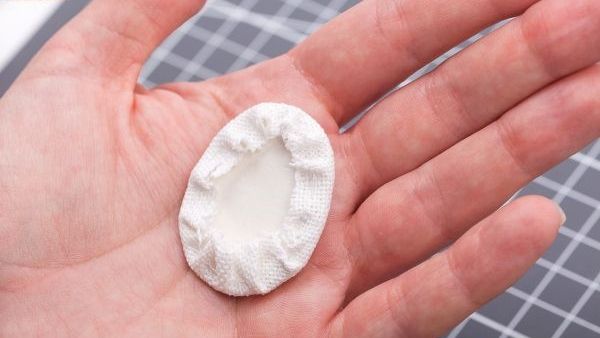 Beginner2 hrFree
A step-by-step guide to making a micro-embroidered pendant: draw the lavender motif, work it in rococo/bullion stitch and stem stitch, cut ovals from fabric, cardboard, and felt, gather the blank, and glue it into the base.
Master class BeginnerFree
This master class shows how to embroider a dimensional flower with sequins: first draw a circle in the required size, divide it into petal guides, bring the needle up on one guide line, pick up one sequin and two small seed beads, repeat the sequence until the petal has enough volume, then take the needle down exactly in the center of the circle and secure the thread on the wrong side. Repeat for every petal. The center can be embroidered after the petals, or you can fill it first with small crystals and then build the sequin-and-bead petals from the center outward. For beginners, firm plain fabric in an embroidery hoop makes the small details easier to control.
Master class BeginnerFree
This lesson covers the first basic step in ribbon embroidery: which tools you need, which base fabric is easiest for practice, what types of ribbon can be used, how to cut about 40 cm of ribbon, trim one end at a 45-degree angle, thread it through a large-eye needle, pierce the ribbon about 1 cm from the end, pull it through to lock it neatly, then seal the straight end with a lighter, fold it, and pierce it with the needle.


