This material explains 10 basic embroidery stitches for beginners: running stitch, backstitch, split stitch, stem stitch, simple double-sided satin stitch, French knot, chain stitch, lazy daisy, fly stitch, and scattered running stitch. The author recommends not starting with complex projects right away, but first practicing simple, essential foundations of practical embroidery.
BeginnerFree
Translated
Things you will learn
Beginners should practice basic stitches first instead of starting with complex designs.
Running stitch and backstitch are the foundation for lines and outlines.
Split stitch and stem stitch help create dimensional lines, stems, and twigs.
French knots work well for tiny details such as snow, flower centers, and small accents.
Lazy daisy and chain stitches are useful for flowers, lettering, and decorative chains.
A set of basic embroidery stitches
After studying the guide, you will have a basic stitch set for outlines, stems, small details, flowers, lettering, and filling simple shapes.
Materials and tools
Materials
Practice fabric, Use a small fabric sample that is comfortable for stitch practice.
Embroidery floss, For some stitches, thread thickness and the number of strands affect the result.
Embroidery hoop, Keeps the fabric taut.
Embroidery needle, Choose a needle that matches your fabric and thread thickness.
Tools
Scissors, For trimming threads.
Fabric marker or pencil, Use it to mark lines and simple shapes.
Preparation
Prepare a practice sample
Place the fabric in a hoop and choose a few floss colors so the stitches are easy to see.
Do not start with a complex piece
Practice the movements on simple lines and small shapes first; then it will be easier to move on to full embroidery.
Line and outline stitches
These stitches help you draw lines, define outlines, and build the base of an embroidery design.
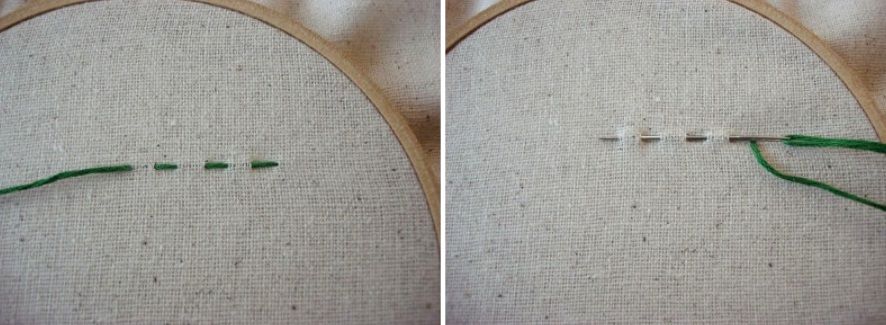
Running stitch
Move the needle forward in a simple rhythm. The stitches should be even on both the front and the back.
Backstitch
On the back, the seam moves forward, while on the front the thread is laid backward. This creates a continuous chain that outlines shapes well.
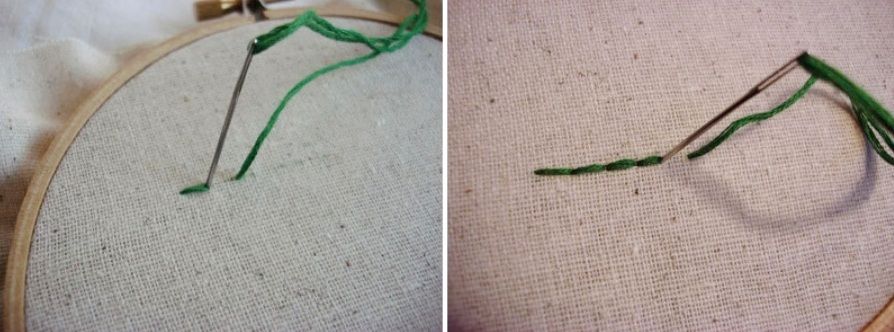
Split stitch
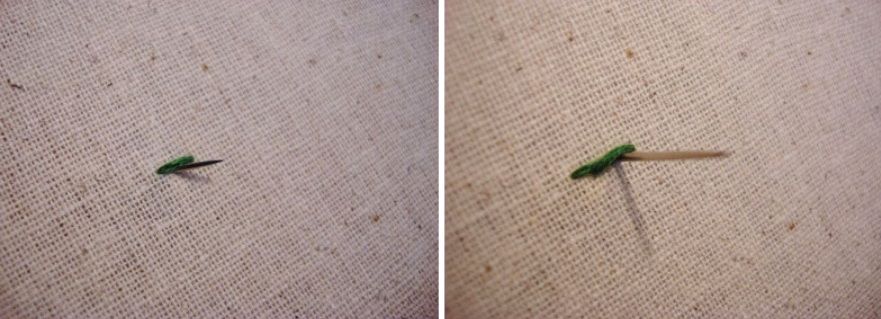
First make a regular forward stitch, then bring the needle up from the back through the middle of the previous stitch. Depending on the number of thread strands, the line becomes a dimensional braid.
Aim for the middle
If the needle does not come up through the center, the line will look less even.
Stem stitch
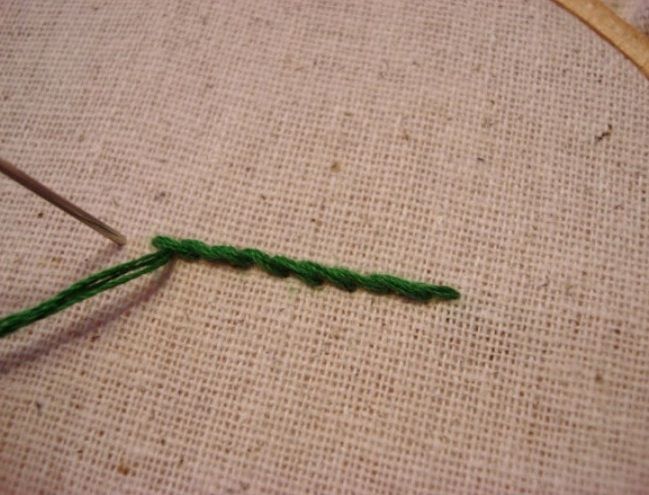
It is similar to split stitch, but the needle passes beside the previous stitch rather than through it. Stem stitch is especially useful for stems, grasses, and twigs.
Filling, knots, and decorative loops
These techniques help fill shapes and add dots, flowers, and decorative chains.
Simple double-sided satin stitch
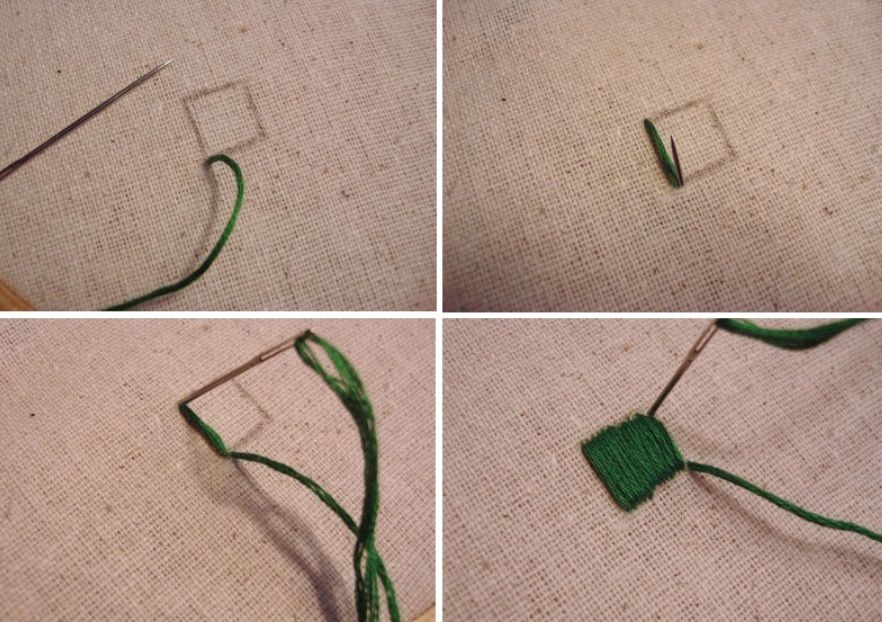
Draw any shape and fill it with straight stitches along the outline. The method is simple, but it requires neatness.
French knot
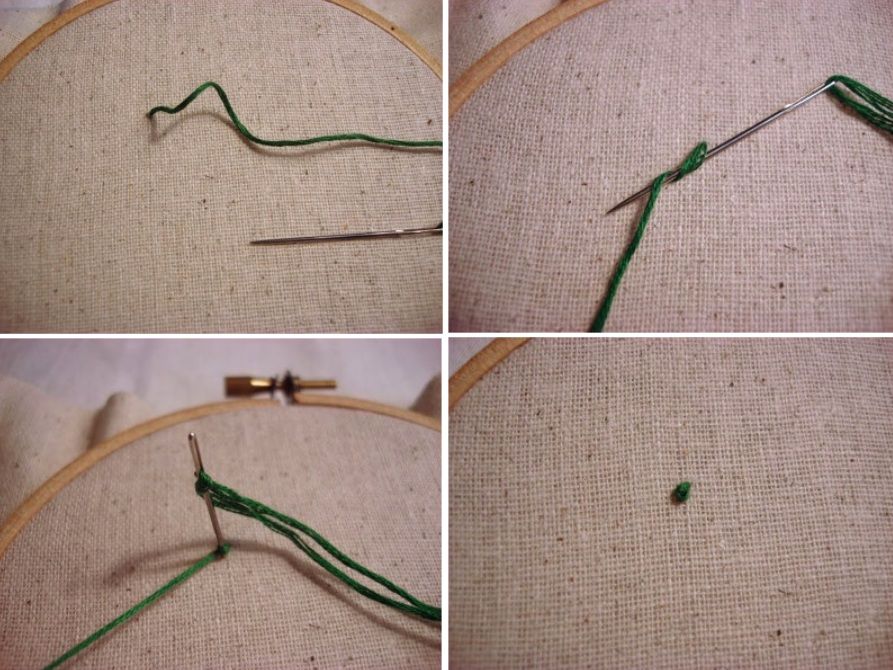
Bring a 2–3 strand thread to the front, wrap it around the needle 2–4 times, and take the needle back to the wrong side, slowly tightening the floss wraps into a knot.
Tighten slowly
If you pull sharply, the knot may become uneven.
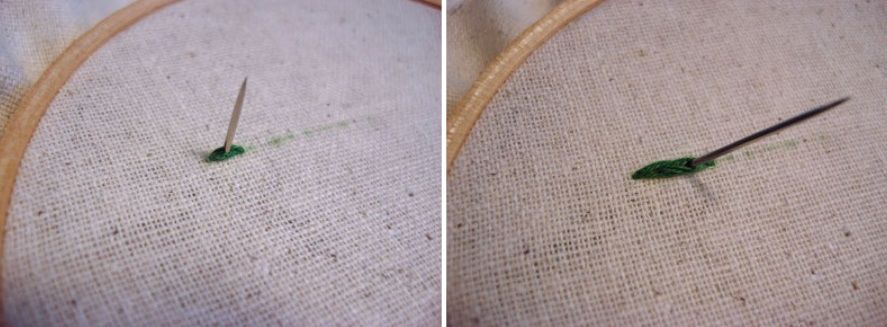
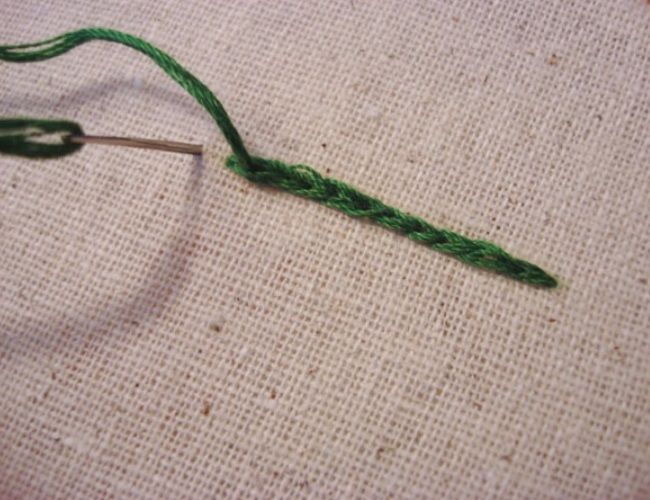
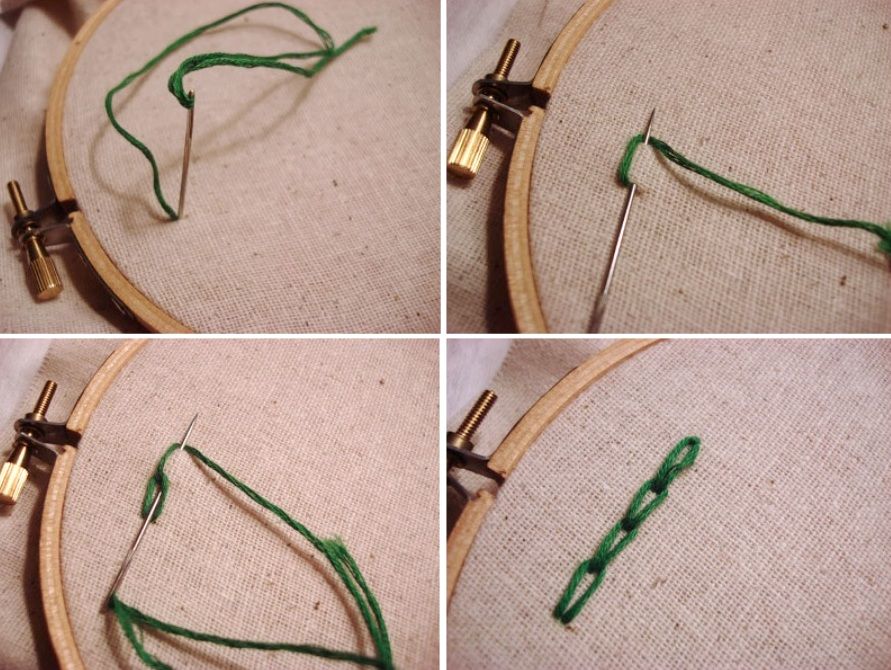
Chain stitch
When the needle is on the front, make a loop and secure it with a stitch from the back, bringing the thread up again inside the loop. Chain stitch is often used for lettering on clothing.
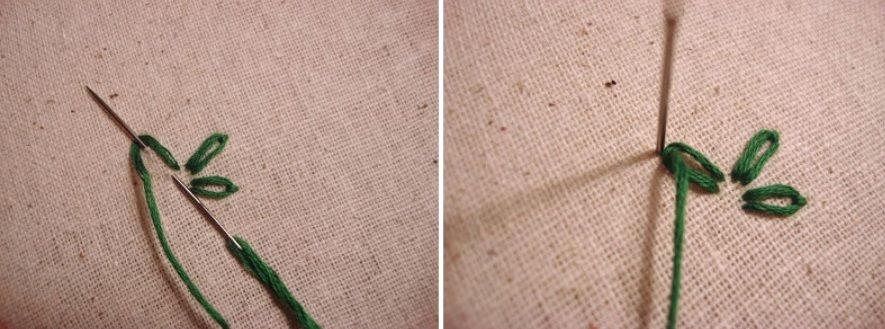
Lazy daisy, or detached chain stitch
This stitch is made like chain stitch, but as separate petals rather than a continuous chain. It is ideal for small flowers and pairs beautifully with cross-stitch filling.
Looped and free stitches
The final two stitches add decorative texture and help fill defined areas.
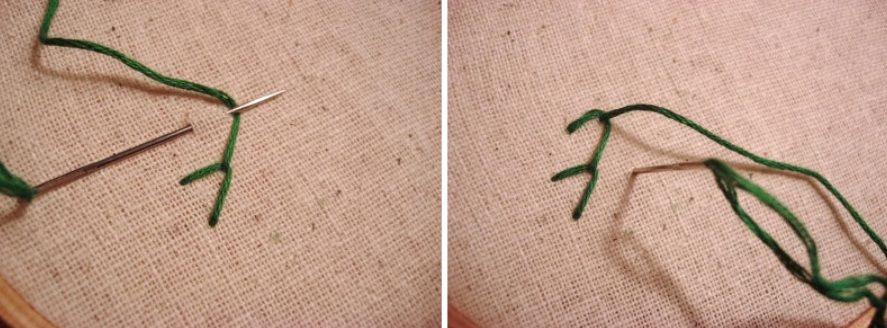
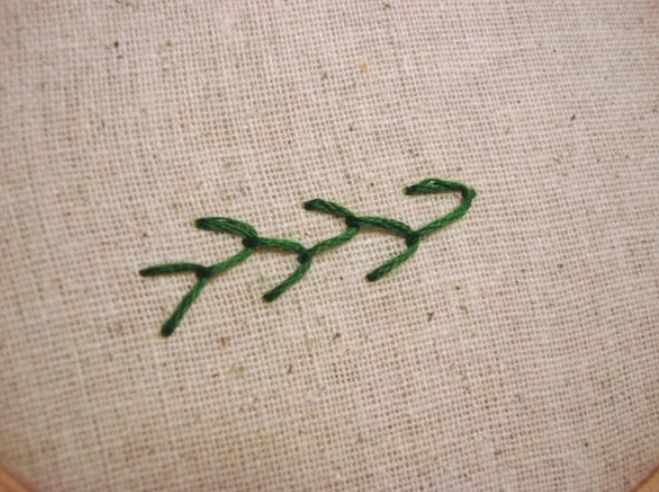
Fly stitch
This is a looped stitch worked in a staggered order: each next stitch begins from the center of the previous one.
Scattered running stitch
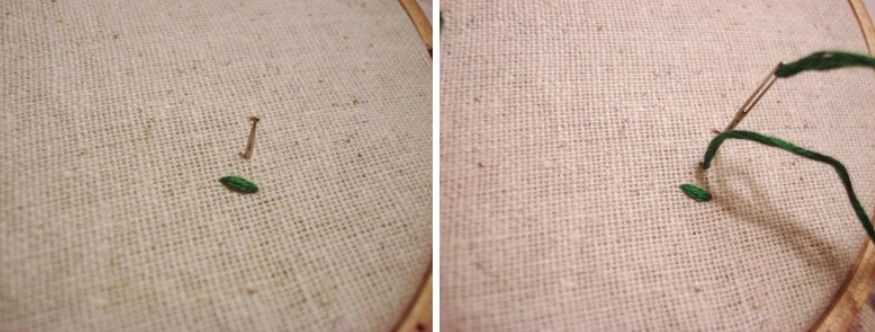
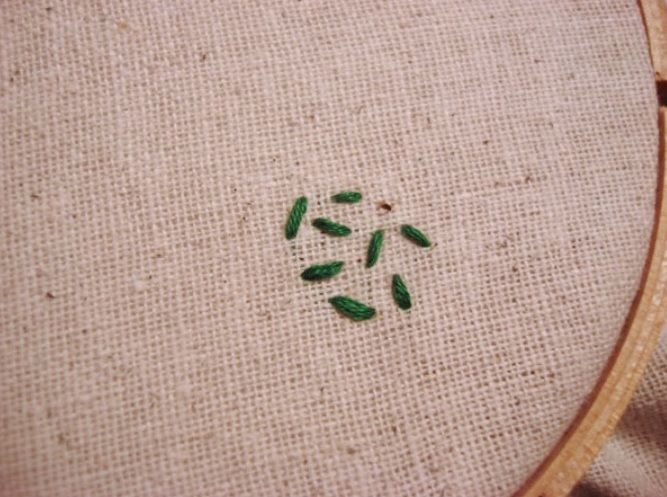
This is a regular running stitch, but smaller and placed randomly. It looks distinctive when kept inside a clearly defined area.
Finish and variations
Finish
Check the practice sample
Compare your lines, knots, loops, and filled areas. Mark the stitches worth repeating before you start a larger project.
Variations
Floral embroidery
Stem stitch, lazy daisy, and French knots are useful for twigs, small flowers, and flower centers.
Clothing decoration
Chain stitch can be used for lettering and decorative lines on clothing.

 BeginnerFree