This master class shows how to embroider a mimosa branch: prepare linen or firm cotton, green embroidery floss for the branch, yellow embroidery thread for the buds, and a fine pencil or disappearing marker. First mark the branch outline on the fabric, using dots for closed buds and circles for open mimosa flowers. Then embroider the branch with green floss in 3 strands using a two-part stitch, add stem stitch where needed, make closed buds with French knots, cut yellow thread into 10 cm lengths for fluffy flowers, tie the bundle with thin thread every 3 cm, cut between the ties, trim the tassels into balls, fluff them with a needle, and sew them onto the marked spots.
BeginnerFree
Translated
Things you will learn
Mimosa embroidery needs only a few materials: fabric, green floss, and yellow thread for the buds.
The design is first marked with a fine pencil or disappearing marker.
Closed buds are embroidered with French knots.
Fluffy flowers are made from short bundles of yellow thread tied with a thin thread.
The finished branch can be framed, used on a card, or added to clothing decor.
Embroidered spring mimosa branch
The result is a light spring motif: a green branch with yellow fluffy buds, suitable for a picture, greeting card, or textile decoration.
Materials and tools
Materials
Fabric, Linen or firm cotton works well.
Green embroidery floss, Used in 3 strands for the branch.
Yellow embroidery thread, For the fluffy mimosa buds and flowers.
Thin thread, For tying yellow thread bundles every 3 cm.
Tools
Embroidery needle, For stitches, French knots, and sewing on the fluffy balls.
Sharp scissors, For cutting bundles and trimming the tails.
Fine pencil or disappearing marker, For marking the branch outline and bud placement.
Preparation
Choose the final use
Decide whether the mimosa will be a framed picture, greeting card, clothing detail, or accessory decor. This determines the branch size.
Prepare the drawing
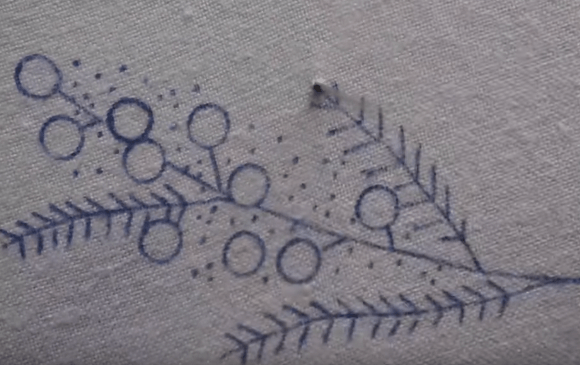
Mark the mimosa branch on the fabric with a fine pencil or disappearing marker. Use dots for unopened flowers and circles for open mimosa flowers.
Mark and embroider the branch
First create the green base that will later hold the fluffy flowers.
Mark the outline
Transfer the mimosa branch to the fabric with a fine pencil or disappearing marker. Mark closed buds with dots and open flowers with circles.
Embroider the branch in two movements
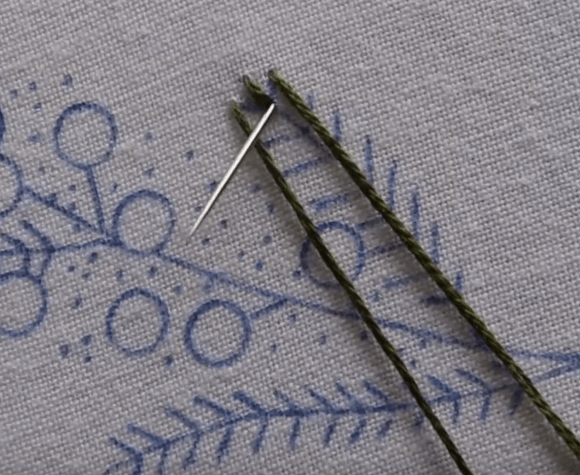
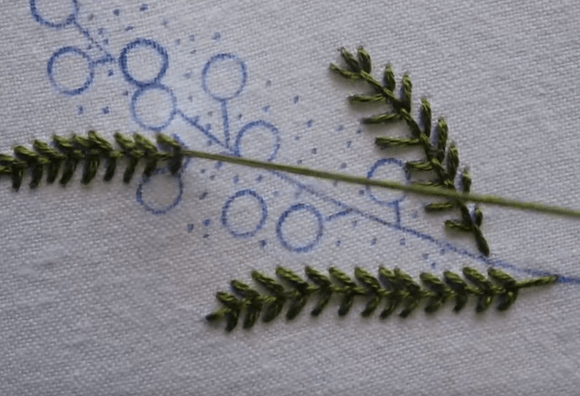
With green floss in 3 strands, work each stitch in two movements: first make a vertical stitch and take the needle to the back, then make a horizontal stitch and bring the needle to the front exactly in the center of the branch.
Repeat along the outline
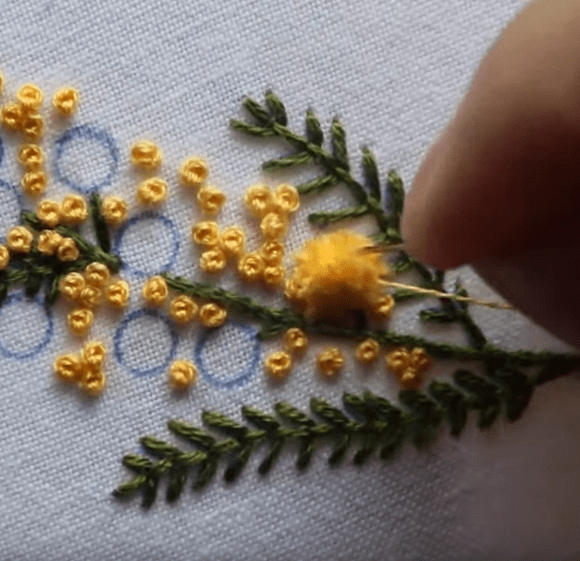
Repeat the movement along the marked outline to create a small herringbone-like branch. Where there are no leaves, use stem stitch.
Keep the branch center aligned
The horizontal stitch should come up in the center; otherwise the branch will look uneven.
Buds and fluffy flowers
The main mimosa effect comes from dimensional yellow thread balls.
Embroider closed buds
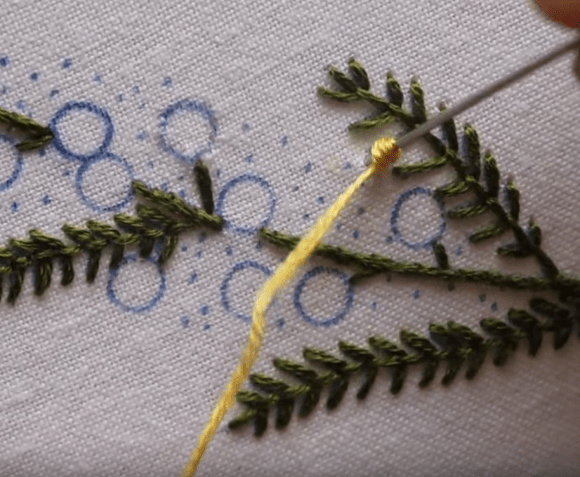
Make the closed buds with French knots at the marked dots.
Prepare the fluffy bundles
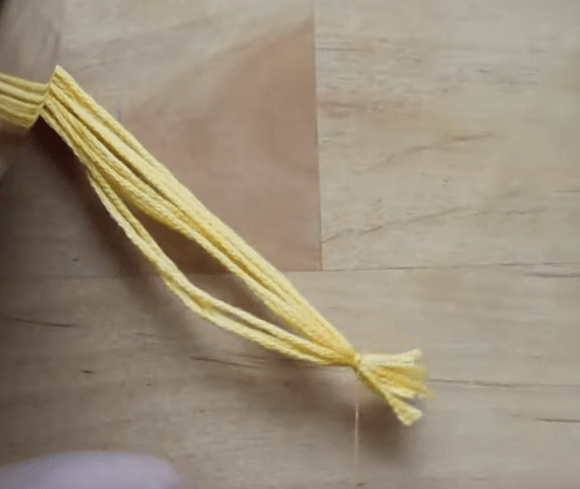
Cut yellow thread into 10 cm lengths. Gather the pieces together and tie them with thin thread every 3 cm.
Cut the bundle apart
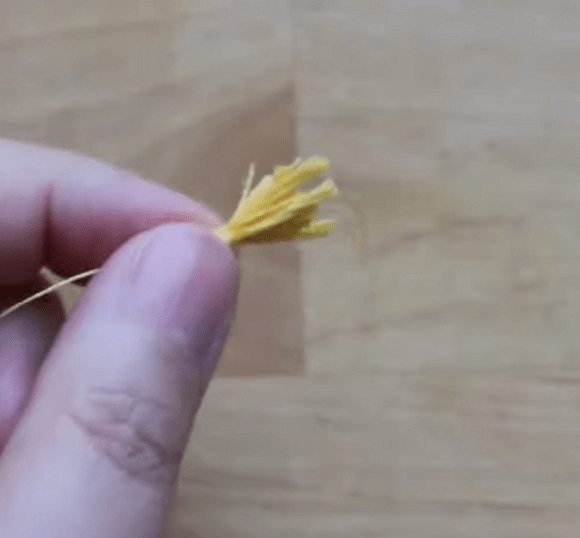
Cut the bundle between the knots to make small tassels.
Shape the balls
With sharp scissors, trim the tails, shape each tassel into a ball, and fluff it with a needle.
Trim gradually
Cut a little at a time so the ball does not become too small.
Sew on the fluffy buds
Sew the yellow balls where the open mimosa flowers were marked on the drawing.
Finish and variations
Finish
Final check
Check the branch outline, density of the green stitches, shape of the yellow balls, and bud placement. The finished mimosa can be framed, added to a card, or used as clothing decor.
Variations
March 8 card
A small mimosa branch can be embroidered on a greeting-card base.
Clothing or accessory decor
The same technique works for textile decoration if you choose a stable fabric and secure the fluffy buds neatly.

 BeginnerFree