How to Embroider with Beads Without a Hoop: The Monastery Method
A guide to the 'monastery' method of bead embroidery without a hoop: how to position the fabric on the table, check your needle, lay the beads from top to bottom, and secure the thread reliably.
BeginnerFree
Translated
Things you will learn
The 'monastery' method suits large bead embroidery pieces: the fabric lies flat on the table instead of being stretched on a hoop or folding frame, so you don't have to hold your hands up in the air.
The loose edge of the fabric is rolled up and pinned with thin pins so it doesn't unroll, and the beads are laid from top to bottom.
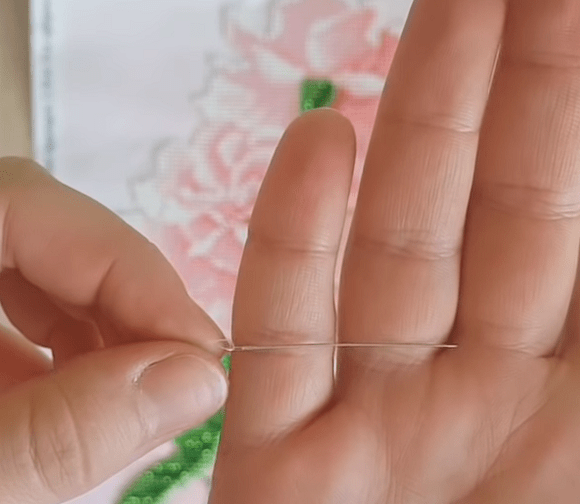
Before you start, always check the beading needle: it needs to pass freely through a bead together with the thread twice, and a test pass through the fabric should feel easy, without any effort.
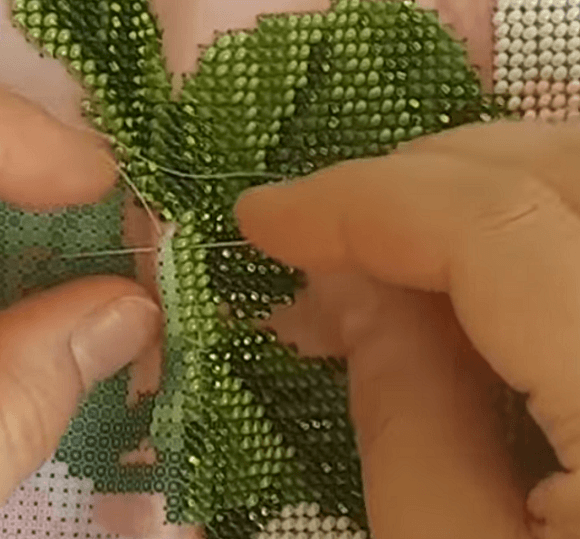
The embroidery is worked in two passes, without bringing the needle through to the back on every stitch, which keeps the fabric even and the beads from shifting.
What You'll Make
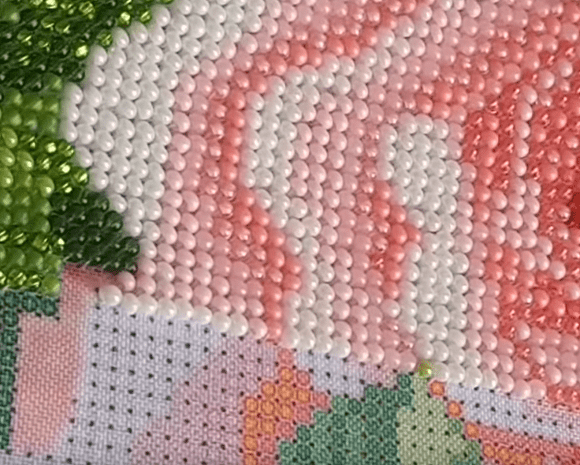
Smooth, even bead embroidery worked flat on the table with no hoop or folding frame: the beads sit in neat rows from top to bottom, and the thread is securely anchored on the back.
Materials and tools
Materials
Canvas or base fabric for bead embroidery, The base needs to be dense enough to hold the beads but still let the needle pass through easily.
Beading thread, Chosen to match the bead color; it needs to pass freely through the needle together with a bead, twice.
Beads in the colors you need, The bead colors are chosen to match your embroidery design.
Tools
Beading needle, It should pass through a bead together with the thread freely, twice, and pierce the base easily, without effort.
Thin pins, Needed to pin the rolled-up loose edge of the fabric so it doesn't unroll.
Scissors, For trimming the thread after securing it at the end of your work.
Preparation
Choose to embroider on a flat surface
If holding the fabric on a hoop or a folding frame feels awkward and tires out your hands, try the 'monastery' method: the fabric simply lies flat on the table.
Prepare the Fabric and Check the Needle
Before you start neat, hoop-free embroidery, you need to position the fabric correctly and make sure your needle is right for the job.
Roll up the loose edge of the fabric
Roll up the loose edge of the piece, and if needed, pin it with very thin pins so it doesn't unroll. Position the embroidery so you're laying the beads from top to bottom.
Check the quality of your beading needle
The needle needs to pass freely through a bead together with the thread TWICE. Also make a test pass through the fabric without the thread or a bead: if the needle struggles to go through, pick a different one — it should slide easily even through a dense base.
Don't skip this check
A needle that's too tight or too coarse can damage the fabric and get in the way of laying the beads evenly.
Embroider Using the Two-Pass Technique
The core technique of the 'monastery' method is embroidering without bringing the needle through to the back on every stitch.
Secure the thread and make your first stitch
Secure the thread, leaving the tail on the front side — you'll tuck it under the beads later. Bring the needle from the back to the front in the upper-left corner, thread on a bead of the color you need, and pull the needle through the 2 lower holes of the canvas (or the marks on your pattern), moving right to left.
Repeat the stitches following your pattern
Repeat the same steps for each following bead. This technique doesn't require bringing the needle through to the back on every stitch — the embroidery is worked in two passes. The fabric comes out perfectly even, with no beads shifting out of place.
Secure the thread at the end of your work
To secure the thread at the end of your work, after threading on the last bead, make your pass diagonally instead of horizontally — that is, bring the needle back out at the same point the stitch started from. Then pass the needle back through the bead and trim the thread on the back.
Check that it's secure
The diagonal pass should lock the thread in place so the bead doesn't slide out of position later.
Finish and variations
Finish
Check the evenness of the fabric
The finished embroidery should look even, with no beads out of place — and your hands shouldn't feel tired, since you did all the work without holding the fabric up in the air.
Variations
Folding Frame or Table
If a folding frame with your hands held up in the air feels tiring, the tabletop 'monastery' method is a gentler alternative for large bead embroidery pieces.
The thread and needle get stuck in the bead, or won't pass through it twice.
Likely cause
The needle is too thick or too coarse for the beads you're using.
How to fix it
Switch to a finer beading needle that passes through a bead together with the thread freely, twice.
The rolled-up fabric edge keeps unrolling
Problem
The loose edge of the piece keeps unrolling while you work.
Likely cause
The edge was rolled up without pinning it in place.
How to fix it
Roll up the loose edge and pin it with very thin pins so it stays in place while you embroider.
The beads shift on the fabric
Problem
The rows of beads look uneven, with individual beads sliding out of line.
Likely cause
The needle was brought through to the back on every stitch, instead of using the two-pass technique.
How to fix it
Embroider using the two-pass technique: don't bring the needle through to the back on every stitch — pull it through the two lower holes of the canvas, moving right to left.
?FAQ
What is the 'monastery' method of bead embroidery?
It's a method where the fabric lies flat on the table instead of being stretched on a hoop or folding frame, and the embroidery is worked in two passes without constantly bringing the needle through to the back.
How do I check a beading needle before I start?
The needle should pass freely through a bead together with the thread twice, and should also pierce the fabric easily on its own, without the thread or a bead.
What does 'two-pass embroidery' mean?
The needle comes out to the front, a bead is threaded on, and the needle is pulled through the 2 lower holes of the canvas moving right to left — without having to bring it through to the back on every single stitch.
How do I secure the thread at the end of my work?
After the last bead, make a diagonal pass, bringing the needle out at the same point the stitch started from, then pass the needle back through the bead and trim the thread on the back.
Your project
Log in to track your project, attach photos, and publish your result into the shared feed.

 BeginnerFree