Japanese Sashiko Embroidery: Working Principles and a Quick Master Class
A quick master class on sashiko embroidery: materials and tools, pattern transfer onto fabric, line stitching sequence, 3-to-2 stitch ratio technique, thread fastening without knots, and common beginner mistakes.
Beginner1 hr1 projectFree
Translated
Things you will learn
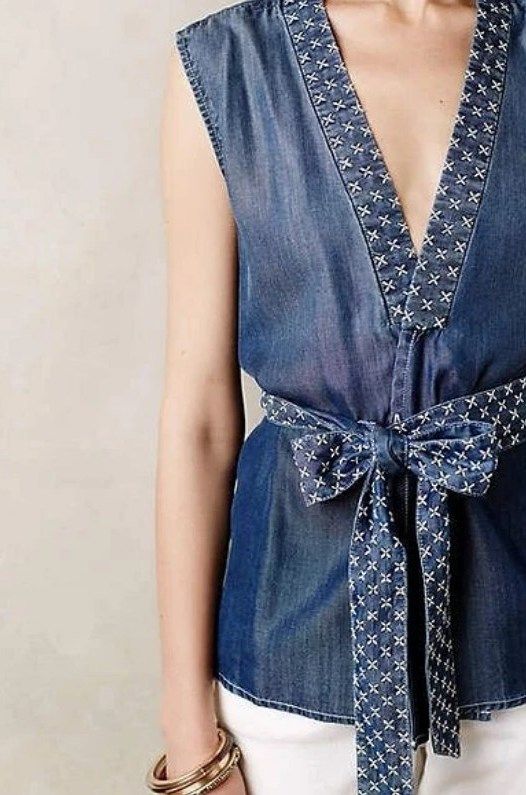
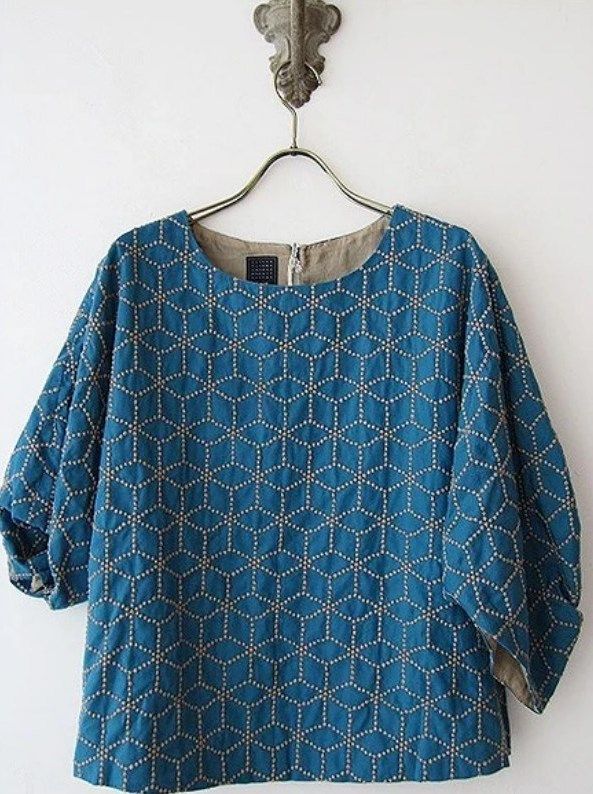
The simple technique and refined finished look make sashiko embroidery ideal for decorating not only home decor items, but also clothing—from jeans to silk blouses.
Sashiko embroidery requires no special skills, but it does not tolerate rushing or careless work; traditionally, it is worked with a long, large-eyed needle on medium-weight cotton fabric using thick twisted thread, though fine fabric, needles, and threads may also be used.
The first and most important rule is careful pattern transfer onto the fabric, such as using white carbon paper secured with tape; always preshrink the fabric before embroidering to prevent shrinkage.
The embroidery is worked with a single strand of thread (occasionally two strands to make a line thicker); plan the order of lines in advance: first horizontal, then diagonal, followed by the border (optional).
The core of the technique is a 3-to-2 stitch ratio with the longer stitch on the front side, without pulling the thread tight until the end of the row; thread ends are secured with a knot or a slack loop (knotless on the back), depending on whether the appearance of the reverse side matters.
What You'll Get
You will master the principles of sashiko embroidery and stitch a small pattern sampler with neat stitches.
Materials and tools
Materials
Drawn pattern diagram
White carbon transfer paper, if unavailable, the pattern can be drawn with a pencil directly onto the fabric
Embroidery floss, 100% cotton
Tools
Needle, ideally, a specialized sashiko needle
Tape, for securing the carbon paper to the fabric
Thimble
Scissors
Preparation
Choose fabric and thread
Traditional sashiko embroidery is stitched with a long, large-eyed needle on medium-weight cotton fabric using thick twisted thread—just as Japanese peasants once did when mending worn clothing. However, nothing prevents you from using fine fabric, needles, and threads—it all depends on the desired effect.
Preshrink the fabric
Be sure to preshrink the fabric to prevent shrinkage later.
See how sashiko is used in decoration
The simple technique and refined finished look make sashiko embroidery ideal for decorating clothing and home decor items.
Examples of sashiko embroidery on clothing and textiles
The simple technique and refined finished look make sashiko embroidery ideal for decorating not only home decor items, but also clothing—from jeans to silk blouses. Embroidery in this technique requires no special skills, but it does not tolerate rushing and never forgives carelessness.
Transfer the pattern onto fabric
The first and most important rule of sashiko is careful pattern transfer onto fabric.
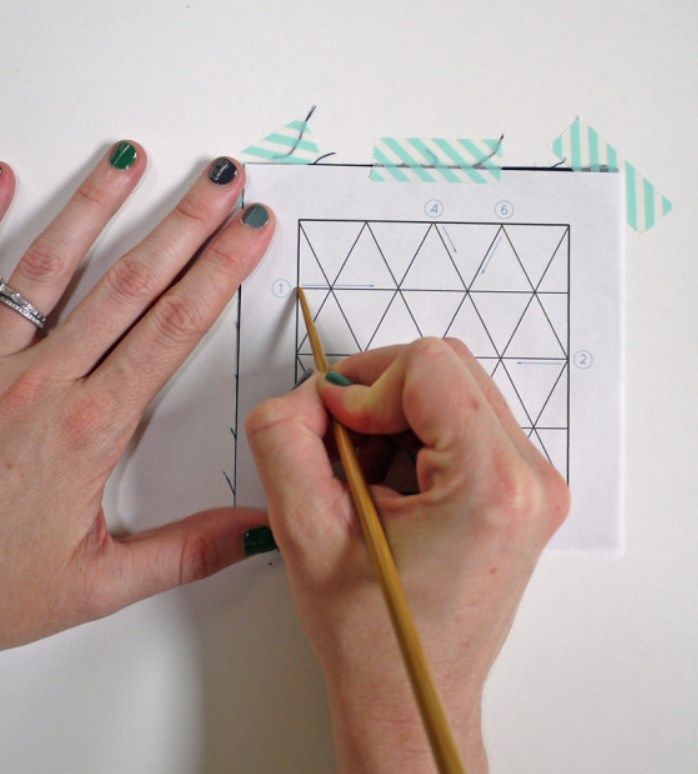
Secure the carbon paper and transfer the pattern
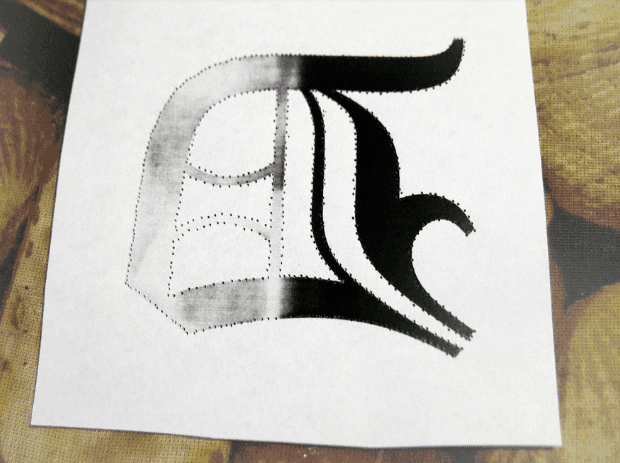
Use white carbon paper, secured to the fabric with tape for convenience (if you don't have carbon paper, the pattern can be drawn directly onto the fabric with a pencil).
Plan the stitching sequence
Be sure to plan the order of lines! First stitch the horizontal lines, then the diagonals, followed by the border (optional).
Embroider the pattern with sashiko stitches
The essence of the embroidery is stitches in a 3-to-2 ratio, with the longer stitch on the front side.
Stitch with a single strand
Sashiko embroidery is worked with a single strand of thread (sometimes two strands are used when a thicker line is needed). If the embroidery is on an item where the back side is visible, avoid knots and use alternative ways to secure the thread tails; otherwise, use regular knots.
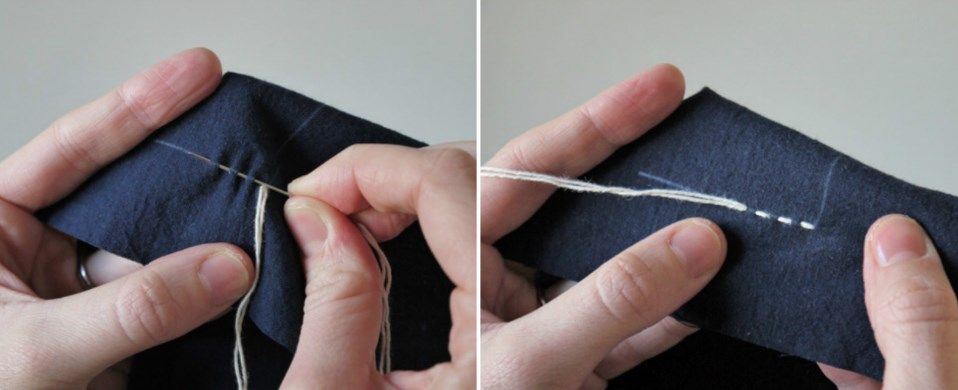
Load stitches onto the needle and push it through
Load stitches onto the needle in a 3-to-2 ratio (the long stitch on the front side) without pulling the thread through. Once loaded, put on a thimble and push the needle through. Smooth out and gently stretch the fabric, relaxing thread tension.
Secure the thread at the end of the row
Upon reaching the end of the row, tie a second knot, leaving a small amount of slack to compensate for fabric tension.
Leave a loop at turns
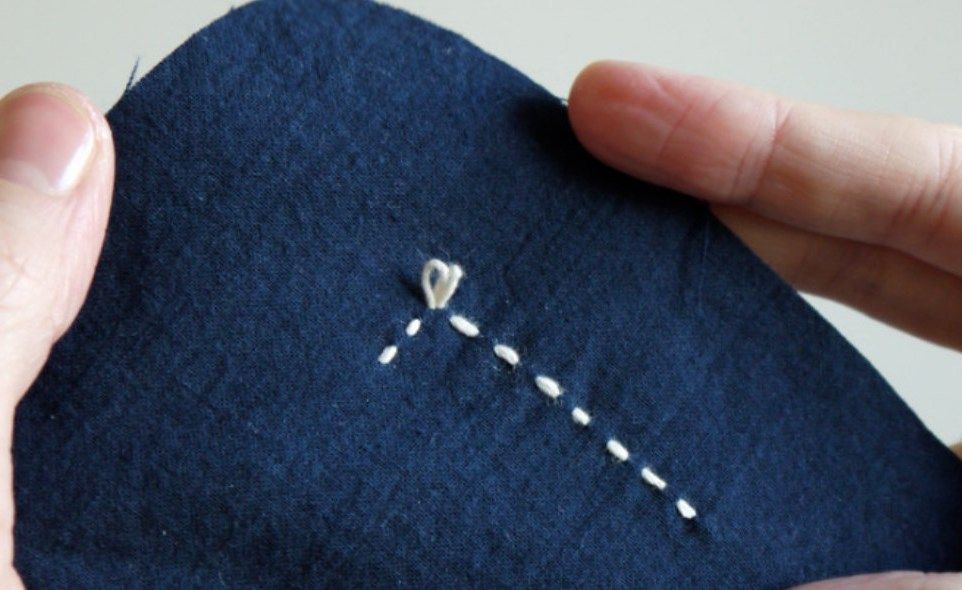
If the pattern involves a turn, leave a small loop on the wrong side. When transitioning from one row to another, tying a knot is not necessary—leave a slack loop instead! It will not be visible on the right side. Such slack allowances will keep the embroidery from puckering or creating excessive tension.
Review common challenges
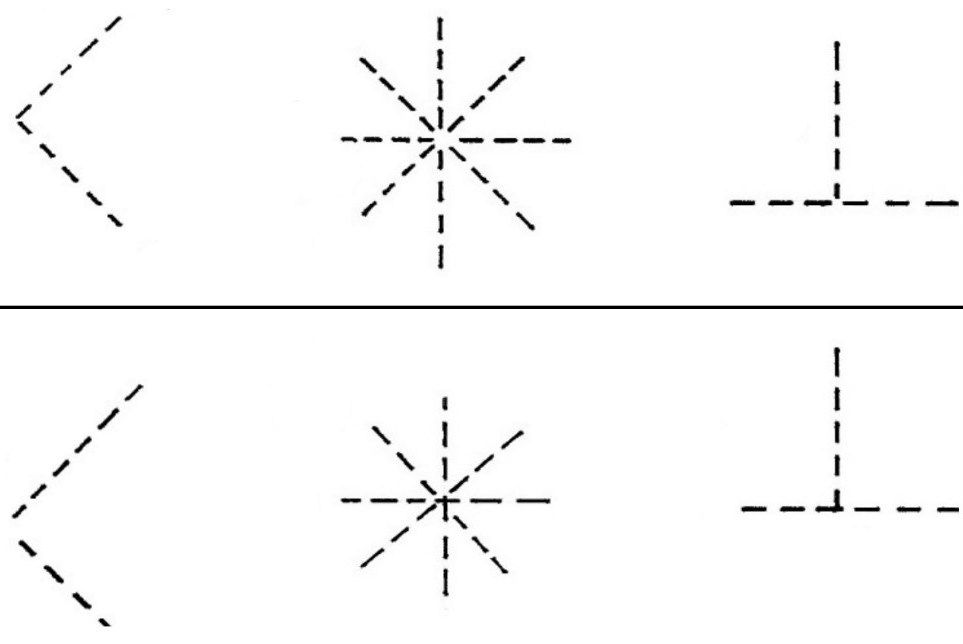
The diagram illustrates the most common issues—the top shows correct stitch placement, and the bottom shows incorrect placement.
Compare correct and incorrect stitches
The provided diagram illustrates the most common issues (top shows correct stitch placement, bottom shows incorrect placement).
Finish and variations
Finish
You've mastered the basics of sashiko embroidery
You have learned the principles of sashiko embroidery: pattern transfer, line sequence, and the 3-to-2 stitch ratio technique. Now you can stitch more intricate patterns on clothing and textiles.
Variations
Use two strands for thicker lines
Sometimes two strands of thread are used when you need to make a line thicker.
Use finer fabric and needle
Nothing prevents you from using fine fabric, needles, and threads instead of traditional heavier materials—it all depends on the desired effect.
After stitching, the stitches along a line look uneven in size and do not form a straight row.
Likely cause
Stitches were gathered without maintaining the 3-to-2 ratio, or the thread was pulled through before reaching the end of the row.
How to fix it
Load stitches onto the needle in a 3-to-2 ratio without pulling the thread through until the end of the row, and refer to the diagram for correct versus incorrect stitch placement.
Fabric puckers after washing
Problem
After the first wash of the finished embroidery, the fabric around the stitches puckers and distorts.
Likely cause
The fabric was not preshrunk before embroidering, so it shrank after the pattern was already stitched.
How to fix it
Always preshrink the fabric before pattern transfer and embroidery to prevent shrinkage in the finished piece.
Waves appear along the stitch line
Problem
After stitching, the fabric ripples along the line of stitches instead of lying flat.
Likely cause
The thread was pulled too tightly, without enough slack on turns and transitions between rows.
How to fix it
Leave a slack loop on turns and when transitioning from one row to another, easing thread tension as described in the master class.
?FAQ
What fabric and thread are used in traditional sashiko embroidery?
Medium-weight cotton fabric and thick twisted thread, stitched with a long, large-eyed needle—just as Japanese peasants once did when mending worn clothing.
How do you transfer the pattern onto fabric?
Using white carbon paper secured to the fabric with tape; if carbon paper is unavailable, the pattern can be drawn directly onto the fabric with a pencil.
In what order should pattern lines be stitched?
First horizontal lines, then diagonal lines, and finally the border (optional).
What stitch ratio is used in the sashiko technique?
A 3-to-2 ratio, where the longer stitch runs along the front side.
Do you always need to tie knots in the thread?
No—if the appearance of the wrong side matters, avoid knots and leave a slack loop; otherwise, use regular knots.
 Beginner1 hr1 projectFree