Ribbon Embroidery from A to Z. Step 1: How to Secure Ribbon in the Needle
This lesson covers the first basic step in ribbon embroidery: which tools you need, which base fabric is easiest for practice, what types of ribbon can be used, how to cut about 40 cm of ribbon, trim one end at a 45-degree angle, thread it through a large-eye needle, pierce the ribbon about 1 cm from the end, pull it through to lock it neatly, then seal the straight end with a lighter, fold it, and pierce it with the needle.
BeginnerFree
Translated
Things you will learn
To begin, you need scissors, an embroidery hoop, a lighter, and a large-eye needle.
For first practice, canvas, tapestry fabric, or a printed ribbon-embroidery design is easier to use.
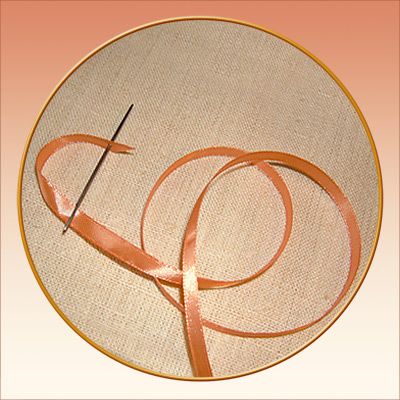
One end of the ribbon is cut at a 45-degree angle so it threads through the needle more easily.
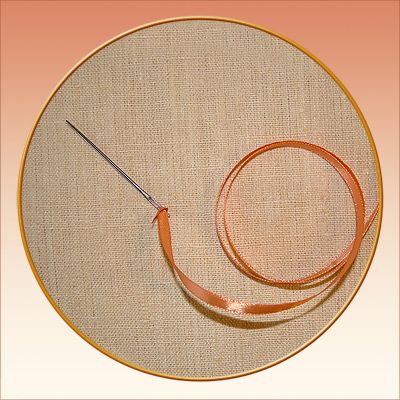
Pierce the ribbon about 1 cm from the end and pull it through to make a neat lock.
Seal the other end with a lighter so the ribbon does not fray.
Ribbon secured in the needle
After preparation, the ribbon sits neatly in the needle eye, does not create a bulky knot, and the free end is sealed against fraying.
Materials and tools
Materials
Embroidery ribbon, 40 cm, The example uses 1 cm wide ribbon; silk, satin, grosgrain, and organza ribbons can all be used for ribbon embroidery.
Tools
Large-eye needle, A wide eye makes it easier to thread the ribbon.
Scissors, For cutting the ribbon and trimming one end at an angle.
Lighter, Used to carefully seal the other end so it does not fray.
Embroidery hoop, For later stitching on canvas, tapestry fabric, or a printed design.
Preparation
Choose a practice base
For first ribbon-embroidery practice, canvas or tapestry fabric is easiest. You can also use a printed design made for ribbon embroidery.
Cut the ribbon
For this first exercise, cut a piece of ribbon about 40 cm long. The tutorial shows a 1 cm wide ribbon.
Secure the ribbon in the needle
The lock should stay slim: the neater the ribbon sits in the needle, the easier it will be to embroider.
Trim the end at an angle
Cut one end of the ribbon at a 45-degree angle. The pointed end is easier to pass through the needle eye.
Thread the ribbon
Pass the angled end of the ribbon through the large-eye needle.
Pierce the ribbon 1 cm from the end
Step back about 1 cm from the ribbon end, hold the pointed tip, pierce the ribbon with the needle, and bring the needle out on the other side.
Tighten the lock
Pull the ribbon through, lower the short tail, and pull both the ribbon and the tail at the same time. The lock should be flat and neat.
Avoid bulk
A bulky lock will make the needle harder to pull through the fabric.
Prepare the other end of the ribbon
The free end is secured separately so the ribbon will not fray while you work.
Seal the straight end
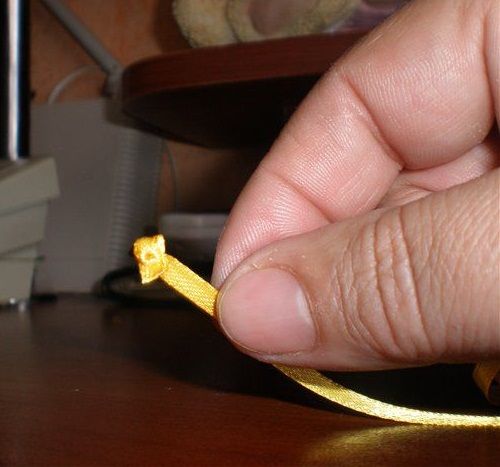
Carefully seal the other, straight end of the ribbon with a lighter so it does not fray.
Use the flame carefully
Bring the flame close only briefly and do not hold the ribbon too near it, or the edge may melt too much.
Fold and pierce the end
Fold the sealed end and pierce it through the middle with the needle, pulling the ribbon all the way through.
Finish and variations
Finish
Check before stitching
Make sure the ribbon is secured flat in the needle, the free end is sealed, and the needle moves easily through your chosen base fabric.
Variations
Other ribbon types
The same method works for silk, satin, grosgrain, and organza ribbons of a suitable width.
Different ribbon width
If the ribbon is wider or denser, choose a needle with a larger eye and make sure the lock does not become bulky.
 BeginnerFree