How to Sew a Pleated Fabric Face Mask You Can Reuse
 BeginnerFree
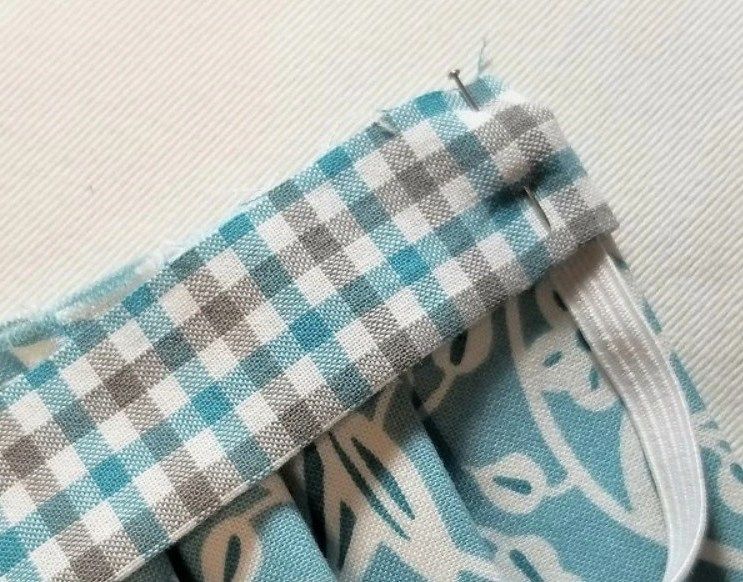
This tutorial shows how to sew a simple, reusable pleated fabric mask. The base is cut from a 20x36 cm rectangle, and side strips cover the raw edges and hold the elastic in place.
Rubrics
Komok.me
Komok is a craft community for master classes, lessons, and projects in sewing, knitting, and other crafts.


Sewing
Sewing tutorials, patterns, clothing alterations, home textiles, bags, and practical sewing techniques from Komok.
BeginnerFreeThis tutorial shows how to sew a simple, reusable pleated fabric mask. The base is cut from a 20x36 cm rectangle, and side strips cover the raw edges and hold the elastic in place.

 BeginnerFree
This master class explains how to finish a raw leather edge: choosing the right knife for a clean cut, dyeing the edge, waxing it, and burnishing it with a slicker for a neat result.
 IntermediateFree
A step-by-step master class for sewing an elastic-waist satin midi skirt: choosing lightweight fabric, bias cutting with the Grasser pattern, steam-shrinking the waistline, sewing an enclosed seam without a serger, adding a double elastic waistband, and finishing the hem with a baby hem.

 BeginnerFree
Here's how to invisibly close a small hole in pants: prep a fabric patch and fusible interfacing, mix chopped-up thread with fabric glue, and set the patch with an iron through paper.

 BeginnerFree
A tutorial on refreshing an old, peeling faux leather bag: strip away the damaged coating, refresh the lining if needed, paint the base with acrylic paint, and seal the results with acrylic varnish.

 BeginnerFree
Yes, we women are mysterious creatures. 😏 Even a trip to the sauna calls for the right outfit. A comfortable, good-looking robe is simply a must-have for the sauna, steam room, or pool.

 Beginner1 hr 30 minFree
A step-by-step tutorial for insulating leather jacket sleeves: mark and cut a batting insulation piece to the sleeve's inner width, cut a lining piece with extra allowance, zigzag-stitch the batting to the lining and sew the sleeve seam, attach a knit cuff to the insulation's lower edge while stretching it as you sew, and hand-sew the finished insulation piece to the raw edges of the shearling lining's armhole.

 BeginnerFree
Summer is coming fast, and the sea and beach are calling. We're all tired of lockdowns and COVID, but there's one silver lining: we've started shopping online a lot more. And that's exactly where the trouble hides — it's easy to misjudge the size when you buy this way. So what do you do if you're heading to the beach tomorrow and there's no time to exchange the item? Or there's another common scenario — the top of your two-piece swimsuit fits perfectly, but the bottom is too big. I'll show you how to take in a swimsuit bottom simply and quickly, without a sewing machine — or rather, how to reduce its volume and give it an original touch.

 IntermediateFree
A step-by-step tutorial for sewing a two-layer panama hat: draft the pattern for the crown top, side band, and brim to your own measurements, fuse the pieces with interfacing and double-sided fusible web, sew and bind the seams with bias tape, join the crown to the brim, and finish with decorative metallic topstitching.

 Beginner40 minFree
A step-by-step tutorial for drafting a three-tier skirt pattern: take the main measurements — hip circumference and garment length, split into three tiers — plus extra height measurements from the waistline to the floor at the front, side, and back; calculate the first tier's width, adjust it using the reference points, and calculate the second and third tiers' widths using a gathering coefficient.

 Beginner1 hrFree
A step-by-step tutorial for sewing a 50×50 cm pillowcase with the French seam on the outside: cut a square piece and two rectangular pieces, hem the long edge of the rectangular pieces with a double fold, layer the pieces wrong-side up so the envelope flap forms in back, sew the main seam with a 1.3 cm allowance, turn the pillowcase right side out, and topstitch around the perimeter 1.5 cm from the edge — this is what creates the neat French seam on the right side, while all the raw edges stay hidden.

 Intermediate2 hr 30 minFree
A step-by-step tutorial for sewing a baby sleep sack: print and tape together the pattern (or draft it yourself from a grid diagram), cut the bib, back, and bag pieces, sew the lining to the batting and quilt it, gather the top of the bag, sew the bib to the front, insert a zipper into the side seam, join the outer fabric to the lining, and bind the raw edges with bias tape.
 BeginnerFree
A short master class on repairing stretched knit cuffs: when it is easier to replace the cuff, how to unpick the old one, align the pieces, sew with a 1.5-2 mm stitch length, press the seams, and sew the cuff back in using 4 matching points.
 BeginnerFree
How to make a textile camouflage net: choosing a nylon or fishing-net base, preparing natural-colored fabric scraps, setting up a net on a 4-5 m² work area, and using three fill techniques — the snake weave, fringe, or a mixed method.
 BeginnerFree
This guide explains how to repair a hole in a jacket: restore a torn seam, apply an adhesive patch to raincoat fabric, close a small burn hole in leather, disguise a visible tear with a zipper or reflective tape, and glue an inner patch on coated nylon or a down jacket.
 BeginnerFree
Sometimes a denim jacket or shirt still looks great, but the collar has worn out and lost its shape. A quick restoration lets you replace the collar on a shirt or jacket in a couple of hours and refresh a favorite piece — sometimes even turning it into a designer item.
 Beginner1 hrFree
A step-by-step tutorial for sewing a Simon the Cat plush toy: print the pattern, cut the fleece pieces with seam allowances, sew the body, clip notches on the paws and cut a slit in the head, turn the toy right side out and stuff it with hollow-fiber filling, sew on the tail and eyes, then finish the face and paws with decorative stitching.
 IntermediateFree
A step-by-step tutorial for sewing boxer briefs from knit fabric using ready-made patterns (sizes 46, 48, 50, 52): assemble the fly, bind it with bias tape, join the double gusset to the front and back pieces, calculate and sew on the elastic waistband using four alignment marks, and hem the bottom edge.