How to Sew a Pleated Fabric Face Mask You Can Reuse
This tutorial shows how to sew a simple, reusable pleated fabric mask. The base is cut from a 20x36 cm rectangle, and side strips cover the raw edges and hold the elastic in place.
BeginnerFree
Translated
Things you will learn
Cut a 20x36 cm base piece, two 4.5x10 cm side strips, and two 6-7 cm lengths of elastic.
Stitch the base, turn it right side out, press it, and form three pleats along the marked lines.
Attach the elastic, finish the side strips, and check the mask's fit.
Tips from the discussion will help you adjust the elastic length, the side strips, and the fit at the nose.
What you'll get
You'll end up with a pleated fabric mask that covers the nose and mouth and stays on with elastic ear loops. This is a household fabric mask, not a certified medical device: it doesn't replace medical-grade protective equipment and doesn't guarantee protection against viruses.
Materials and tools
Materials
Natural fabric in two prints, Use a plain, neutral fabric for the inside and a patterned one for the outside.
Thin elastic, 2 pieces, 6-7 cm each, Check the length against your fit — for some kinds of elastic, 6-7 cm may be too short.
Fabric chalk or a fabric marking pencil, Needed for marking the pleat lines.
Matching thread
Tools
Ruler, For cutting and marking the pleats.
Sewing shears
Pins, For pinning the pleats, elastic, and side strips in place.
Iron, For pressing the base and side strips.
Sewing machine, For all the main seams.
Preparation
Prep the fabric
Before cutting, wash, dry, and iron the fabric. That way the finished mask will hold its shape better after its first wash.
Check the elastic
The elastic should stretch without pinching. If it's a firm or wide type, the approximate 6-7 cm length may end up too short.
Cut the pieces
In the basic version, the mask is made of one large piece, two side strips, and two short pieces of elastic.
Cut the base, strips, and elastic
Cut one large piece 20x36 cm, two side pieces 4.5x10 cm, and two lengths of elastic, 6-7 cm each. You can adjust the measurements to fit an adult's or a child's face.
Tip from the discussion
If your fabric is thick or the pleats end up taller, the 4.5x10 cm side strips might come up short. In that case, it's best to cut them a little longer than needed.
Assemble the mask base
First, the large piece is turned into a two-layer base.
Stitch the main piece
Fold the large piece in half, right sides together. Stitch along the 20 cm side, leaving about a 7 mm seam allowance.
Stitch the main piece along the 20 cm side.
Turn and press the base
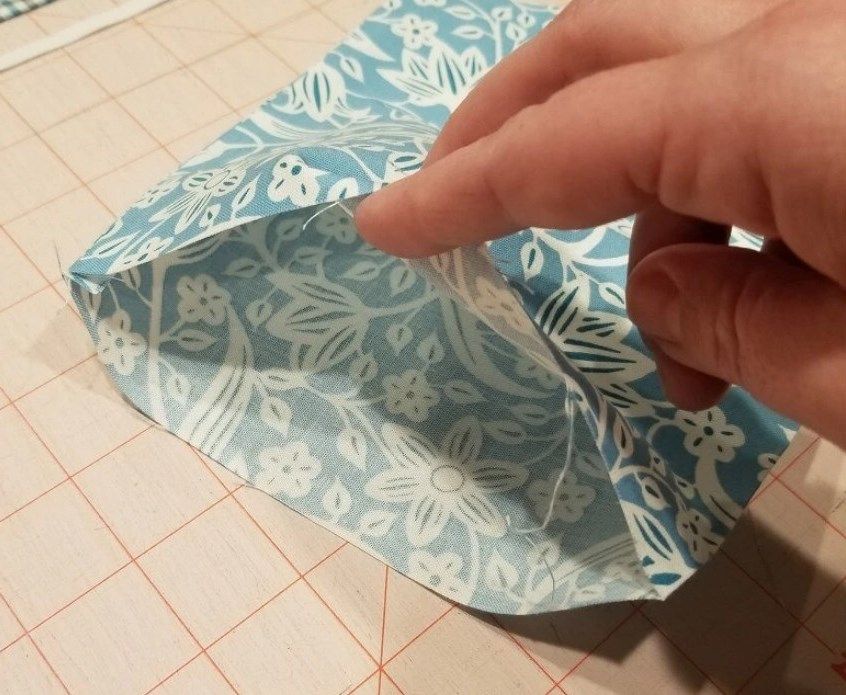
Turn the piece right side out, smooth out the seam allowance, and press it well. The seam should end up at the bottom.
Turn the base right side out and press it.
Form the pleats
The pleats let the mask expand in height and cover the face better.
Mark the pleat lines
Lay the base flat with the raw edges on the sides and the seam at the bottom. Measure 3.8 cm up from the bottom and draw a horizontal line. From that line, measure up another 2.5 cm and draw a second line.
Mark and form the pleats.
Form and secure the pleats
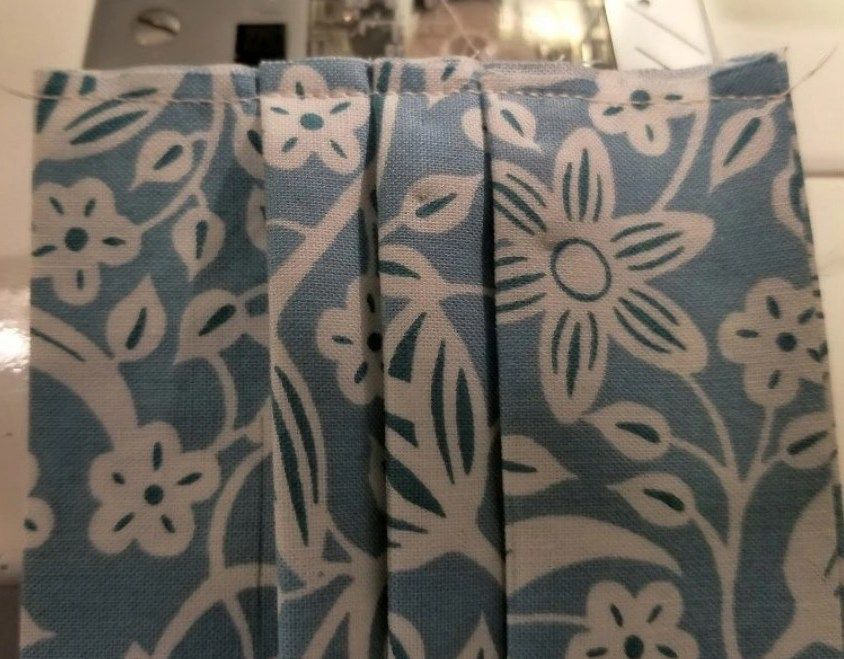
Fold a pleat along the marked line and pin it in place at the edges. Do the same for the second and third pleats, then stitch along the side edges so the pleats stay put.
Mark and form the pleats.
Check
After forming the pleats, the side edge gets shorter. Before sewing on the strips, check that they're still long enough for a neat fold.
Elastic and side strips
The side strips cover the raw edges and hold the elastic in place.
Attach the elastic at the edges
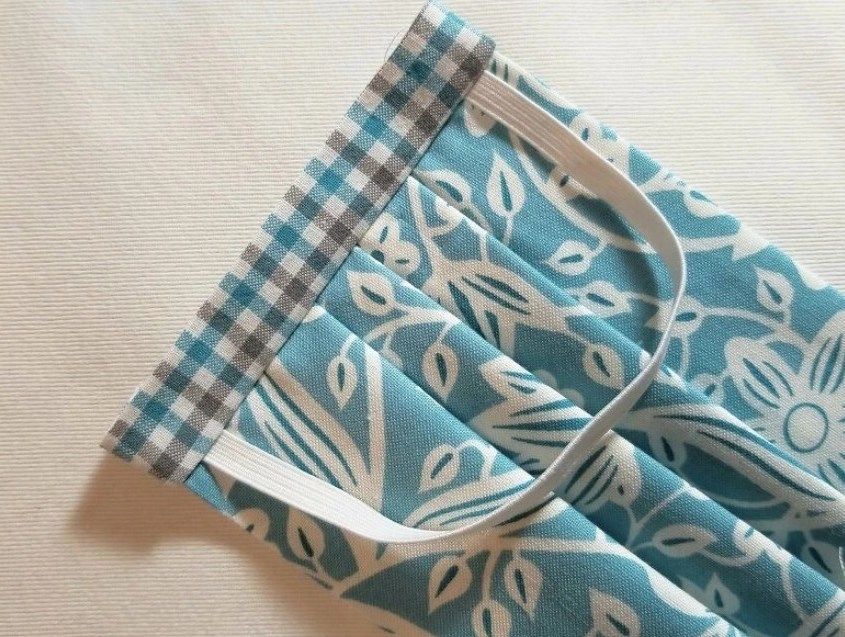
Pin the elastic to the mask's side edge. Secure the ends with short stitch lines; for extra strength, you can use a zigzag stitch.
Attach the elastic at the side edges.
Tip from the discussion
It's best to try the elastic's length before the final stitching — different types of elastic stretch differently.
Prep the side strips
Fold the finishing strips in half lengthwise, wrong side in, and press the fold.
Fold and press the side strips.
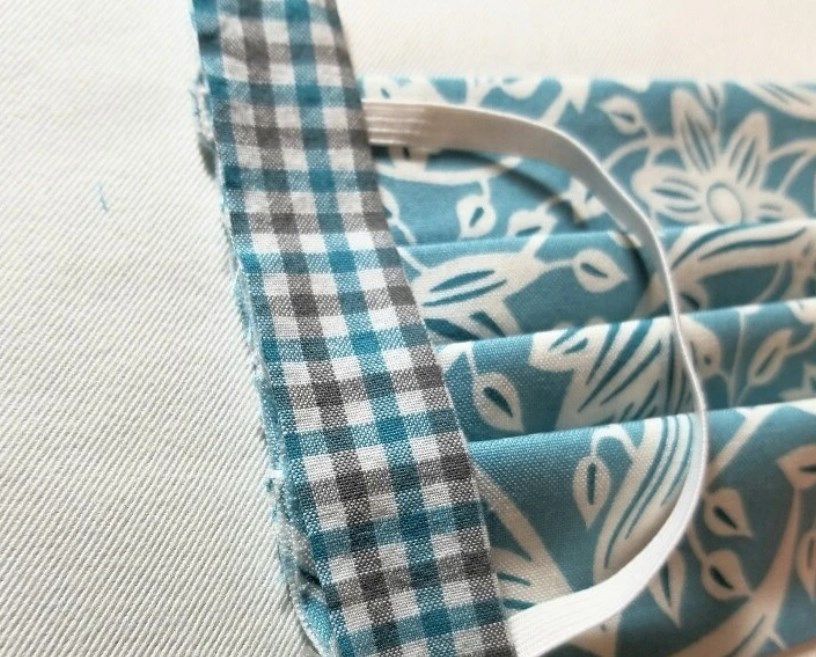
Place the strip on the side edge
Lay the strip over the elastic so the raw edges line up with the mask's side edge.
Lay the strip over the elastic and line up the raw edges.
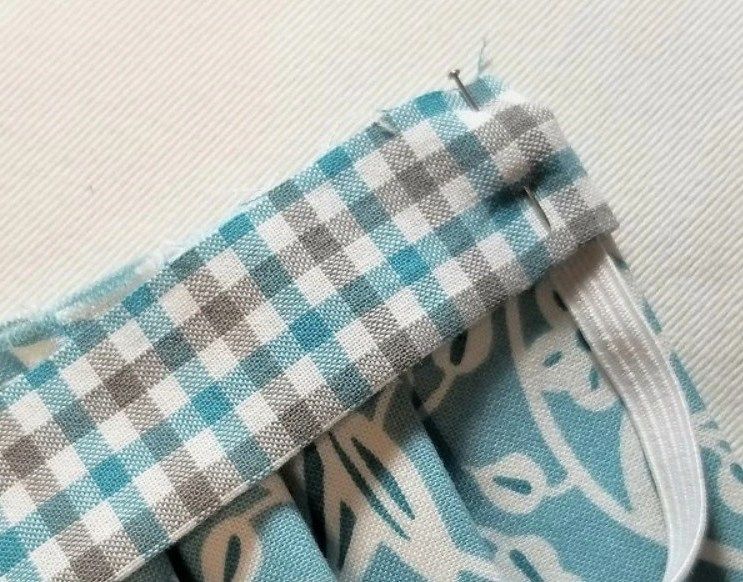
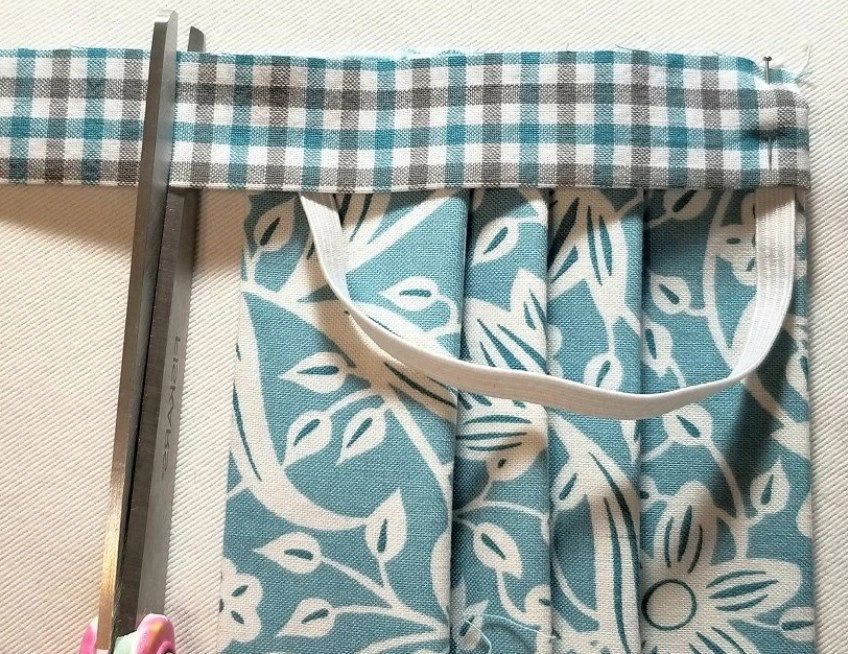
Fold under the end of the strip
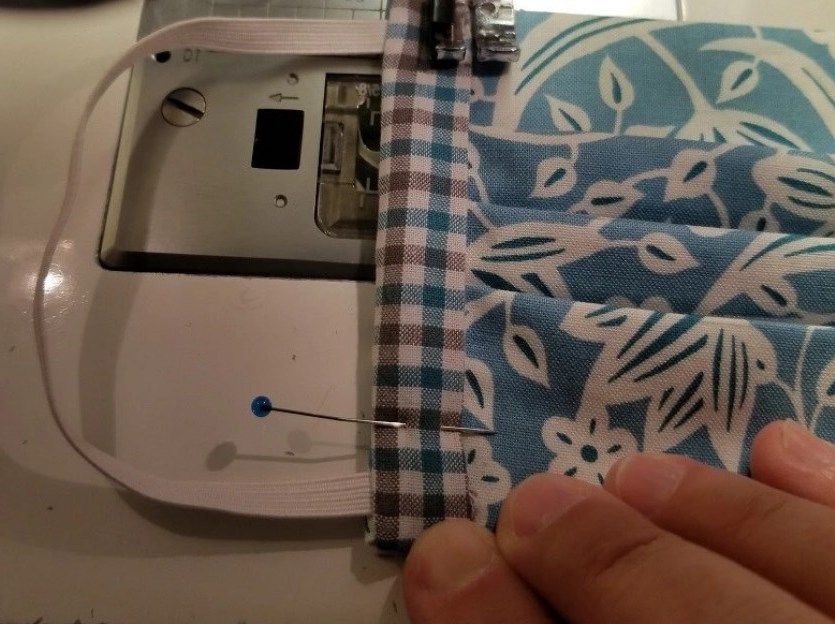
Fold the end of the strip inward and pin it in place. If needed, trim off the excess length, leaving about 1.5 cm for the fold.
Fold under the end of the strip and pin it in place.Pin the side strip in place before stitching.
Finish with topstitching
The topstitching secures the strip and finishes the side edge.
Sew the first securing stitch
Stitch about 7 mm from the edge, backstitching at the start and end.
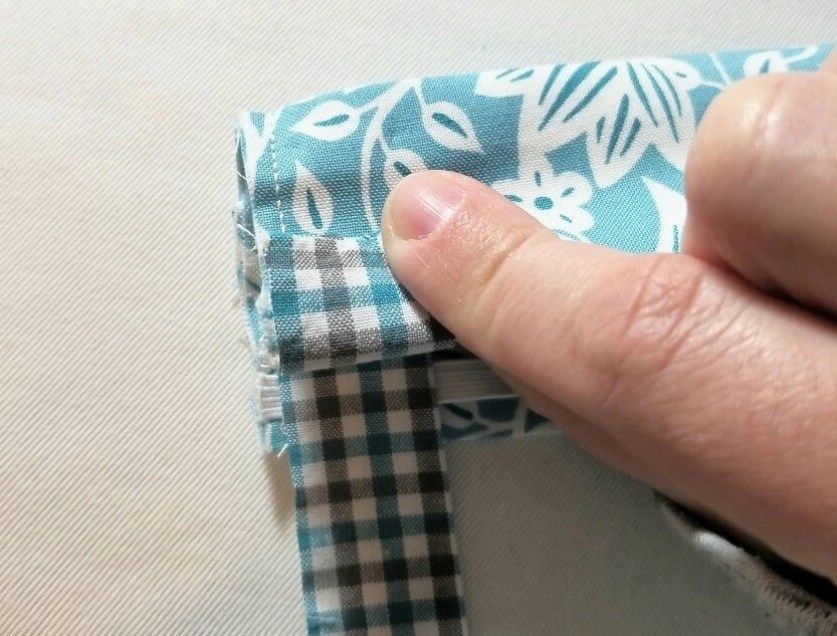
Fold the strip to the other side
Fold the strip to the back of the mask, neatly enclosing the raw edge, and pin it in place.
Fold the strip to the back.
Edgestitch the strip
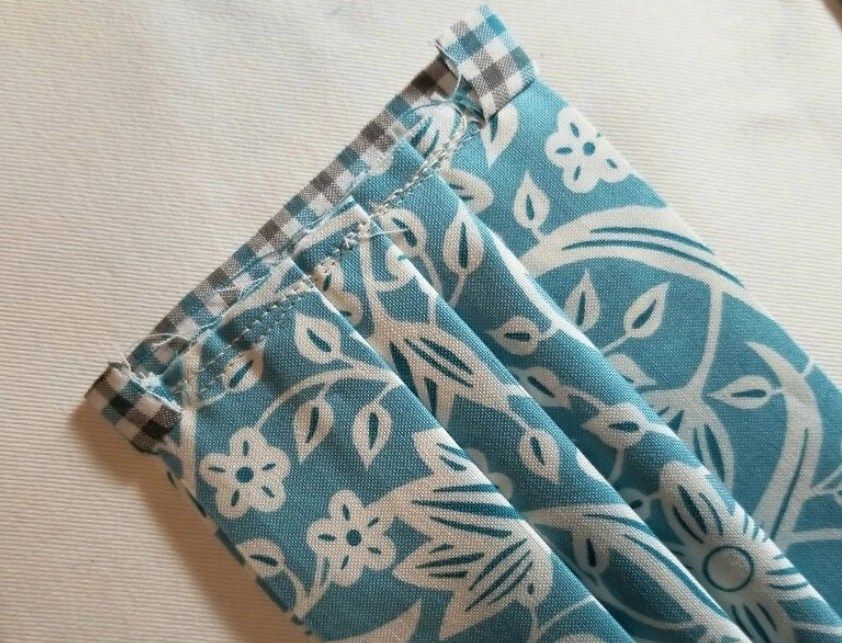
Edgestitch the strip in place. Then topstitch the opposite side of the strip, and repeat the whole process on the mask's other side.
Edgestitch the strip in place.
Check the finished mask
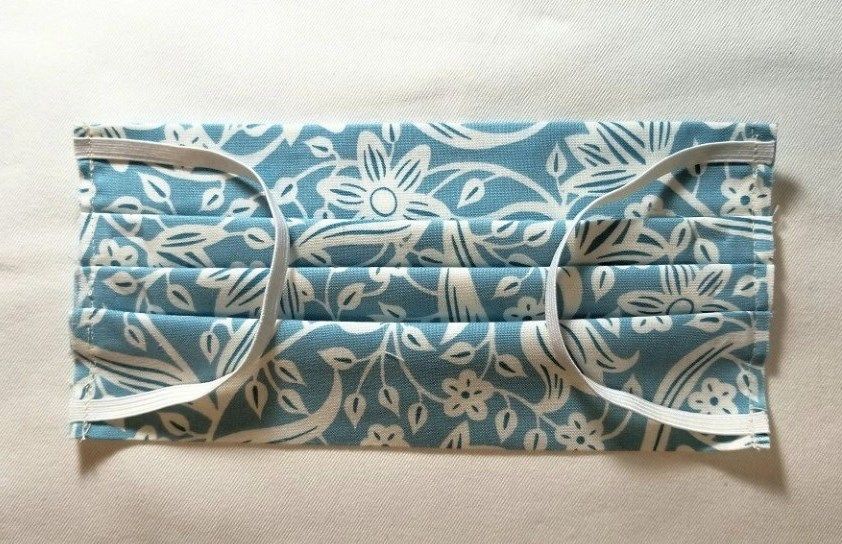
Smooth out the pleats and check the elastic and the fit. You can wash and press the finished mask before wearing it.
The finished mask after finishing both side edges.
Finish and variations
Finish
Care
After wearing it, wash the fabric mask and press it well. If the fabric has shrunk, be sure to pre-shrink the material before cutting next time.
Variations
A pocket for a replaceable filter layer
Based on suggestions from the discussion, you can adapt the design to add a pocket for a replaceable filter layer. This is an optional add-on and doesn't turn the mask into medical protective equipment.
Kid-sized version
For a child, shrink the main piece and adjust the elastic length by fitting it on them. It's important that the mask doesn't pinch or make breathing difficult.
The fabric doesn't hold its shape well enough for a snug fit.
How to fix it
You can add a soft wire or a nose bridge insert. Cover the edges of the insert with fabric so they don't scratch the skin or tear the material.
The side strip is too short
Problem
After the pleats are formed, the 4.5x10 cm strip barely covers the side edge.
Likely cause
The pleats came out taller, the fabric is thicker, or the fold takes up more length than expected.
How to fix it
Cut the side strip a bit longer than needed and trim off the excess after fitting it to the mask's edge.
The elastic pinches or doesn't sit like in the photo
Problem
The 6-7 cm piece turned out too short.
Likely cause
Your elastic may be firmer or less stretchy than the one in the original example.
How to fix it
Before the final stitching, try the tension on and lengthen the elastic if it pinches.
?FAQ
Is this a medical mask?
No. This is a household fabric mask you sew yourself. It's not a certified medical device and doesn't guarantee protection against viruses.
Can I change the size?
Yes. You can scale the base measurements down or up to fit an adult's or a child's face. It's especially important to check the pleat height and elastic length.
Can I add a pocket for a replaceable filter?
Yes, that can be done as a variation on the design. A pocket like this is handy if you want to insert and swap out an extra layer, but it doesn't make the mask a certified medical device.
Your project
Log in to track your project, attach photos, and publish your result into the shared feed.
Girls, in your case I'd add more elastic along the top and bottom of the mask so it sits more snugly against the face. Or better yet — something like wire, to give it a stable shape. Just make sure to finish the edges well, otherwise a mask like that won't survive being washed…
I actually had to sew a mask like this for my son for school. I don't have photos for a tutorial, but I do have patterns for different ages, and I can describe the process in reasonably more detail, although the two tutorials above already cover the main points pretty thoroughly. Given the spread of the coronavirus (including here in Ukraine), I think this will be useful. We don't have any masks in pharmacies either — there are even signs up saying, "No masks, we don't know when there'll be more"…
My mask is cut from a template pattern, and what sets it apart from the earlier ones is a seam down the front. That's exactly what makes it sit snugly against the face. The piece itself is two layers; I'd recommend sewing it from cotton fabric or flannel.
Besides what the girls used in the previous two tutorials, you'll also need a printed and cut-out pattern.
Print this sheet on a regular home printer, at 100% scale, on A4 paper:
Now let me walk you through the sizing:
the light green line is for kids ages three to six;
the orange line is for kids seven to twelve;
the purple line is for teens and women;
the black line is for adult men.
For one mask you need to cut four pieces (mirrored — 2 + 2). Don't forget to add 6-7 mm seam allowance along every raw edge!
Stack the pieces two at a time, right sides together, and stitch (just the center seam!).
Then take the two pieces you've sewn this way, put them right sides together, and stitch the long sides of the mask.
After that, turn the piece right side out, smooth it out, and press the seam allowances. Then stitch along the long sides, about 5 mm from the edge.
Now fold the short side edges under twice and stitch them down, forming a channel for the elastic. Backstitch the fold (backstitching at the start and end of the seam).
All that's left is to pick the elastic length and thread it through the channel with a safety pin. I usually sew the ends of the elastic together by hand, especially if it's a cord-type elastic.
Well, panic is already creeping into our tight-knit ranks... Everything will be fine! I'm already seeing articles online along the lines of how to sew a mask against coronavirus... Same as any mask against viruses, really)) The main thing is to change it often, that's the one thing you shouldn't forget! Our people will put one on and wear it all day as a breeding ground for germs...
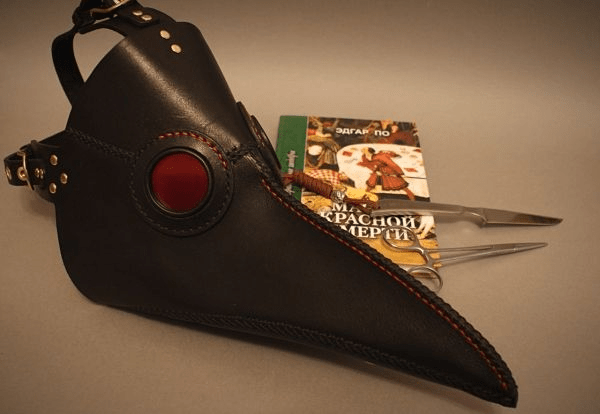
My husband sent me a tutorial for sewing a plague doctor mask 😄.
And that's how the panicked discussion about protective gear ended))
I'm joining in too) I sewed masks for my family and for friends) Even for my little daughter — she happily puts hers on when she sees we're wearing ours too. I got the pattern from somewhere online.
 BeginnerFree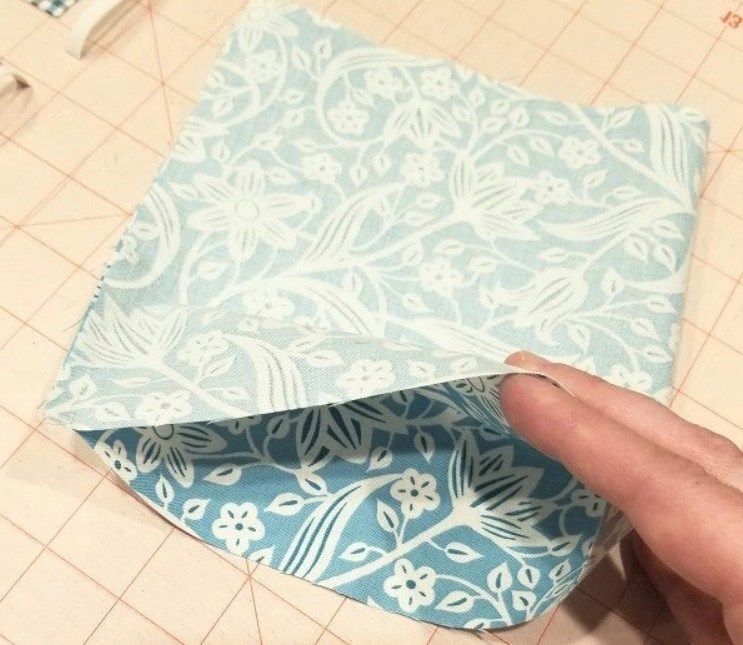


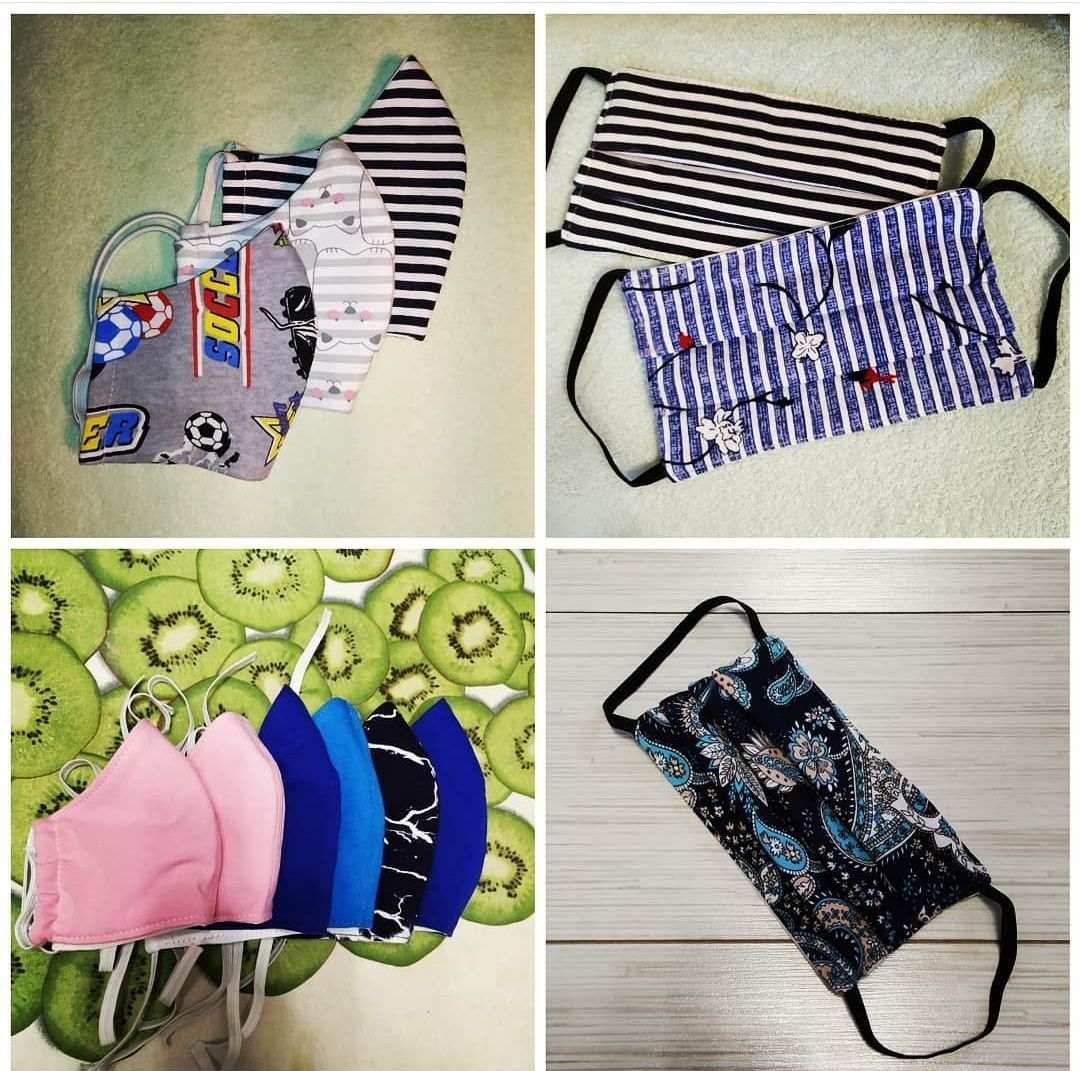
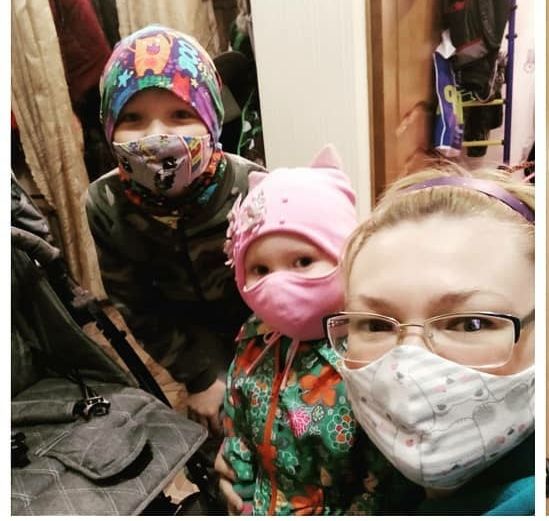


Girls, in your case I'd add more elastic along the top and bottom of the mask so it sits more snugly against the face. Or better yet — something like wire, to give it a stable shape. Just make sure to finish the edges well, otherwise a mask like that won't survive being washed…
I actually had to sew a mask like this for my son for school. I don't have photos for a tutorial, but I do have patterns for different ages, and I can describe the process in reasonably more detail, although the two tutorials above already cover the main points pretty thoroughly. Given the spread of the coronavirus (including here in Ukraine), I think this will be useful. We don't have any masks in pharmacies either — there are even signs up saying, "No masks, we don't know when there'll be more"…
My mask is cut from a template pattern, and what sets it apart from the earlier ones is a seam down the front. That's exactly what makes it sit snugly against the face. The piece itself is two layers; I'd recommend sewing it from cotton fabric or flannel.
Besides what the girls used in the previous two tutorials, you'll also need a printed and cut-out pattern.
Print this sheet on a regular home printer, at 100% scale, on A4 paper:
Now let me walk you through the sizing:
For one mask you need to cut four pieces (mirrored — 2 + 2). Don't forget to add 6-7 mm seam allowance along every raw edge!
Stack the pieces two at a time, right sides together, and stitch (just the center seam!).
Then take the two pieces you've sewn this way, put them right sides together, and stitch the long sides of the mask.
After that, turn the piece right side out, smooth it out, and press the seam allowances. Then stitch along the long sides, about 5 mm from the edge.
Now fold the short side edges under twice and stitch them down, forming a channel for the elastic. Backstitch the fold (backstitching at the start and end of the seam).
All that's left is to pick the elastic length and thread it through the channel with a safety pin. I usually sew the ends of the elastic together by hand, especially if it's a cord-type elastic.