
How to sew a trendy faux leather headscarf yourself
Girls, this accessory is at the peak of fashion right now! Not to mention that faux leather blocks cold wind, while the soft and warm lining keeps you cozy inside. No need to overpay for a store-bought headpiece when it's quite simple to sew one yourself.
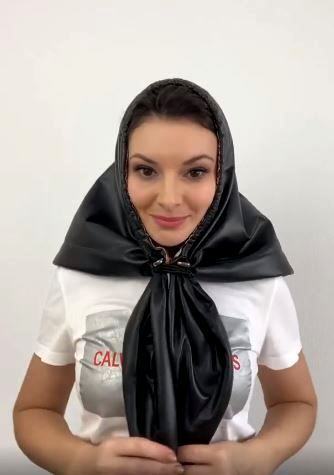
You will need about 0.7 m of faux leather and some batting/insulation.
If you are making the headscarf with a drawstring, prepare 4 eyelets (5 mm diameter), 2 cord locks, and elastic cord.
Drawstring sizing:
- head circ. 54 cm — drawstring 60 cm, elastic 160 cm;
- head circ. 55 cm — drawstring 64 cm, elastic 164 cm;
- head circ. 56 cm — drawstring 68 cm, elastic 168 cm;
- head circ. 57 cm — drawstring 72 cm, elastic 172 cm;
- head circ. 58 cm — drawstring 76 cm, elastic 176 cm.
Here is the universal pattern:
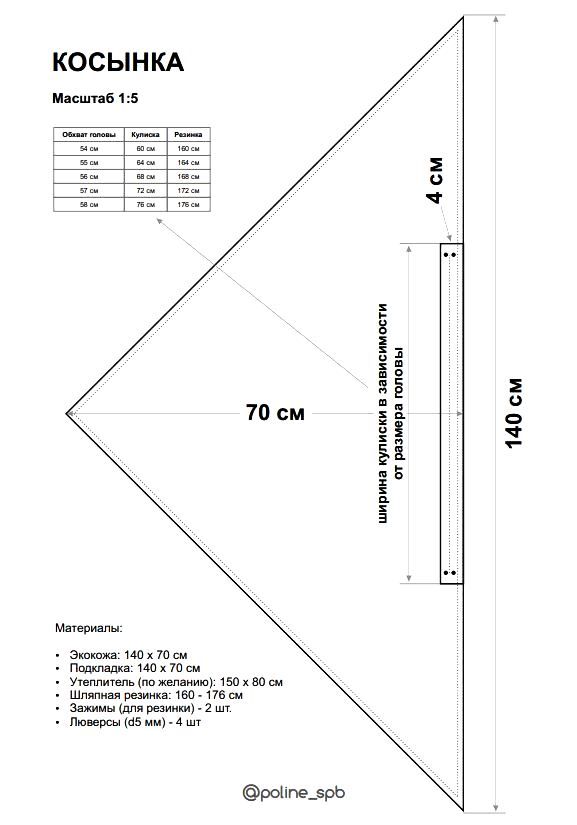
Cut out the necessary pieces from the faux leather, lining, and insulation (cut with extra seam allowance). By the way, the author recommends choosing a lining that can also serve as the outer side of the headscarf, making it reversible.
Before sewing, make sure your needles don't leave permanent holes! The author uses special leather needles.
Place the faux leather against the insulation with the wrong sides together, ensuring an even seam allowance. Pin the pieces together.
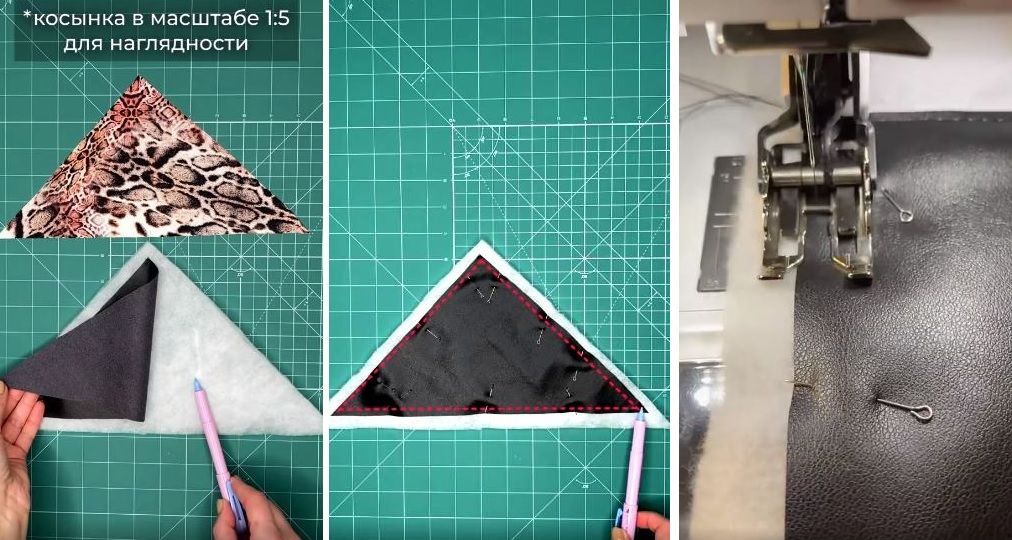
Stitch from top to bottom along two sides, then along the bottom edge. This prevents the fabric from bunching. Remove the pins and trim the edges.
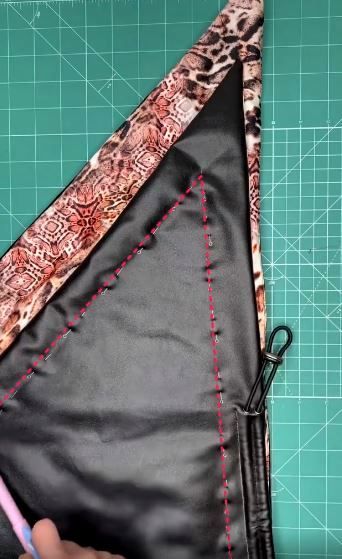
Next, let's make the drawstring channel. Measure the required width from the center of the bottom edge based on your head circumference and mark a height of 4 cm.
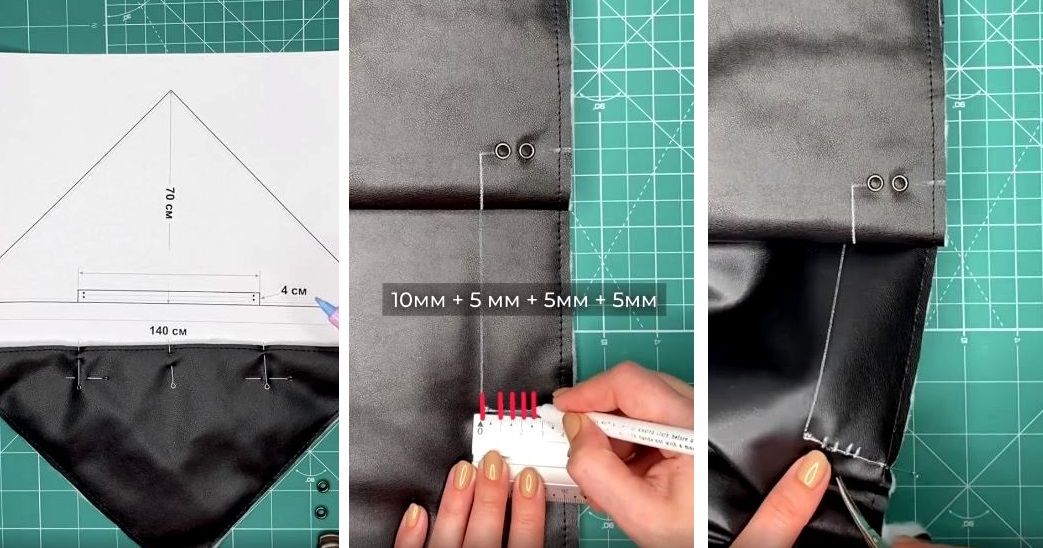
Measure 1 cm from the corner, then mark three points every 5 mm. Make holes in two spots.
Make a reinforcing patch from a scrap of faux leather – cut a rectangle and punch two holes in it.
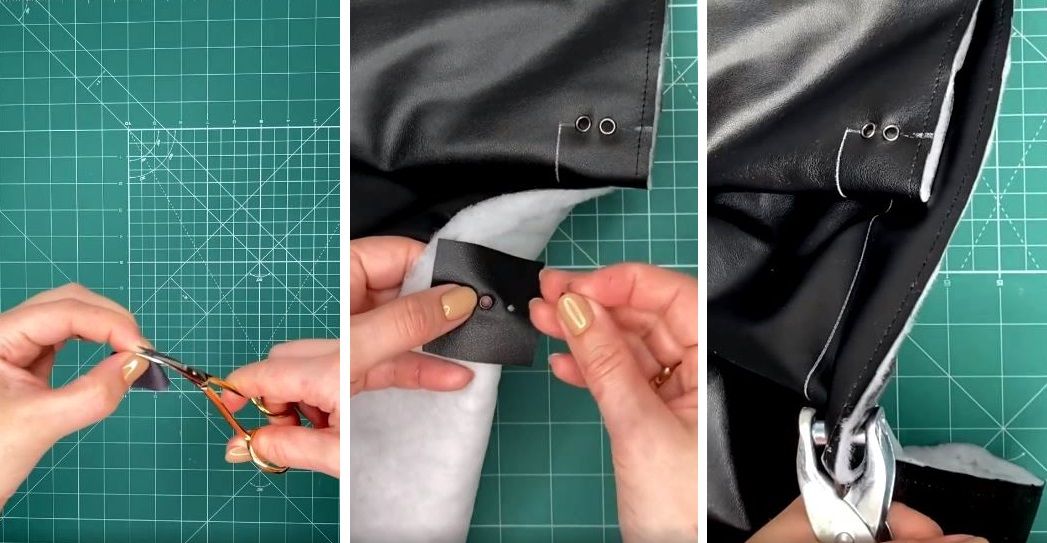
Install the eyelet. Push aside the batting from the inside. Place the patch over the eyelet, add the washer on top, and secure firmly with pliers. Install the second eyelet the same way.
Next, place the lining and faux leather right sides together. Pin along the bottom edge and stitch. Remove the pins. Then, lightly press the lining without using steam.
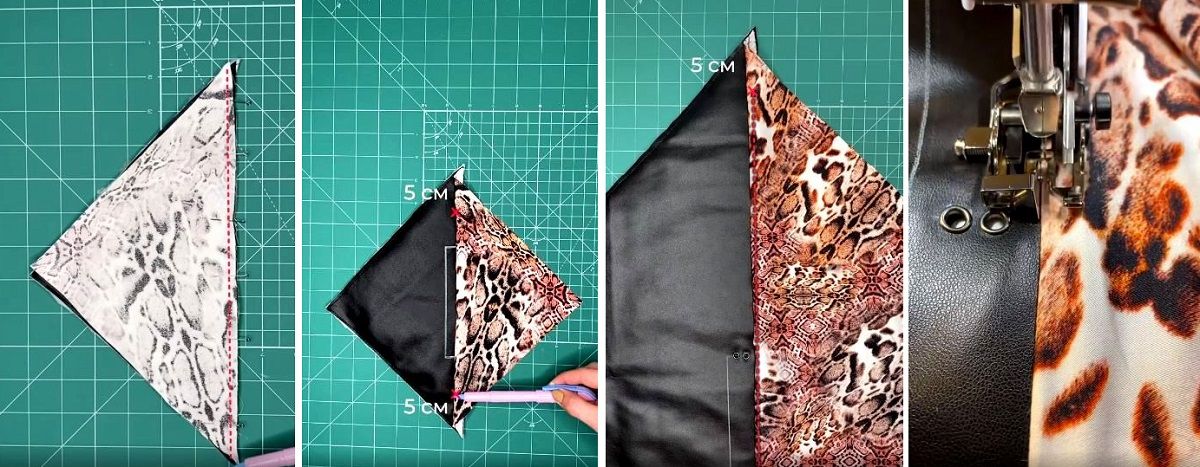
Start 5 cm from the corner and topstitch the seam allowance onto the lining, 2 mm from the edge.
Now you will need the elastic cord and two cord locks.
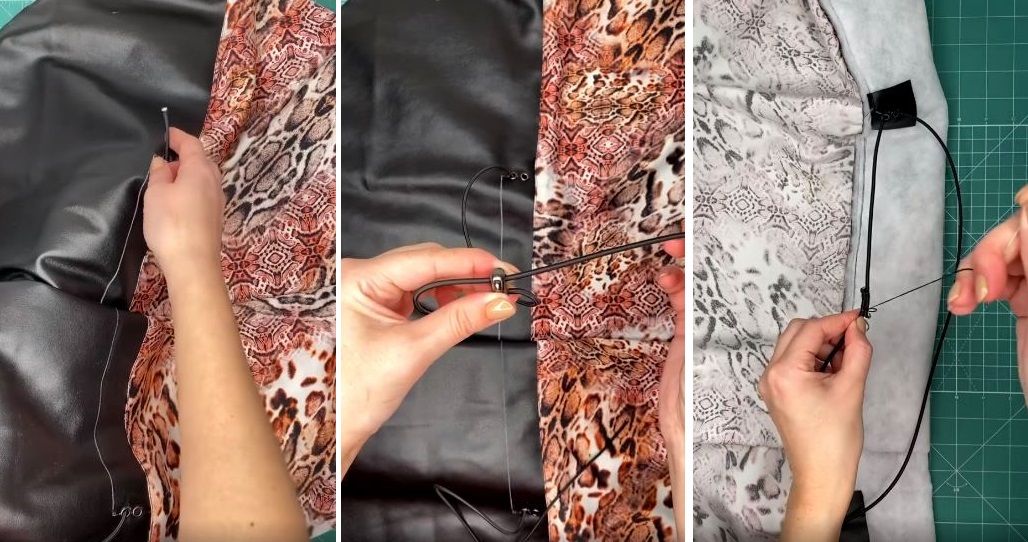
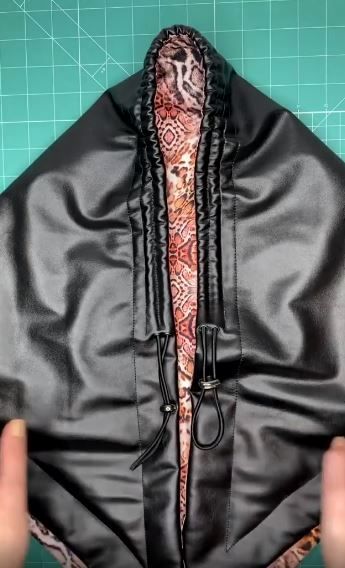
Insert the end of the elastic into the eyelet, pull it through from the inside, and pull it out on the other side. Insert the elastic into the cord lock from both sides. Feed the ends of the elastic back into the eyelet, overlap them on the inside, and secure.
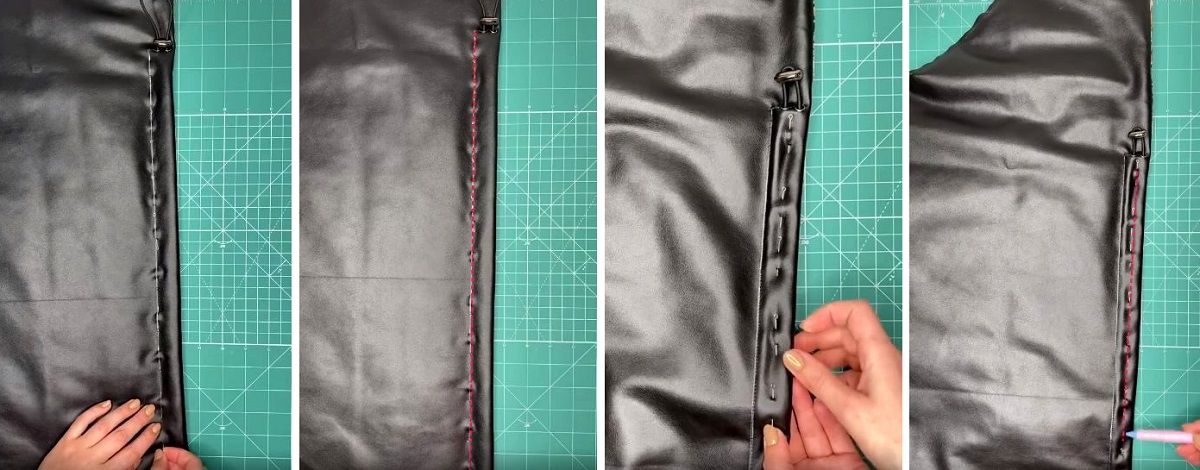
Pin along the marked drawstring line. Stitch. The pins will hold the faux leather securely and prevent the needle from slipping off the line. Next, push the elastic aside and pin along the center of the entire drawstring channel. Stitch along the marked line. The author recommends using a single-toe foot for this. To help it glide better, apply a little cream to the faux leather.
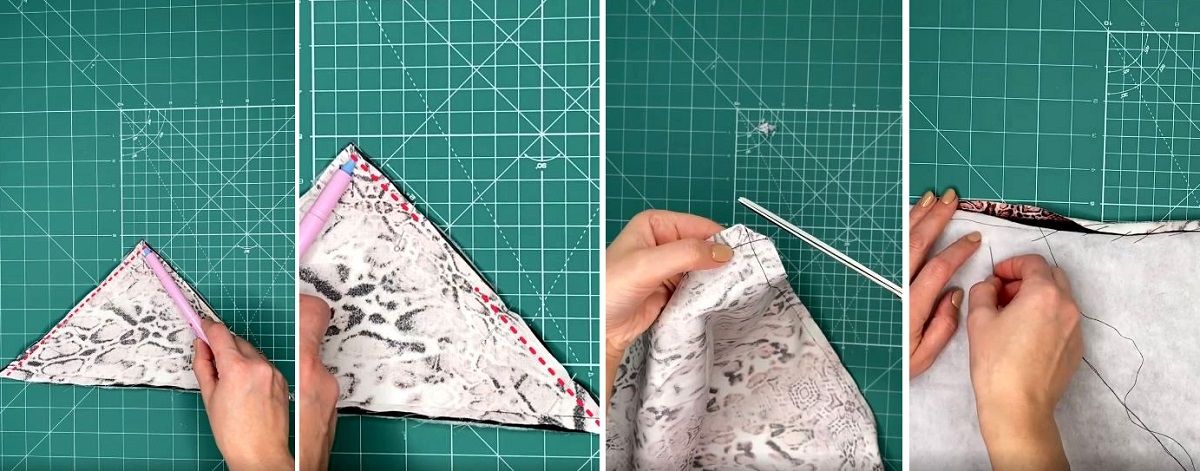
Place the headscarf right sides together with the lining and align the edges. Pin the pieces. Stitch from bottom to top along both sides, leaving a small opening for turning.
Trim the corners of the seam allowances. Baste the allowance to the insulation with diagonal stitches. For the area with the opening, baste only the faux leather.
Turn the headscarf right side out and push out the corners. Close the opening with hand stitches.
Add quilting if desired.
That's it, your headscarf is ready!
You can watch the detailed tutorial in the author's video – (https://www.instagram.com/poline_spb/)
https://youtu.be/FoF1GTnE8a8
Thanks to her for the interesting idea and detailed masterclass!


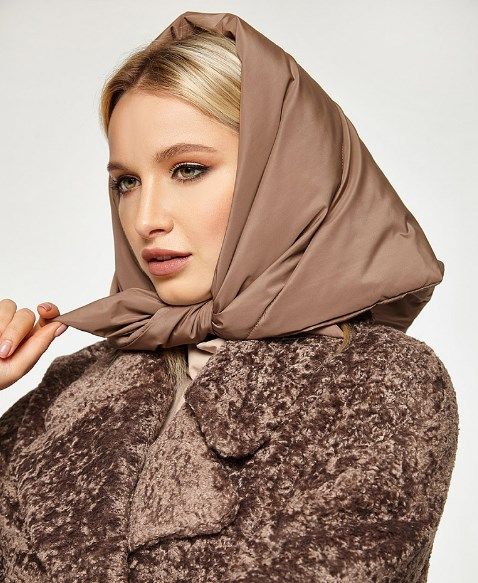


Looks cute :giggle: It echoes American fashion from the 60s – when beauties would ride in convertibles and their hair would get terribly tangled in the wind. And a headscarf was perfect for keeping the hairstyle intact ;)
By the way, the heroine in the photo looks a lot like the legendary Alyonushka 😃