
Sewing Faux Leather at Home: Key Tips
The process of sewing faux leather is very similar to working with genuine leather, but there are some specific nuances.

Faux leather can have a woven or knit backing.
If you have chosen leather with a knit backing, keep in mind that it will stretch in two directions—lengthwise and crosswise.
Therefore, it is recommended to reinforce all edges, the bottom hem, sleeve edges, and the shoulder blade area with non-fusible interfacing. Secure the interfacing by stitching or topstitching the seam allowances.
Since any seam on faux leather leaves permanent needle holes, you must sew carefully, as re-stitching is not an option. Consequently, your patterns must be tested and fit perfectly.
Ensure all seam allowances are consistent; this makes joining the pieces much easier.
It is recommended to temporarily join pieces using special adhesive tape or stationery clips.
When choosing pocket styles, it is preferable to use patch pockets, welt pockets, or pockets integrated into side seams.
Use a Teflon-coated presser foot for topstitching; for standard seams, a roller foot or a foot with a wheel is suitable.


This minimizes friction between the foot and the leather (without reducing the pressure on the feed dogs), thereby facilitating fabric movement. Otherwise, the top layer of leather will stretch while the bottom layer will bunch up. If you do not have special feet, try placing strips of paper under the presser foot.
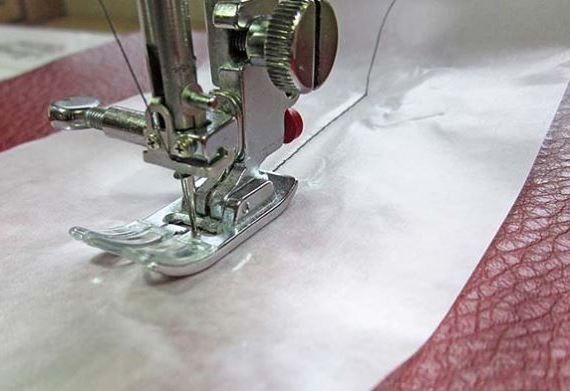
These are easily removed after stitching.

Just keep in mind that the stitch length should be 4-5 mm (with smaller stitches, the paper strips are difficult to remove).


@Yanka, I don't know, I haven't tried it myself, but people advise sticking tape to the bottom of the foot, leaving a hole for the needle. They say it glides perfectly.