
How to sew a midi skirt with ties – ready-made patterns and tutorial
This very feminine and sophisticated skirt model looks so romantic! It shows off the legs just enough, without being vulgar.

## To sew this beauty, you will need:
- fabric – 1.9 m for a 1.5 m width;
- a little fusible interfacing;
- button – 1 pc.;
- thread, sewing tools.
## Patterns
Ready-made patterns are designed for a height of 168 cm for size 52 (bust 104 cm, waist 85 cm, hips 112 cm), size 62 (bust 124 cm, waist 104 cm, hips 132 cm), and size 70 (bust 140 cm, waist 120 cm, hips 148 cm). Print them to scale.


## Cutting and sewing
Cutting pieces:
- back panel – 1 piece on the fold;
- front panel – 2 pieces;
- inner front waistband – 1 piece;
- outer front and back waistband – 1 piece;
- tie – 1 piece.
Include 2 cm seam allowances for the slanted front edge and the hem, and 1 cm for other seams. Reinforce both waistbands with fusible interfacing up to the ties. If your fabric is thick enough, you can reinforce the waistband only up to the fold.

Create pleats on the front and back panels, pinning them in place or securing them with a few stitches.

Stitch the front pleats to a depth of 30-40 mm, and the back ones to a depth of 20-30 mm.

Press the pleats and pin them along the top edges (or baste them).
Place the panels right sides together and join the side edges. Pin them or baste them.
Stitch the side seams. Finish the raw edges with a zigzag stitch or an overlocker. Press the seam allowances toward the back panel.
The next step is finishing the bottom corners on the front panels. Fold the side allowances to the right side, pin or baste them.

At the corners, join the fabric edge-to-edge without gaps. Baste or pin at an angle. Stitch along the seam, then trim excess fabric to a 5 mm allowance.

Turn the corners to the wrong side and press.
Finish the edges of the front and the hem of the skirt.
Press the hem allowance to the wrong side, trimming excess fabric at the top of the hem.
Secure the hem with pins and stitch.

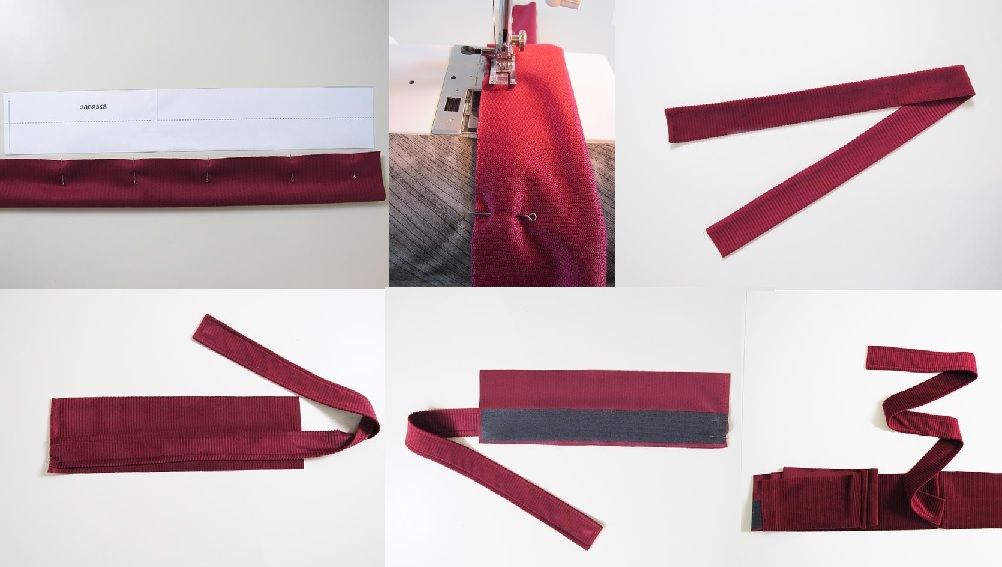
Sew the waistband. Attach the ties by inserting them between the inner and outer waistband on the reinforced side. Align the top of the tie with the waistband fold.

Attach the waistband to the panels.

Make a buttonhole and sew on the button.


I love wrap skirts! Though in a lighter, summer version. But the pattern is essentially universal! (y) It can be adapted for a summer skirt too. And modified, if desired. Made from thin fabric, it would make a absolutely gorgeous beach skirt. You could even add a small ruffle along the slanted front edges; it would be romantic and feminine!