
Making bias tape from household items
I'm all for practicality and saving money, so I stopped buying store-bought bias tape a long time ago. Plus, once you try finishing your garment edges with the same fabric as the dress, skirt, or top itself, you'll see how much more aesthetic and harmonious the finished piece looks. Many will ask why bother making it yourself when you can just buy it, or why not use those special machines designed for making bias tape. But it's much simpler than that, and it won't cost you a penny.
So, we need:
- a utility knife;
- a pin;
- fabric strips.
Cut fabric strips twice as wide as the internal width of the utility knife, from which you have previously removed the blade and detached the bottom part. If you have a disassembled or broken utility knife at home, that will work too 🙃. Fold the edges of the future bias tape and hold them in place with a pin.

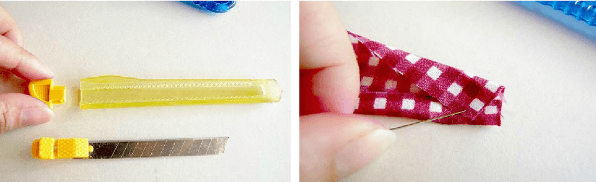
Carefully insert the edge of the future bias tape into the knife and feed it through the inside until you reach the end. Gently pull the bias tape blank all the way through.


Press the bias tape with an iron, and you're ready to finish your garment edges!


I had this little thing made, which is a pretty good substitute for a store-bought bias tape maker tool.
I just attach it to the ironing board, pull it through little by little, and iron it. I make as much as I need in terms of length.