
How to sew a simple DIY tent
Beach season is approaching, and we are starting to plan our seaside trips. The weather is so unpredictable these days that you need to be ready for anything.
This post is for fans of semi-wild vacations on partially equipped beaches.
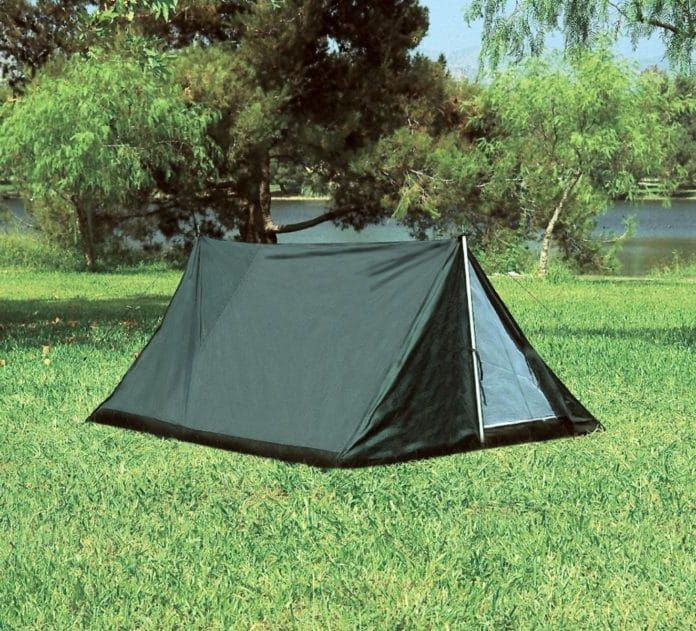
Last year, I saw a couple on the beach quickly and easily set up a small tent—they used it to hide from the sun and the wind (which was carrying very prickly sand). It's a very handy thing! Because while an umbrella is nice, its shade is constantly shifting, and it doesn't protect you from the wind.
I wanted to sew something similar. I think the material can be combined: the main part should be thin raincoat fabric, and the windows (which can be made quite large) or even the back wall opposite the entrance would be good to sew from mesh. This will make the tent ventilated, which is important in the heat. The bottom of the tent can be made denser using waterproof material. If you want to sew a waterproof tent, choose the appropriate material.
In addition, you will need strong ropes and tape for finishing the seams.
I found this tent pattern.
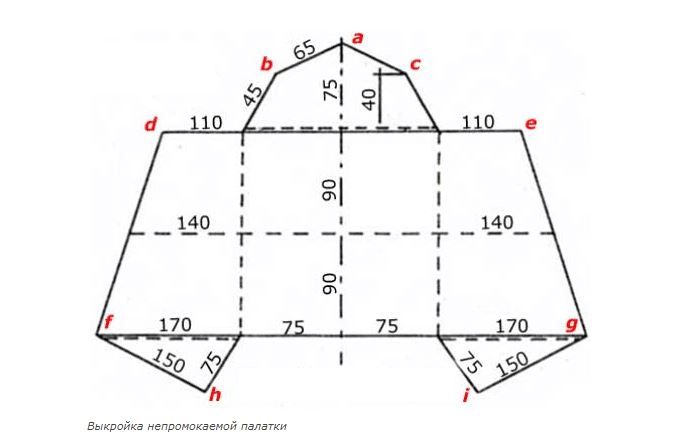
Its base is 1.5 m by 1.8 m. That is quite enough for two people.
This design involves one upright pole. For better stability, it can be made in the shape of an 'A'. The back wall is secured with guy lines.
Sewing sequence:
- sew a guy line made of nylon rope between points a and fg;
- sew guy lines to points b and c;
- make loops at the outer corners of the base (these can also be made of nylon rope) – these will be used to secure the tent with pegs;
- if you like, you can sew a zipper at the entrance or add several magnetic fasteners;
- sew all parts of the tent to the base.
And a few nuances: you can pre-make mesh windows on the side walls, and it is advisable to finish the edges of all seams with tape—this will make it stronger and neater. What do you think of this idea?


We once climbed into one of those kids' tents as a dare, all five of us 😆 plus a cat. An indispensable thing for kids!