
How to add a fabric lining to a knitted hat
Do you have a favorite hat that isn't warm enough for winter? Don't despair or rush to knit or buy a new one for the winter season. You can insulate your favorite hat with a simple jersey or fleece lining.

I prefer fleece linings as I find them warmer, so I will show you how to make such a lining using fleece.
Take a piece of fleece and lay it out on a flat surface. Note that you should measure the head circumference along the stretch of the fabric. The length of the piece should be equal to the head circumference, and the height of the fabric should be 1-1.5 cm more than the height of the hat on the inside.
Fold the fabric in half with the fuzzy sides facing each other. Mark your lines on the smooth side of the fabric, as the "fuzzy" side will be the right side of the lining and will be in contact with your head.


Place the hat on the fabric and stretch it slightly at the top seams. Trace the hat, adding seam allowances immediately. Trim off the excess.
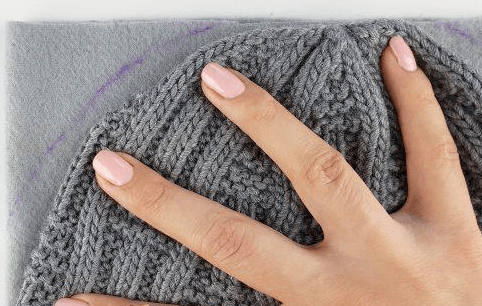

Now fold the hat in half and place it strictly in the center of the fabric piece to draw the crown darts.

Pin the piece together and sew. I won't finish the edges, as fleece doesn't fray. Unfold the hat to sew the top seams.


Connect the two crown centers together with a few stitches. It is important to remember that you should sew the pieces together with the wrong sides facing each other. Now pay attention! Place the hat on an empty jar and smooth out the lining and the hat. When making the lining, you might find that there are extra centimeters left along the edge. Pin the edge and trim the excess.


Sew the edge of the lining using a mattress stitch, and your insulated hat is ready!


You are right! I forgot to mention that this method is only suitable for items that fit loosely on the head. I often used this method when my kids were small and I needed to insulate a hat (especially when a hat was passed down "by inheritance" from one child to another).