
Creating Custom Fabric – 3 Unique Dyeing Techniques
Let's explore ways to create custom hand-dyed fabric. We all have that one plain, unremarkable piece of fabric in our stash that we don't know what to do with. Transforming such a fabric remnant with custom prints will definitely give you plenty of ideas for your next project 😉
How do you get a "flying dandelion" effect like this on fabric?

It turns out you just need to tie many small knots in the fabric, placing stones or beads inside each one.

Then, simply dye it with your chosen color.

Rinse, dry, cut, and sew—and you'll turn that striking fabric into an equally striking bag!

The second interesting method is drawing your own print using glue )
Apply any design to the fabric, for example, a graphic pattern. You will need a bottle with a fine tip for easier application.
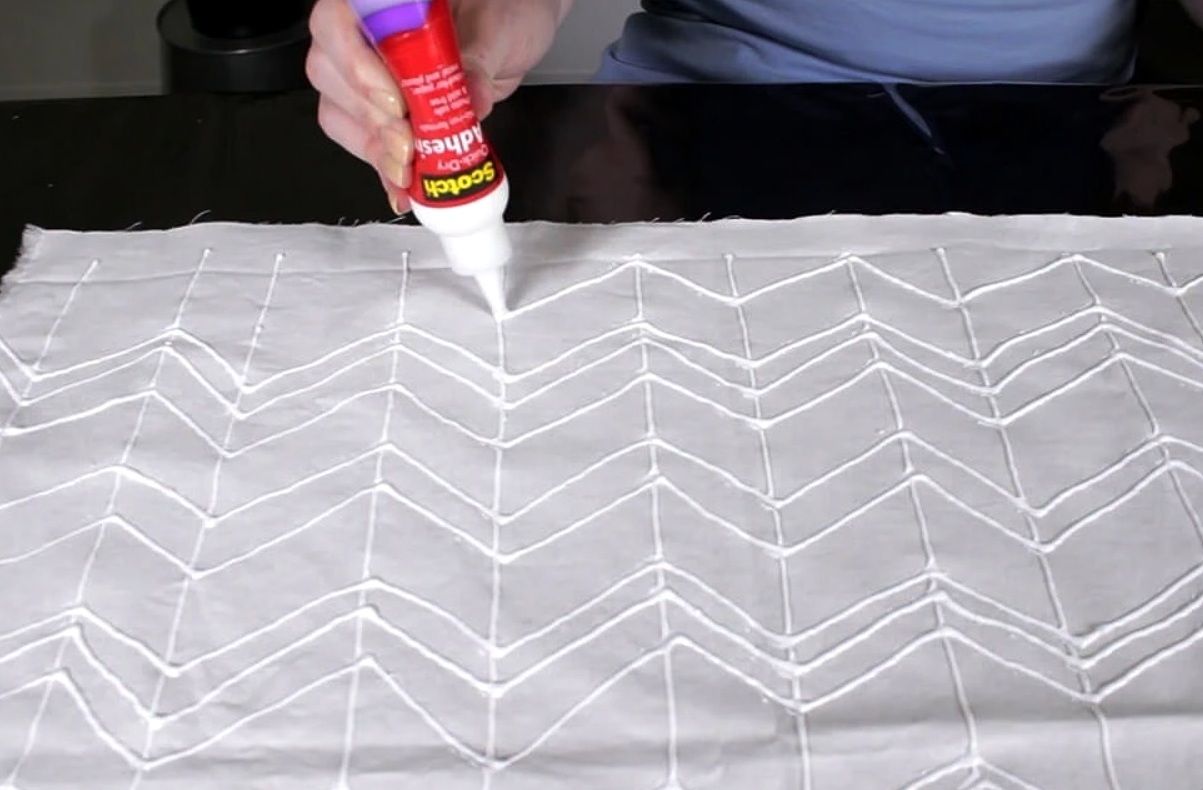
Be sure (!) to let the glue dry until it forms a "crust" before placing the fabric into the dye bath. After the required dyeing time, rinse and dry the material, then remove the remaining glue mechanically.

This beautifully hand-printed fabric makes a great shawl, tablecloth, or pillowcase—there are so many options 👍

A similar effect can be achieved by marking the fabric with a regular marker like this:

Then, follow these lines with a simple running stitch. There is a nuance here—regular thread will work, but fishing line or beading thread is more convenient.

Pull each stitch tight to create dense gathers.

After dyeing, it is visible to the naked eye that significantly less dye reached the folds.

Wash and dry the material, and you have beautiful custom fabric! 😍

P.S. Ideas and photos collected from blog.darice.com, onlinefabricstore.net, and sewtreefrog.com – thank you! 🙂


The first method turned out unusual! (y) I wonder if the method will also work with bleaching?