
First-Grader’s Room Decoration: How to Make a Number One
September 1 is approaching, and parents of first graders may be planning a small celebration. A number one covered with paper flowers can be used as a festive photo backdrop or room decoration.

What You Need
Foam board or several layers of cardboard for the base; white and coloured napkins or crepe paper; PVA craft glue; double-sided tape; and a stapler.
This number is decoration, not a toy. An adult should use the utility knife and scissors. Keep small parts, wire, and any hot-glue gun used for a variation away from children. Let adhesive cure fully, use stable wall hardware, and do not hang the decoration above a bed or sleeping area.
How to Make a Large Number One
Draw two halves of the number on the foam-board base. It does not have to be a one: you can choose another number or a letter. An adult cuts out both halves with a utility knife.

Join the two halves with double-sided tape.

The base is ready for decoration.
Stack several layers of napkins or paper, staple them at the centre, and cut out circles of the same size.

Separate the paper circles layer by layer and shape them with your fingers.
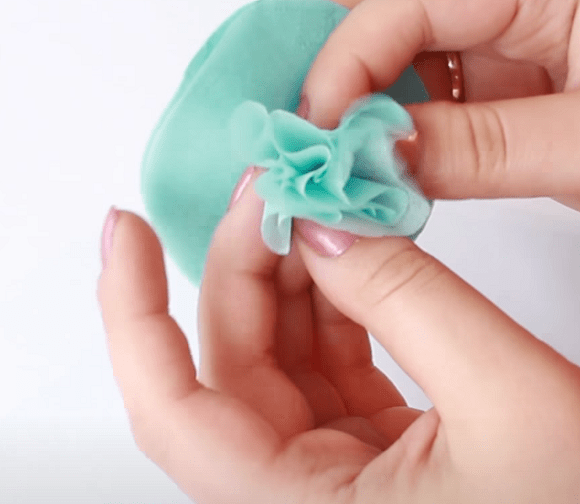
Gently fluff the finished flower and prepare enough flowers to cover the base.
Apply PVA glue to the foam board and attach the paper roses gradually across the front and sides.

You can cover the back with plain white or coloured paper.
The same idea can be adapted for a first birthday or a first wedding anniversary; keep the finished decoration securely mounted and out of reach of young children.


My godmother always saves me in situations like this: she organises parties and makes similar numbers for children from tiny multicoloured balloons. She sometimes puts a very small motion-activated LED inside, so each balloon glimmers in the dark. For a child's display, any lights and batteries need to be enclosed and used exactly as their maker directs, and small parts should remain out of reach.
For busy mums who do not have time to make whole "flower beds", I can suggest a very simple way to create this kind of decoration from wide satin ribbon, a stapler, and sew-on pearls.