
Sew a Simple Retro Summer Dress for a Baby Girl
Retro dresses can look especially charming on little girls. This archive tutorial shares a simple pattern and sewing guide for a dress designed for children 80–90 cm tall.

The pattern is designed for little girls 80–90 cm tall. This is an adult sewing project: keep pins, needles, scissors, the iron, and the sewing machine out of a child's reach, and use them with the usual care.


Transfer the collar pattern to fabric folded in half. Before cutting out the collar pieces, add seam allowances (7-10 mm). Fold the pieces in pairs right sides together and stitch. Carefully trim the seam allowances that were left, and make small notches at the curves.

Turn the collar piece right side out and press with an iron. Topstitch along the edge of the piece, 1-2 mm from the edge.

From another piece of fabric, cut out one dress front piece and two back pieces. On the back halves, immediately mark the future locations of buttons and the fold for the placket.
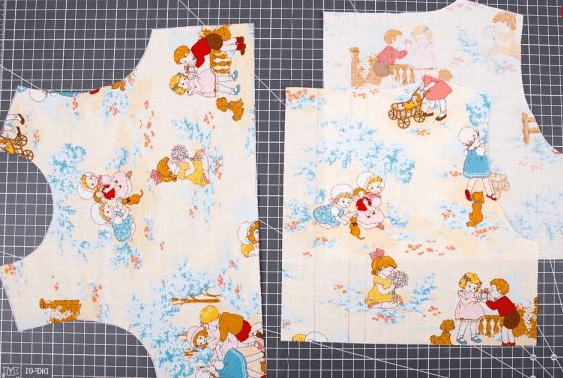
Make a double fold on the back (this will be the placket) and, using a special foot, make buttonholes.

Stitch the pieces together at the shoulder seams. Press the seam allowances and finish the raw edges of the allowances with a serger or zigzag stitch. Pin the neckline and collar piece together. Stitch the pieces together and finish the edges.

Turn the seam allowances to the wrong side and topstitch from the right side.

Cut out the sleeve pieces and cuffs (a 20/5 cm rectangle). Additionally, mark the intended shoulder line and gathering points on the sleeve.

Stitch along the sleeve cap and ease the sleeve. Gather the bottom part of the sleeve in small pleats, fitting it to the cuff size.

Set the sleeves into the armholes.

Finish the raw edges and seam allowances on the wrong side. Fold the cuff in half turned toward the wrong side and stitch along the edge with a blind stitch.
For the skirt, stitch two cuts (40/60 cm) together. Finish the side seam allowances and the bottom edge of the skirt (hem). Make a 1 cm fold on the hem of the skirt.

Carefully gather the upper edge by hand in small pleats, adjusting the skirt volume to fit the bodice size. Stitch the dress top and the skirt together.

Press with an iron and topstitch from the right side.

Sew a small belt from leftover fabric and sew on buttons.


Our dress is ready)


Thank you! This is just right for crafters like me, meaning self-taught ones. I probably will not manage the collar; I will finish the neckline with bias tape and the hem with lace. Of course I will not be able to combine fabrics so beautifully, but I think a polka-dot dress would be lovely too!