
Vintage Dress for Ages 2–3: Sewing Tutorial
This archived sewing tutorial is for adults. Keep sharp scissors, needles, pins, the sewing machine, zipper, and small buttons out of reach of children; supervise any child nearby and secure loose pins and trimmings after each step.
This cute dress is simple and quick to sew.

What you will need
- fabric, preferably natural cotton with a small print – approximately 1 m;
- fabric for the lower bodice pieces;
- contrasting fabric for decorative details;
- decorative bias tape matching the main fabric color;
- buttons – three pieces;
- zipper;
- needles, threads, scissors, sewing machine, etc.
Sewing the dress
The ready-made pattern for 2-3 years is given to scale. Print or redraw the pieces to scale. The scale square is shown on the first sheet, it corresponds to one inch, i.e., 25.4 mm.

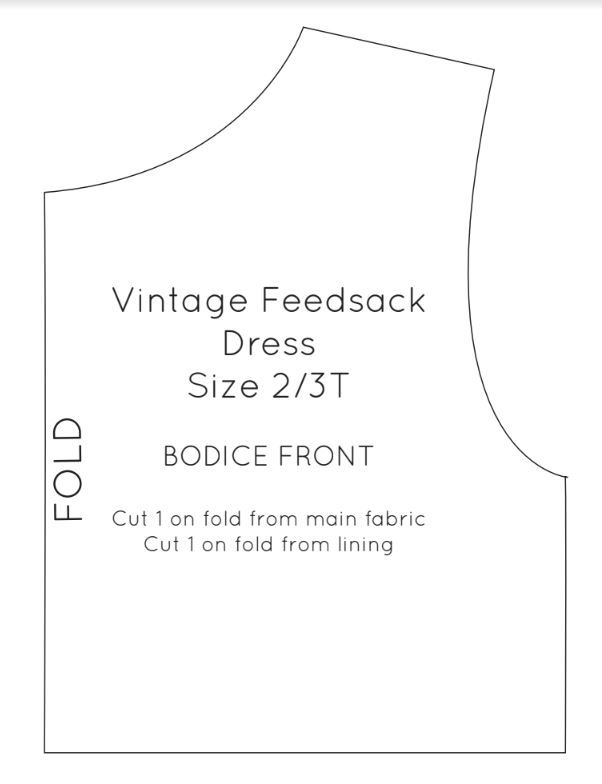

You can also do without a pattern. For a child of this age, you can simply take a properly sized T-shirt and trace the outlines.
The dress is made with a waist seam and a lined bodice.
First, cut one piece on the fold for the front and two mirrored pieces for the back. Cut matching pieces from the lining fabric.

Pin the bodice sets from the main and lining fabric along the shoulder seams. Stitch the seams at the shoulders, press open.

Now we will cut the collar. If you are using a pattern based on a T-shirt, then to get the collar pattern, trace the outlines of the bodice neckline and draw the required collar width.

For the collar, cut out four pieces from contrasting fabric with small seam allowances along the sides. Along the outer side of the collar, do not make seam allowances, as we will finish it with bias tape.

Place the collar pieces in pairs with wrong sides facing inward, stitch together.
On ready-made bias tape, unfold one fold and place the bias tape along the outer contour of the collar's right side, right side down. Pin or baste the bias tape to the collar, then stitch.
Then turn the bias tape to the wrong side, wrapping the raw edges. Secure with pins, then stitch. Stitch along the right side of the collar in the seam where the bias tape was attached. It turns out neat and invisible.

Place the finished collar pieces against the neckline, trimming the edges if necessary. At the same time, on the back, the collar should stop 10 mm short of the center line on each side. We will need this distance for inserting the zipper.

Assemble the set – on the bottom, the main bodice piece right side up, then the collar (also right side up), on top – the bodice from lining fabric wrong side up. Pin everything with pins.

Stitch the pieces along the neckline. Trim the seam allowances with pinking shears. If you do not have such scissors, simply make notches.

Cut out the sleeves. Each consists of two pieces.

Unfold one edge of the bias tape, pin it along the vertical edges on the sleeve slit, stitch.

Wrap the bias tape around the sleeve edge, stitch on the right side in the seam of attachment.

Now cut the bias tape for finishing the bottom edge of the sleeve sections. Make its length with extra allowance for tying a bow.
Finish the bottom raw edges with bias tape.
Overlap the sleeve pieces slightly along the cap, stitch.
Sew the sleeves into the armholes with a basting stitch, stitch, serge/finish the raw edges.

Sew the side seams.

Place two rows of bias tape along the bottom of the bodice for decoration.

Check that on the back the bias tape is at the same height. Stitch the bias tape down.

For the skirt, cut out panels of the desired length and width.
Gather the skirt along the upper edge, join with the bodice.
Sew the zipper into the center back, stitch the rest of the seam.

Hem the bottom of the dress, stitch. Sew on the buttons, tie the bows on the sleeves. Done!
A tutorial was used for this post (https://www.craftinessisnotoptional.com/2011/06/vintage-feedsack-dress-tutorial.html)


Nostalgia :cry: Pleasant nostalgia, though. I had a similar dress in childhood; my mother made it herself, and I shamelessly cut it into scraps. I regret it now, but my girls have grown up too, so we will wait for granddaughters. 😜