
Updating shoes with decoupage
Using the decoupage technique, you can refresh an old pair of boots or shoes, creating a unique look that you definitely won't find in any boutique or store.

To start, you need to remove the top layer from the heel and sand the base with sandpaper. This will ensure the decoupage adheres as tightly as possible to the surface.


Use masking tape to cover the parts of the shoe near the heel. Only the areas you intend to decorate should remain exposed. Paint the heel with white paint. You must use white so that the appliqué retains its colors and brightness as much as possible.

Prepare your chosen image. For this tutorial, a printed pattern was used, but you can use patterns cut from anything. The only condition is that the paper base must be prepared for further work. To do this, coat the colored side of the cutout with varnish, first with horizontal strokes, then vertical. In total, you should apply 5 layers of varnish.

Wait for the varnished surface to dry completely. Do not rush and dry the varnish with a hairdryer, as this will make it cloudy and you will have to start over. Moisten the varnished side with water until the back of the paper is soaked. After that, carefully remove the paper layer from the resulting image. If you have trouble removing the paper, you can periodically moisten the back with water.

Start decoupaging the heel. Wrap the cutout around the heel and trim off any excess.
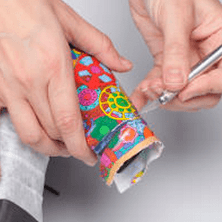
Mix water with PVA glue in a 3:1 ratio. Coat the back of the image with the glue solution and stick it onto the heel, which should also be coated with varnish. After that, apply a few more layers of varnish over the glued image, letting each layer dry in between.


It turned out very cheerful :D You could also decorate the edge above the sole: it would create a bright stripe on the platform to match the color of the heel.