A chenille-technique potholder tutorial: layer a fabric-and-batting sandwich, stitch diagonal lines, cut the top layers to create texture, cut out a circle using a template, and bind the edge with a loop.
Beginner1 hr 30 minFree
Translated
Things you will learn
Chenille-technique potholders can be sewn not just from new fabric, but from unwanted scraps, old linens, or old clothing — as long as the fiber content is natural and can withstand contact with a hot surface.
Besides fabric, you'll need 3 cm wide bias tape, ribbon for the loop, and batting; an ordinary dessert plate works well as a template for a neat circle.
The sandwich is made of 4 layers: a sturdy bottom fabric with batting cut to size, two middle fabric layers slightly smaller (all layers laid with the grain running in the same direction), and a bright top layer with clipped corners.
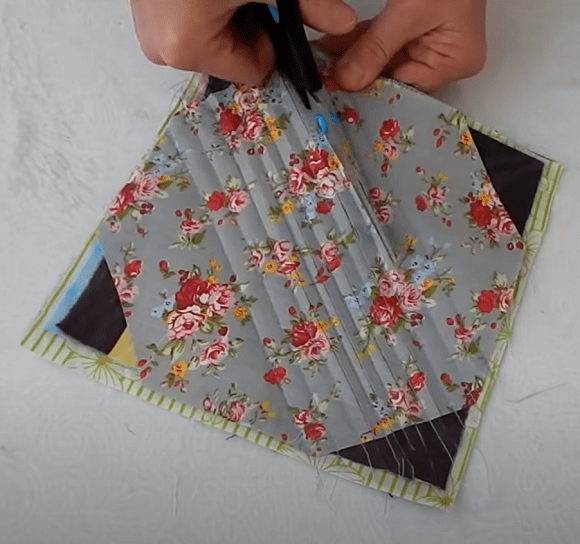
Pin the layers together, mark parallel diagonal lines at a 45-degree angle spaced 1.5 cm apart, stitch along them, then cut the top layers (but not the batting or the bottom layer) between the seams — this is what creates the chenille texture.
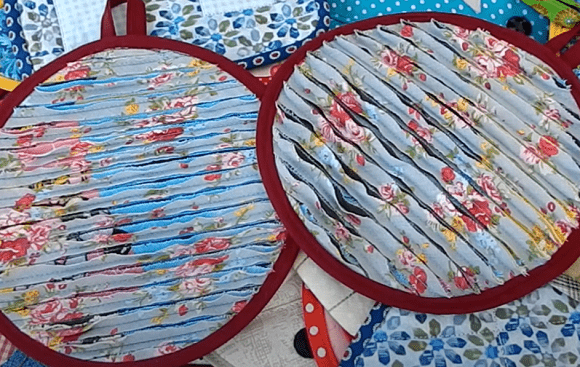
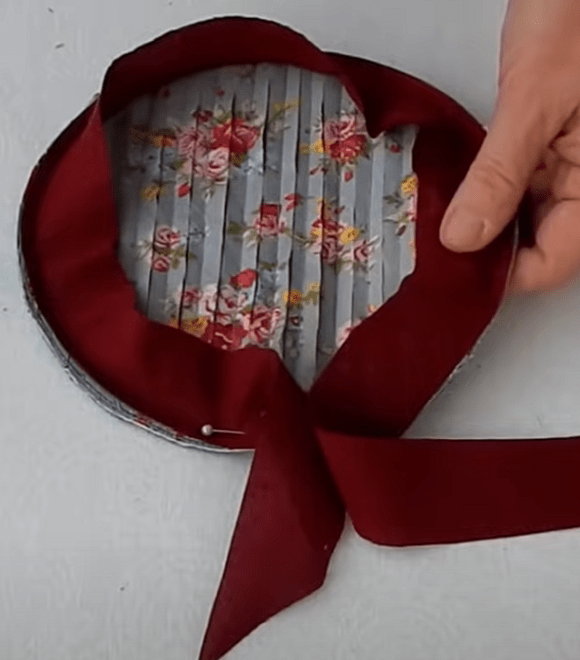
Trace and cut out a circle using the template with a 0.5 cm seam allowance, and finish the edge with bias tape and a tucked-in loop — after cutting, the top layers take on a textured, slightly fluffy chenille surface.
What you'll get
You'll get a round chenille-technique potholder with a textured surface, bound edge, and hanging loop.
Materials and tools
Materials
Sturdy cotton fabric (linen or denim) for the bottom layer
Fabric or scraps for the top layers, new fabric, unwanted scraps, old linens, or old clothing — as long as the fiber content is natural
Batting
3 cm wide bias tape
Tools
Dessert plate, used as a template for the circle
Pins
Pencil, for marking
Sewing machine
Get to know chenille-technique potholders
You can sew chenille potholders even from fabric scraps.
Find out about chenille-technique potholders
It's hard to imagine a kitchen without pretty, practical potholders. You can sew them from fabric scraps — chenille-technique potholders look especially striking and unusual. New fabric works, but so do unwanted scraps, old linens, or old clothing — as long as the fiber content is natural and can withstand contact with a hot surface. To sew this accessory you'll also need 3 cm wide bias tape, ribbon for the loop, and batting. An ordinary dessert plate works well as a template — you can trace a neat circle with it.
Layer the bottom fabric and batting
The base starts with sturdy fabric and batting.
Lay down the bottom fabric layer and the batting
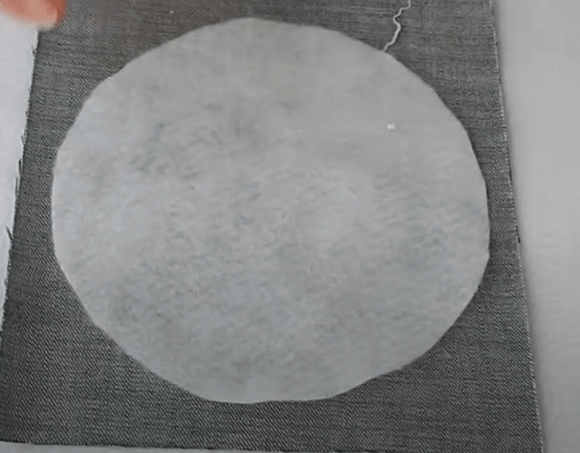
For the bottom layer, choose a sturdy cotton fabric, such as linen or denim. Cut it a couple of centimeters larger than your future circle. Right on top, lay down the batting, cut to the same size.
Add two middle fabric layers
The middle layers are a bit smaller to make cutting easier.
Lay down two slightly smaller fabric layers
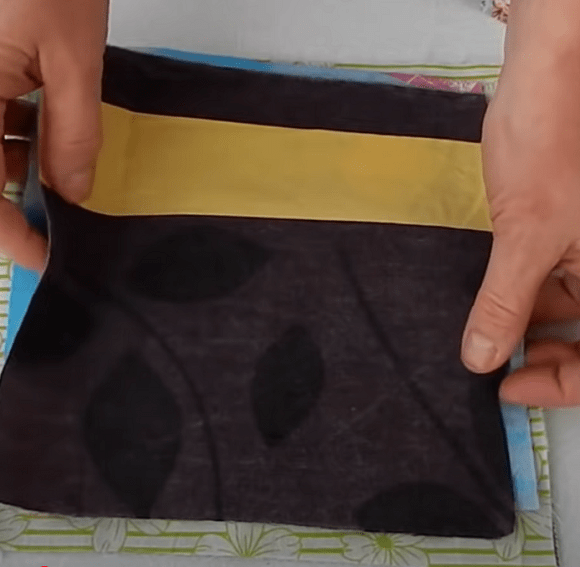
The next 2 layers are fabric, cut a bit smaller than the square base. This size difference makes it easier to cut later. IMPORTANT! Lay all the layers with the grain running in the SAME direction.
Add the bright top layer
The top layer will be the front of the potholder.
Add the top layer with clipped corners
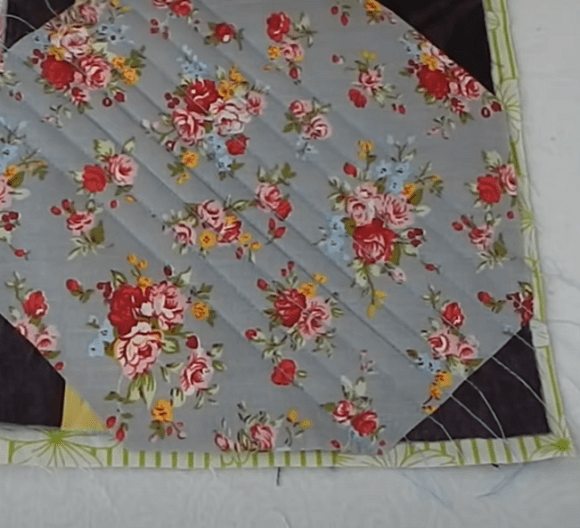
The last layer is a square with clipped corners — it'll be the front of the potholder, so choose a bright, pretty fabric.
Mark and stitch the diagonal lines
The diagonal stitching lines set up the future chenille texture.
Pin the layers together and stitch the diagonal lines
How to sew the multi-layered potholder: pin the sandwich together, then mark parallel lines at a 45-degree angle, spaced 1.5 cm apart. Stitch along them.
Cut the top layers for the chenille effect
Cutting between the stitch lines creates the textured surface.
Cut the fabric between the stitched lines
Now for the main part of creating the chenille effect — cut the fabric (but not the batting or the bottom layer) between the stitched lines.
Trace the template and cut out the circle
Now give the potholder its round shape.
Trace the template with a pencil and cut out the circle
Trace our template with a pencil and stitch along the line. Cut out with a 0.5 cm seam allowance.
Bind the edge with bias tape
The bias tape covers the raw edge on the front side.
Stitch the bias tape along the front edge
Stitch the bias tape along the front side of the edge.
Tuck in the loop and secure the bias tape
The loop lets you hang the potholder up.
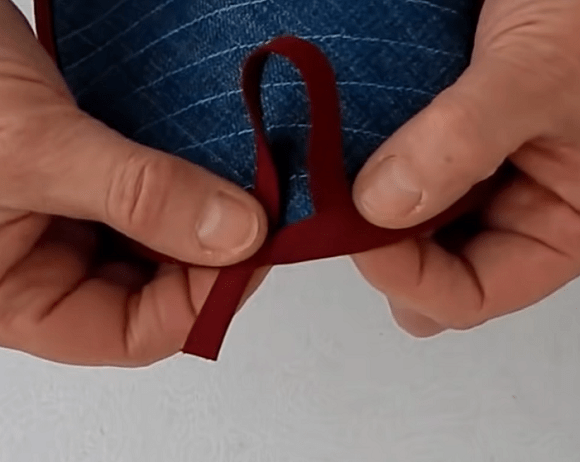
Tuck the loop under the bias tape and secure the seam
Turn everything inside out, tuck the loop under the bias tape, fold it under, and stitch it in place by machine or sew it by hand with an invisible stitch. All that's left is to fold the loop back up and secure it with a stitch at the base — our chenille potholder is ready to brighten up the kitchen!
Admire the chenille texture
After all the cutting and finishing, the potholder gets a raised texture.
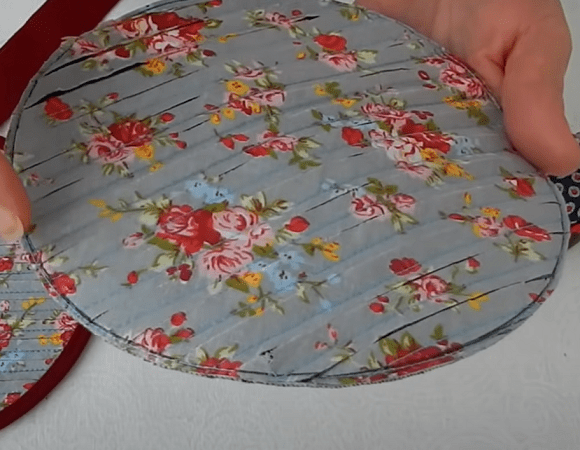
Take a look at the textured surface of the potholder
All that's left is to admire the result: the cut fabric layers form a raised, textured chenille surface.
Finish and variations
Finish
Your chenille potholder is ready
Our chenille potholder is ready to brighten up the kitchen!
Variations
Make the potholder a different shape
If you like, you can make the potholder a different shape — a square or a diamond, for example.
Use leftover fabric and old clothing
New fabric works for the potholder, but so do unwanted scraps, old linens, or old clothing — as long as the fiber content is natural and can withstand contact with a hot surface.
After cutting the top layers, you can see cuts that reach all the way through to the batting or bottom layer.
Likely cause
The scissors or craft knife blade went too deep while cutting between the stitch lines.
How to fix it
Cut only through the top fabric layers, leaving the batting and bottom layer intact — work carefully with scissors that have a sharp but controllable tip.
The layers shift while stitching the diagonal lines
Problem
After stitching the diagonal lines, the fabric layers are offset from each other and the stitching pattern comes out uneven.
Likely cause
The layers weren't pinned securely enough before stitching, or they weren't laid with the grain running in the same direction.
How to fix it
Pin all the sandwich layers together generously before stitching, and make sure every fabric layer is laid with the grain running in the same direction, as noted in the tutorial.
The loop doesn't hold well after securing
Problem
After securing it with a stitch at the base, the loop wobbles or tears off with use.
Likely cause
The loop wasn't tucked in securely enough under the bias tape, or the securing stitch was too sparse.
How to fix it
Tuck the loop under the bias tape securely and stitch over the base several times so the loop can hold up to regular use.
?FAQ
What materials do you need for a chenille-technique potholder?
Sturdy fabric for the bottom layer, fabric or scraps for the top layers, batting, 3 cm wide bias tape, and ribbon for the loop.
How many fabric layers does the sandwich need?
4 layers: a sturdy bottom layer, two middle layers slightly smaller, and a bright top layer with clipped corners.
What angle are the diagonal lines marked at?
A 45-degree angle, spaced 1.5 cm apart.
What do you cut to create the chenille texture?
The top fabric layers between the stitched lines, without cutting into the batting or bottom layer.
What seam allowance do you leave when cutting out the circle?
0.5 cm.
Your project
Log in to track your project, attach photos, and publish your result into the shared feed.

 Beginner1 hr 30 minFree