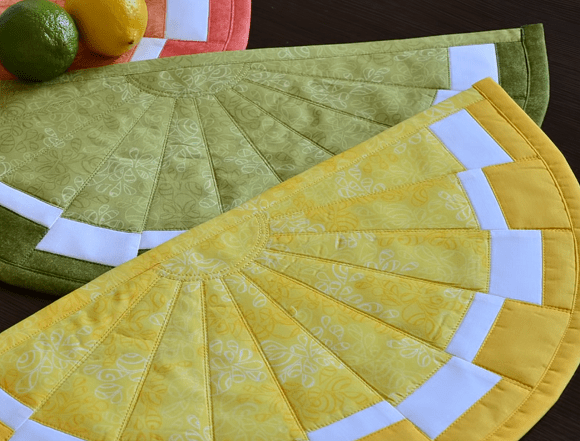
A step-by-step tutorial for sewing a "fruit slice" hot pad: cut fabric strips in three colors, sew them into a panel, cut wedge-shaped pieces from it using a template flipped in a checkerboard pattern, piece the wedges into a fan, fill the center with a half-circle, quilt the piece onto a backing with batting, and bind the straight and curved edges with contrasting binding.
Beginner1 hr 30 minFree
Translated
Things you will learn
Leftover fabric scraps can become a patchwork hot pad — handy for a teapot or teacups, and the fruit-slice shape suits any kitchen decor.
For a "watermelon slice" you'll need cotton in three colors — red, green, and white (a small print works well too), plus a sturdy fabric for the backing and batting.
Cut these pieces: 2 white strips, 25×3 cm and 25×4.5 cm, 1 red strip 25×15 cm, and 2 green strips 25×6 cm; sew them on the machine in this order — green, narrow white, red, wide white, green — then cut wedge-shaped pieces from the panel using a template flipped in a checkerboard pattern to get 5 pieces with the narrow white strip and 5 with the wide one.
Pin and sew the wedges together into a fan, fill the center with a red half-circle attached with a zigzag stitch, then layer the fan onto a backing with batting and quilt each piece with a straight stitch, trimming away the excess fabric.
Finish the straight edge with binding using a blind hem stitch, and bind the curved edge with green binding, folding the ends neatly; you can sew a "lemon slice" or "lime slice" hot pad the same way, choosing fabric in the right color.
What you'll get
You'll get a fruit-slice-shaped hot pad, pieced in patchwork from three-colored wedge segments with neatly bound edges.
Materials and tools
Materials
Fabric in 3 colors (cotton), for a "watermelon slice," you'll need red, green, and white cotton; a small print works well too
Sturdy fabric for the backing, used as the bottom layer of the hot pad
Batting, used between the backing and the patchwork top
Tools
Sewing machine, for sewing the strips, the fan pieces, and the quilting
A ready-made or homemade wedge template, for cutting the wedge-shaped pieces from the panel
Pins, for pinning the fan pieces together before sewing
Rotary cutter, handy for trimming the excess fabric around the edge of the piece
Ruler, for marking out the pieces
Preparation
Gather your materials
You'll need fabric in 3 colors: for a "watermelon slice," that's red, green, and white cotton (a small print works well too), plus a sturdy fabric for the backing and batting.
Cut the fabric strips
To sew the hot pad, cut the following pieces: 2 white strips measuring 25 by 3 cm and 25 by 4.5 cm, 1 red strip measuring 25 by 15 cm, and 2 green strips measuring 25 by 6 cm.
Sew the strips into a panel
The strips are sewn in a specific order, then wedge-shaped pieces are cut from the finished panel.
Sew the strips in the right order
Sew the strips together on the machine in this order: green, narrow white, red, wide white, green. Press the finished panel and get ready to cut the pieces.
Cut the wedge-shaped pieces with the template
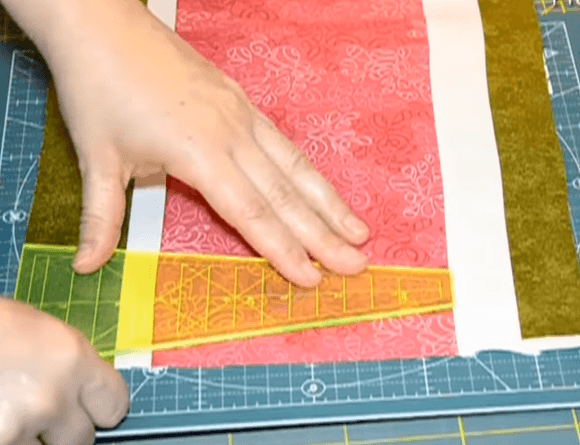
Cut the wedges using a ready-made or homemade template.
Cutting the fabric
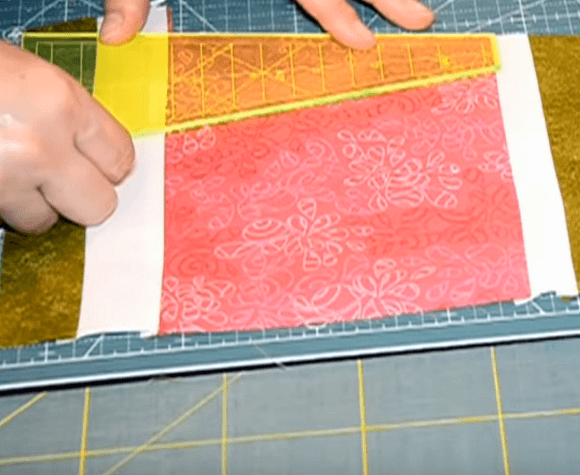
Flip the template in a checkerboard pattern
Flip the template in a checkerboard pattern — this gives you 5 pieces with the narrow white strip and 5 with the wide one.
Marking a piece with a ruler
Piece together the fan
The wedge pieces are sewn together into a fan, and the center is filled with a half-circle.
Sew the wedges into a fan
Pin and sew the colorful wedges together into a "fan."
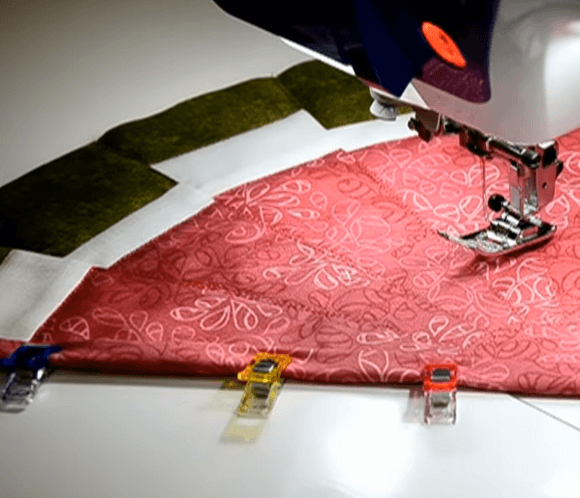
Quilting the segments
Fill the center with a half-circle
To fill the center, cut a half-circle from red fabric and stitch it on with a zigzag stitch.
Quilt and trim the piece
The fan is layered onto a backing with batting, quilted, and trimmed.
Layer the fan onto the backing and quilt it
Layer the fan piece onto a backing made of sturdy fabric and batting, then sew a straight stitch over every piece to secure them firmly.
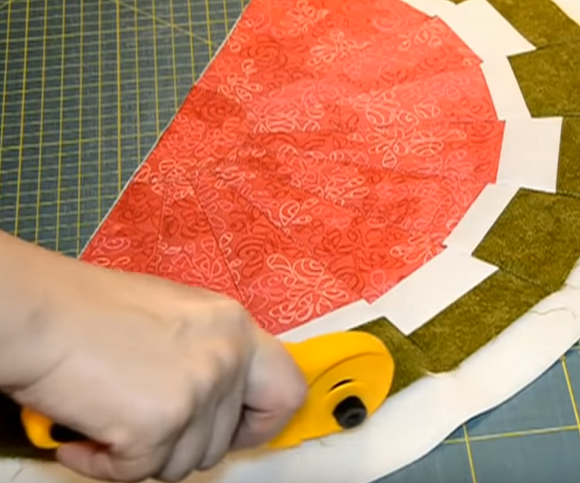
Trimming the edge with a rotary cutter
Trim away the excess fabric
Trim away the excess fabric.
Finish the edges with binding
The straight and curved edges of the hot pad are finished with binding in different colors.
Bind the straight side
Cut binding in two colors — red and white. Finish the straight side of the hot pad with binding, using a blind hem stitch.
Stitching the edge on the machine
Bind the curved edge with green binding
Bind the curved edge with green binding, folding the ends neatly. That completes the hot pad.
Two finished fruit-slice hot pads
Finish and variations
Finish
Sew other fruit slices too
You can sew a "lemon slice" or "lime slice" hot pad the same way, depending on your kitchen decor and what color fabric you have on hand.
Variations
Sew a "lemon slice"
Choose yellow, green, and white fabric instead of red, green, and white to get a lemon-slice hot pad.
Sew a "lime slice" hot pad
Choose fabric in shades of green to sew a lime-slice hot pad.
The fan comes out uneven, with the seams pulling apart
Problem
After sewing the pieces together, the fan looks uneven, and the seams between the wedges pull apart.
Likely cause
The template wasn't flipped in a checkerboard pattern when cutting, so the pieces didn't alternate correctly between the narrow and wide white strip.
How to fix it
Flip the template in a checkerboard pattern when cutting, to get exactly 5 pieces with the narrow white strip and 5 with the wide one — that way the fan comes together symmetrically.
The red half-circle in the center puckers or lifts away
Problem
After stitching it on, the half-circle at the center of the fan puckers or partly lifts away from the base fabric.
Likely cause
The half-circle was stitched on with a straight stitch instead of a zigzag stitch, which secures the seam allowance better on a curve.
How to fix it
Stitch the half-circle on with a zigzag stitch — it holds the seam allowance along the curved edge more securely than a straight stitch.
The green binding's ends look messy on the curved edge
Problem
After binding the curved edge with green binding, the ends of the binding stick out or look untidy.
Likely cause
The binding's ends weren't neatly folded before finishing the seam.
How to fix it
Neatly fold the ends of the green binding under before finishing the stitch around the curved edge.
?FAQ
What fabrics do I need for a "watermelon slice"?
Red, green, and white cotton, plus a sturdy fabric for the backing and batting.
How many fabric strips do I need to cut, and what size?
2 white strips, 25×3 cm and 25×4.5 cm, 1 red strip 25×15 cm, and 2 green strips 25×6 cm.
In what order are the fabric strips sewn together?
Green, narrow white, red, wide white, green.
Why is the template flipped in a checkerboard pattern when cutting?
To get 5 pieces with the narrow white strip and 5 with the wide one — this is needed for the fan to come together correctly.
How are the edges of the finished hot pad treated?
The straight side is finished with two-colored binding using a blind hem stitch, and the curved edge is bound with green binding, with the ends folded neatly.
Your project
Log in to track your project, attach photos, and publish your result into the shared feed.

 Beginner1 hr 30 minFree