Sometimes, to add a touch of mystery and romance to an understated office dress code, all it takes is a neat, charming neck scarf. But if you lack practical scarf-tying skills, the look won't just ...
BeginnerFree
Translated
Sew an Exquisite French Scarf in One Evening
Sometimes, to add a touch of mystery and romance to an understated office dress code, all it takes is a neat, charming neck scarf. But if you lack practical scarf-tying skills, the look won't just ...
Main Steps
Step 1
Sometimes, to add a touch of mystery and romance to an understated office dress code, all it takes is a neat, charming neck scarf. But if you lack practical scarf-tying skills, the look won't just fail to be "complemented"—it might even be hopelessly ruined. Instead of fraying your nerves trying to learn how to tie neck scarves, you can sew a practical and versatile accessory: a French scarf. This accessory gained popularity quite some time ago, and for good reason—just look at what you can do with a single scarf!)
Step 2
To sew a French scarf, you will need: • a cut of synthetic silk or satin; • sewing supplies.
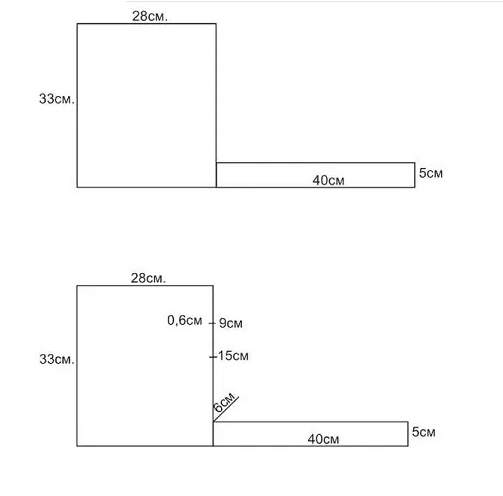
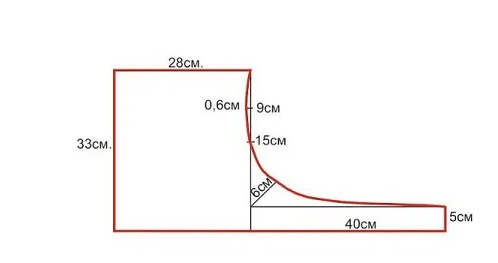
A cut of fabric 140–150 cm wide and 45 cm long will be enough to make two accessories. In principle, 1 scarf takes 35 cm of fabric, but then you'll be left with a fairly large remnant that is, as the saying goes, neither here nor there. The whole secret of this neck scarf lies not in the fabric, but in the pattern itself. On a sheet of paper, draw a rectangle with sides of 28/33 cm. Attach a 5/40 cm rectangle to it. For the pattern to have smooth edges, you need to soften some transitions. Specifically, where the two rectangles join, mark a 45-degree angle and measure 6 cm. Also, place marks at 9 and 15 cm along the inner side of the vertical rectangle. From the 9 cm mark, measure 0.6 cm toward the inside of the shape.
Step 3
Then draw a smooth line connecting all the points from the corner of one rectangle to the corner of the other.
Step 4
As already mentioned, cutting out just one scarf is not practical, so we will cut out pieces for two accessories at once. When cutting, it is important to remember that seam allowances are not included in the pattern, so you need to add 1 cm on each side. After cutting, the rest of the process is as simple as the multiplication table: • place the pieces (you need two for each scarf) right sides together; • stitch them together; • make small notches along the curved edges.
Leave the edge unstitched at the narrow tail. We will turn the piece right side out through this opening.
Step 5
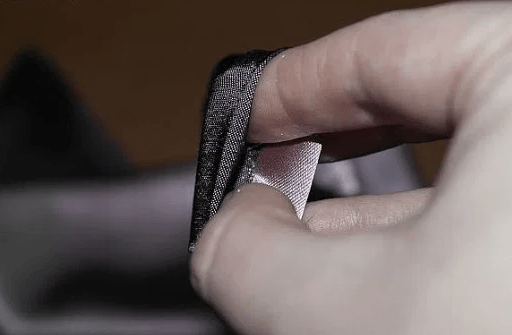
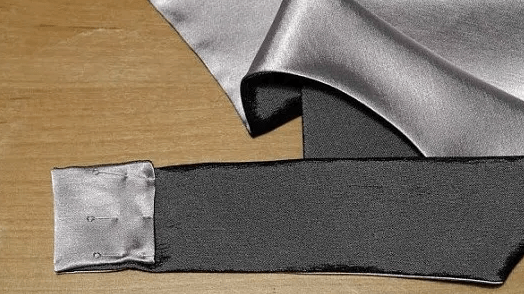
Even out all the seams and press the piece. After that, we create the most important secret of this scarf—the loop. To do this, fold 1 cm inward at the unstitched edge and fold 4 cm over to either side of the scarf. Pin in place and stitch.
Step 6
Then remove the pins and press the piece with a warm iron (preferably with steam) to eliminate any pin marks.
All that's left is the easy part: put on the scarf and create a mysterious, romantic, and unique look in just two seconds!!!
 BeginnerFree