A detailed sewing tutorial for a wrap dress: download and print the A4 pattern at 100%, choose size 40-52 and height 158, 164, or 176, cut the fronts, back, sleeves, pockets, belt, facing, and ties from medium-weight natural fabric, then sew the darts, shoulders, pockets, sleeves, side seams, front edge and neckline facing, belt, and hem.
Intermediate2 hrFree
Translated
Things you will learn
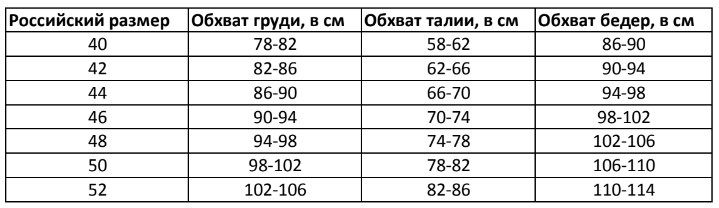
The source provides ready patterns for three heights: 158, 164, and 176, and seven sizes from 40 to 52.
For size 44, the stated fabric requirement is 2.1 m of medium-weight natural fabric.
Print the pattern pieces on A4 at 100%; when joining sheets, match the corner marks, numbering, and text direction.
The facing is cut on the bias in 5 pieces, while the ties are listed separately as pieces that are not cut on the bias.
At the neckline, ease the facing by 2 cm on each front edge; across the back neckline, lay the facing flat without easing.
What you will make
You will make a wrap dress, also close to a robe dress: a V-shaped front edge, belt, ties, sleeves, and pockets. The source stresses that a neat result depends on a firm natural fabric and careful sewing.
Video tutorial reference: a wrap dress made from firm fabric.
Materials and tools
Materials
Medium-weight natural fabric, 2.1 m, yardage is given for size 44
Printed patterns, the ready pattern pieces from the source are printed on A4 at 100%
Thread to match the fabric, 5 spools, 1 spool for the sewing machine and 4 for the overlocker
Tape or glue stick, for joining the printed pattern sheets
Tools
Sewing machine, for straight seams, attaching the facing and belt, and hemming
Overlocker, for finishing shoulder seams, side seams, sleeve seams, and the hem edges
Scissors, for paper and fabric; trim the sharp belt corners with scissors
Soap sliver or fabric pencil, for tracing pattern pieces, corners, and darts
Dressmaking pins, for holding pattern pieces, seams, pockets, belt, ties, and facing
Iron, for pressing seams, ties, belt, front edges, neckline, and hems open or flat
Files and resources
Ready wrap dress patternsPatterns by Alyona Migranova for heights 158, 164, and 176 and sizes 40-52.
Alyona Migranova video tutorialSource material: a video tutorial on sewing a wrap dress from denim fabric.Alyona Migranova video tutorial
Preparation
Print and join the pattern sheets
Print the patterns on a regular printer: A4 format, 100% scale. Join the sheets by numbering and text direction, matching the corner marks along the sheet edges.
Do not lose the notches
The notches are needed for the pockets, sleeves, armholes, belt, and ties. Mark them on the paper pattern pieces right away and transfer them to the fabric while cutting.
Pattern and Cutting
First check the size chart, sketch, and list of pieces, then lay the pattern pieces strictly on the grainline.
Check the size chart and sketch
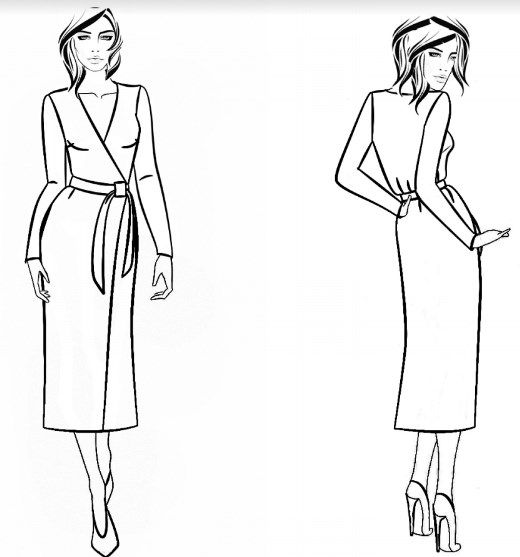
The source provides patterns for three heights: 158, 164, and 176, and seven sizes from 40 to 52. Check the size chart, then look at the dress sketch so the wrap, belt, sleeve, and front edge are clear before cutting.
The pattern covers sizes 40-52 and heights 158, 164, and 176.The sketch shows the robe-style silhouette, wrap front, belt, and sleeve.
Cut out the pattern pieces and check the list
After joining the sheets, cut out the pattern pieces. According to the source, you should have: the dress front piece, or front; half of the back with the center on the fold; sleeve; belt; pocket; tie; and facing, also called bias binding. Mark the notches on the paper patterns.
Lay out the back and front on the grainline
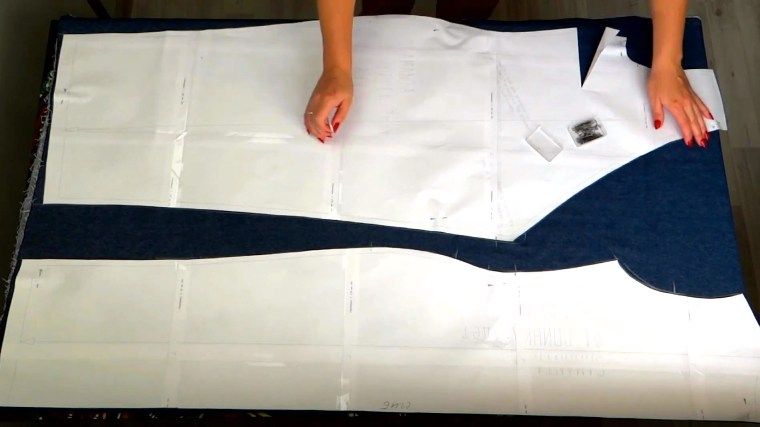
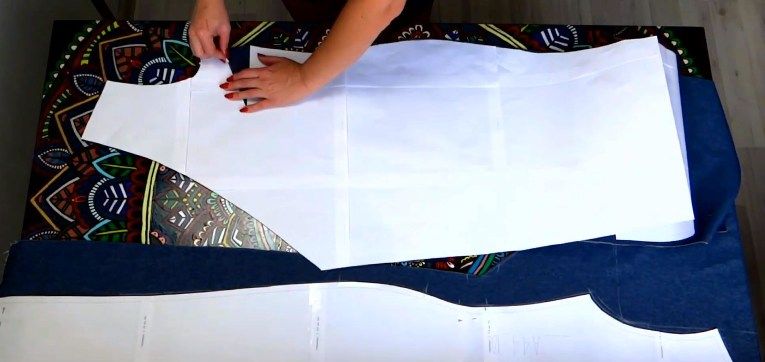
Fold the fabric in half with right sides together, selvage to selvage. Start with the large pieces: place the back with its center fold against the fabric fold, then place the front nearby with a few centimeters of space. The pattern pieces show the grainline direction; it always runs parallel to the selvage.
The back is placed on the fold and the front is laid nearby on the grainline.
Do not save fabric against the grain
The source specifically warns that the pattern must lie strictly along the grainline, even if you want to save fabric.
Lay out the sleeve, pockets, and facing pieces
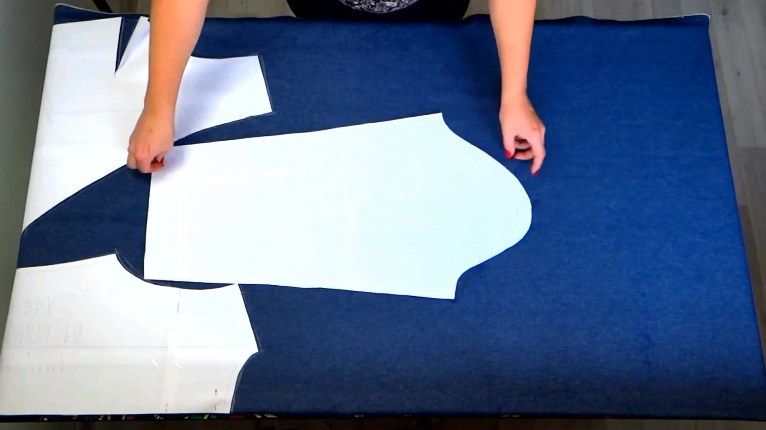
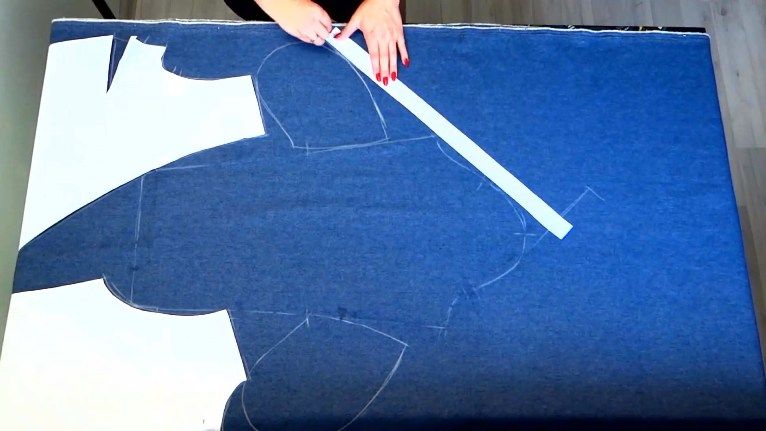
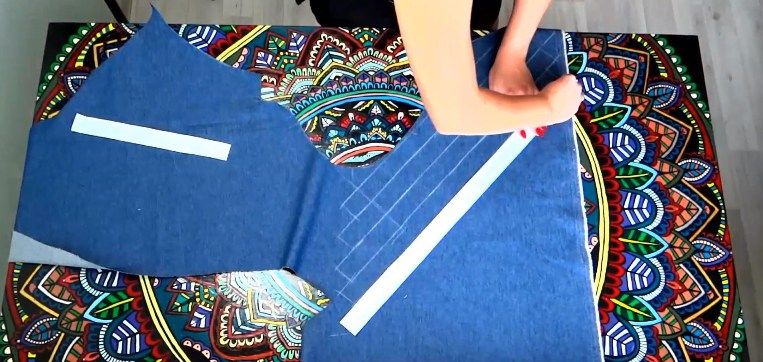
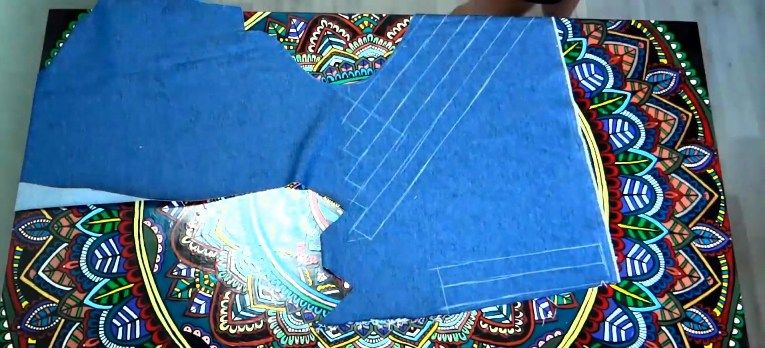
Pin the pattern pieces to the fabric and trace around them. Move the fabric, still folded in two, and trace the sleeve. On both sides of the sleeve, lay out and trace the pocket bags as mirror images. Mark five facing pieces on the bias; the source suggests doing this closer to the end of the layout so you do not misjudge the fabric use.
The sleeve is traced on fabric folded in two.Pocket bags are laid out as mirror images, and the facing pieces are marked on the bias.
Transfer the darts and cut the remaining pieces
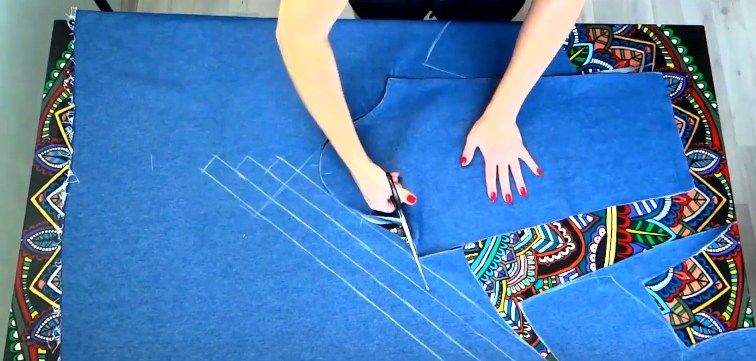
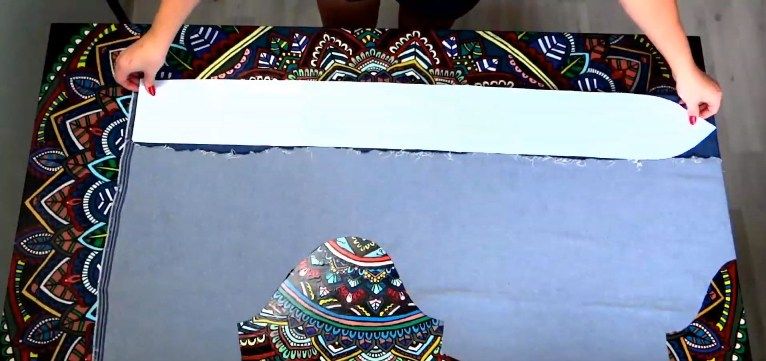
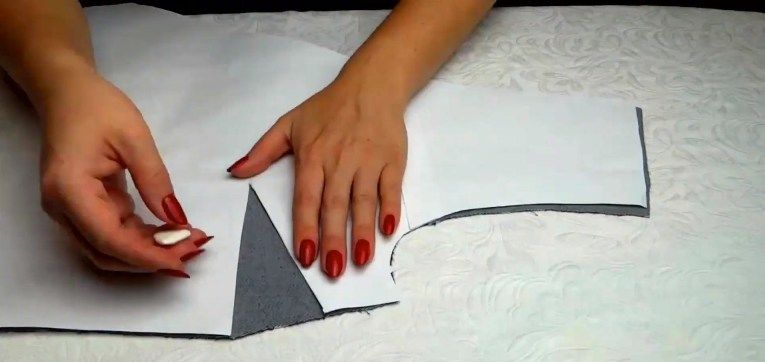
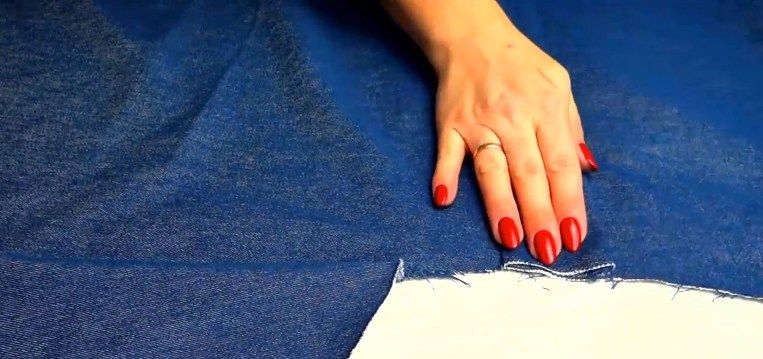
Cut out the front and back pieces, clipping all notches with scissors. Transfer the dart to the second front by turning the paper pattern over. Then cut the sleeve and pocket pieces. Open the fabric and place the belt piece on fabric folded in two at the lower part of the cut. Open the fabric into a single layer again, mark the facing pieces on the remaining areas, then mark the tie pieces not on the bias.
The dart is transferred to the second front by turning over the paper pattern.After layout, the sleeve and pocket pieces are cut out.The belt piece is placed at the lower part of the cut on fabric folded in two.The facing pieces are marked on the remaining areas of fabric.In the source, the ties are marked separately and not on the bias.
Final set of pieces
After cutting you should have: front pieces - 2, one whole back piece - 1, sleeve - 2 mirrored pieces, pocket bag - 4 pieces, belt - 2 pieces, facing - 5 pieces, tie - 2 pieces.
Base Assembly
At this stage, sew the darts, shoulders, pockets, sleeves, belt, and ties before joining the side seams.
Transfer and stitch the bust darts
Transfer the bust darts to the wrong side of the front pieces using the patterns. Pin the darts and stitch them on both fronts.
The darts are transferred to the wrong side and pinned before stitching.The bust darts are stitched on both front pieces.
Assemble the shoulders, pockets, and sleeves
Pin the shoulder seams and the pocket attachment seams: their level is marked by notches on the side seams of the front and back. Sew the shoulders, stitch on the pocket bags, and finish the shoulder seams and pocket-bag seams on the overlocker. Press the shoulder seams, pocket seams, and bust darts. Then pin the sleeves by the notches: the front armhole has two notches, the back has one, and the front and back of the sleeve cap are marked the same way. Set the sleeves into the armholes and finish the edges.
The sleeve is matched to the armhole by the notches and set in.
Sew the facing strips, belt, and ties
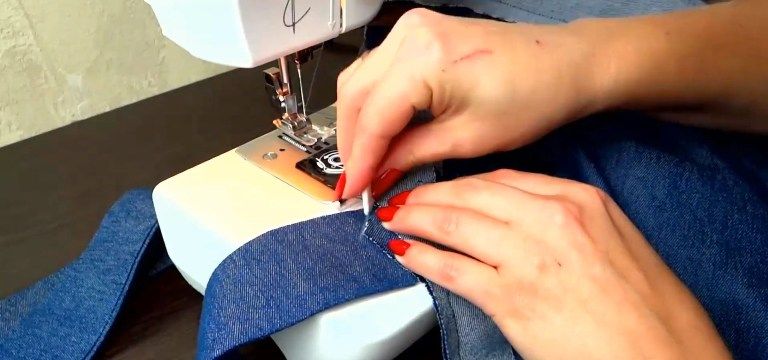
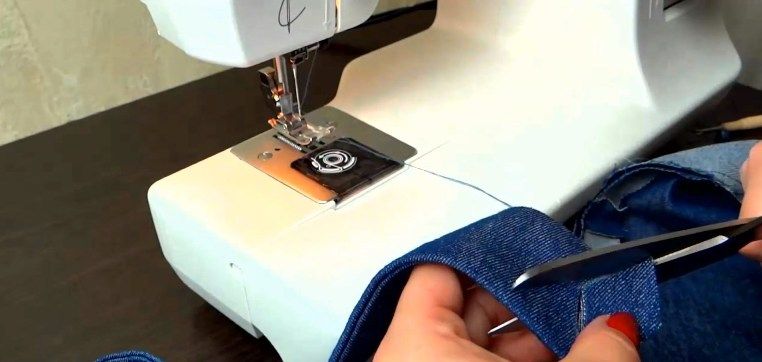
Pin the bias strips together along their short sides and sew them. Pin the belt seams: one short side and one long side. Stitch the belt seam, leaving a turning opening on the short straight open edge; trim the sharp corners at the end of the belt with scissors. Press the bias-strip seams open, turn the two belt pieces right side out, shape them, and press. Fold each tie lengthwise into quarters: first press both long edges to meet at the center, then fold in half lengthwise, press again, and sew a straight stitch.
Pin and sew the side seams with pockets
Pin the dress side edges and pocket bags. Simply pin the left side seam. Into the right side seam, place the belt with the open edge inside and add the tie according to the notches; the belt seam should face upward, toward the armhole. Place one more tie at the center of the belt into the same seam. Sew the side seams with one straight seam, catching the belt, tie, and pockets. Finish the edges and press the side seams.
The belt and tie are inserted into the right side seam by the notches.The side edges and pocket bags are pinned before one continuous seam.The belt and tie must be caught in the side seam in the right direction.
Front Edge, Belt, and Final Finishing
The most delicate part is finishing the front edges and neckline with the facing, including easing at the neckline and correcting the belt corner.
Pin the facing to the front edge and neckline
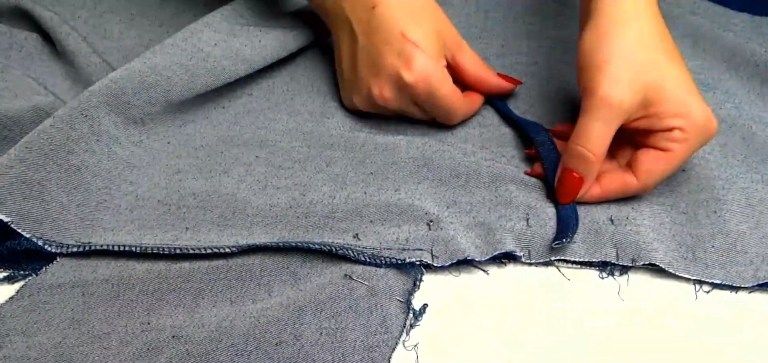
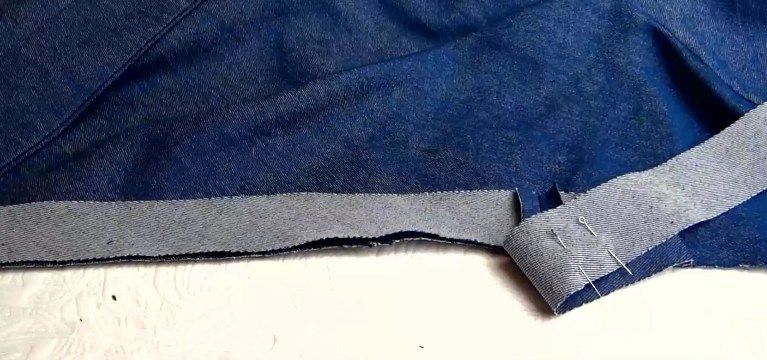
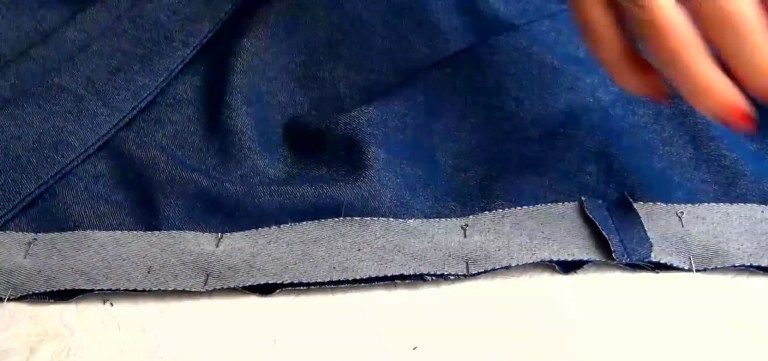
Start finishing the neckline and front edges. Pin a tie to the left front at waist level, where the corner sits. Pin the second belt piece to the right front at the same point. Pin the facing to the front edge down to the waistline on both sides, without stretching or easing the garment.
The facing is pinned to the front edge down to the waistline without tension.
Ease the facing along the neckline
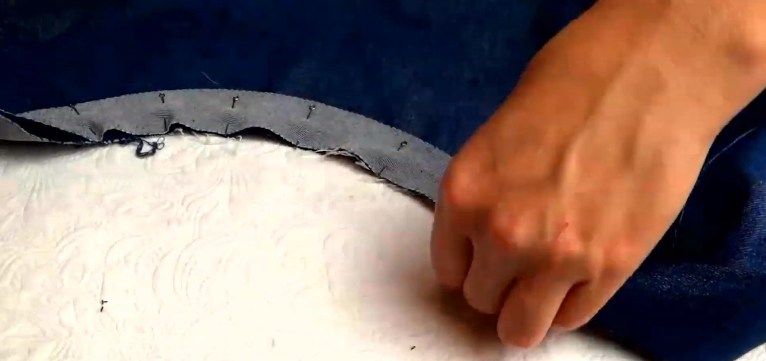
At the neckline, while pinning the facing, add 2 cm of easing on each front edge. The simple method from the source: lay the facing evenly from the waist to the shoulder seam, then measure 2 cm toward shortening and gently stretch the facing evenly along the whole neckline length. Across the back neckline, lay the facing evenly, without easing. Repeat the same on the other side of the dress.
At each front edge, the neckline facing is eased by 2 cm.Across the back neckline, the facing is laid evenly without easing.
Check the belt corner before attaching the facing
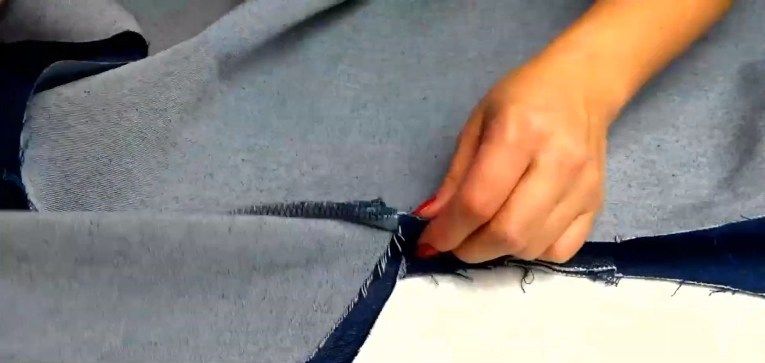
Attach the facing with a straight stitch. In the source, the author found an error: the belt had been pinned so it could not be finished correctly. If you see the same problem, take the belt out and trace the front-edge corner onto it from the other side, using the notch. Make sure the belt seam points toward the top of the dress. Trace the corner with soap and trim it.
If the belt is pinned incorrectly, the front-edge corner is transferred to the belt by the notch.
Check the belt seam direction
The belt seam should face toward the top of the dress. Otherwise the front-edge corner will be hard to finish neatly.
Insert the belt and finish the facing
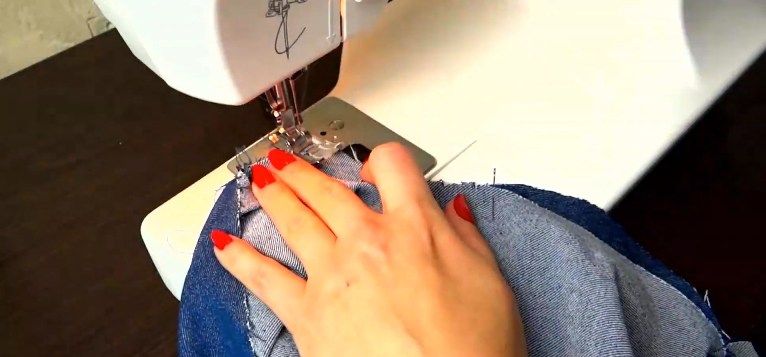
Insert the belt, pin one side of the corner, and stitch. Clip the belt seam at the center of the corner, pin the second half, and stitch the second side of the belt corner. Check the belt attachment from the right side and finish attaching the facing to the front edge.
The belt corner is stitched on both sides after clipping the seam.
Topstitch the facing, sleeves, and hem
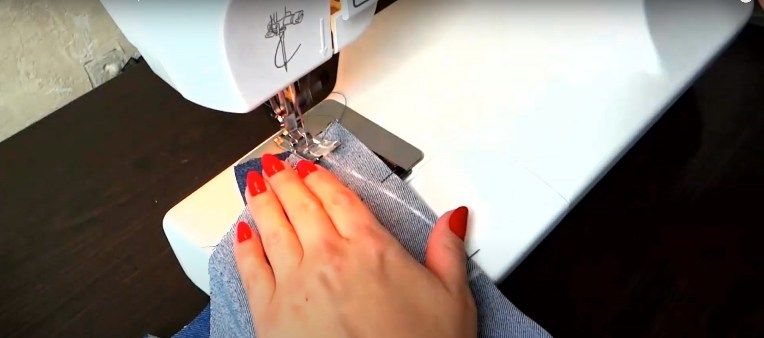
Turn the facing under twice and pin along the full length of the front edge. Stitch 1.5-2 mm from the facing edge. Finish the sleeve and dress hem edges on the overlocker. Turn the dress hem and sleeve hems up by 2 cm and sew with a straight stitch. Press the front edge, neckline, dress hem, and sleeve hems.
Finish and variations
Finish
Final pressing
After hemming, press the front edge, neckline, dress hem, and sleeve hems so the facing and hems lie flat.
Check the wrap while moving
Try the dress on and walk in it. If the neckline opens, use one of the discussion-derived fixes: a hidden snap, a button with an internal loop, or a small dart adjustment.
Variations
Fabric
The source specifically names firm natural fabric, and the video tutorial shows a denim dress. Use a light fabric only after checking that the front edge and wrap hold their shape.
Hidden wrap fastening
From the discussion: for firm fabrics, you can add hidden hooks, snaps, or an inner button with a non-through loop so the neckline does not open.
After cutting or fitting, a piece behaves asymmetrically.
Likely cause
The pattern pieces were laid out off-grain to save fabric.
How to fix it
Place the patterns strictly on the grainline: it runs parallel to the selvage. The source emphasizes this directly.
Pockets, sleeves, or belt do not line up
Problem
It is hard to understand where to attach the pockets, sleeves, belt, and ties.
Likely cause
The notches were not transferred from the paper pattern to the fabric.
How to fix it
Before cutting, mark the notches on the patterns, and while cutting transfer them to the pieces with small scissor clips. In the source, pockets, armholes, sleeve cap, belt, and ties are all aligned by these notches.
The wrap opens or the neckline gaps
Problem
When moving, the neckline loosens and may expose the chest or underwear.
Likely cause
The line across the chest may be too long, or the wrap may need extra fastening.
How to fix it
From the discussion: you can shorten the line with a small 1-1.5 cm dart, add a hidden snap, or sew on an inner button with an internal non-through button loop. If the neckline itself is acceptable but shows underwear, a plunge bra was also suggested.
The front edge and neckline ripple
Problem
The facing along the neckline lies loosely or sticks out.
Likely cause
The 2 cm easing was not made on each front edge, or the facing was stretched unevenly.
How to fix it
Pin the facing without tension along the front edge down to the waist, then add 2 cm of easing on each front edge at the neckline. Across the back, the facing should lie without easing.
The belt corner cannot be finished
Problem
After pinning the belt, it is impossible to close the front-edge corner neatly.
Likely cause
The belt was inserted from the wrong side, or the belt seam does not face the top of the dress.
How to fix it
Repeat the correction from the source: take the belt out, trace the front-edge corner onto it from the other side using the notch, trim the corner, insert the belt again, clip the seam at the corner center, and stitch both sides.
?FAQ
What sizes does the wrap dress pattern cover?
The source gives ready patterns for three heights: 158, 164, and 176, and seven sizes from 40 to 52.
How much fabric do I need?
For size 44, the source specifies 2.1 m of medium-weight natural fabric.
How should I print the pattern?
Print it on A4 at 100%, then join the sheets by numbering, text direction, and corner marks.
Why ease the facing along the neckline?
The source asks you to ease the facing by 2 cm on each front edge at the neckline. This helps the front edge and neckline sit closer to the body; the back neckline is not eased.
What can I do if the wrap opens at the chest?
In the discussion, readers suggested shortening the line with a small 1-1.5 cm dart or adding a hidden snap, hook, or inner button with a non-through loop. If the neckline is fine but underwear shows, a plunge bra was suggested.
Your project
Log in to track your project, attach photos, and publish your result into the shared feed.
Very beautiful! I have always loved styles like this, with an accent on the waist and legs showing when you take a flowing step 😍 There is just one small problem with the neckline at the chest: no matter how tightly I wrap the dress edges, the neckline loosens as I move, and I constantly have to adjust it so my chest and underwear do not end up “outside.” How can I reinforce the neckline so it does not open at the worst possible moment?Show full quoteCollapse
Very beautiful! I have always loved styles like this, with an accent on the waist and legs showing when you take a flowing step 😍 There is just one small problem with the neckline at the chest: no matter how tightly I wrap the dress edges, the neckline loosens as I move, and I constantly have to adjust it so my chest and underwear do not end up “outside.” How can I reinforce the neckline so it does not open at the worst possible moment?
If you want to secure the wrap so it does not spread open, a hidden snap or a button sewn on the inside and fastened to an internal non-through loop will solve the problem completely 👍 If the neckline is not critical in motion but exposes the bra, then you need the right underwear - look for a plunge bra: it sits as low as possible 😉
Very beautiful! I have always loved styles like this, with an accent on the waist and legs showing when you take a flowing step 😍 There is just one small problem with the neckline at the chest: no matter how tightly I wrap the dress edges, the neckline loosens as I move, and I constantly have to adjust it so my chest and underwear do not end up “outside.” How can I reinforce the neckline so it does not open at the worst possible moment?Show full quoteCollapse
Very beautiful! I have always loved styles like this, with an accent on the waist and legs showing when you take a flowing step 😍 There is just one small problem with the neckline at the chest: no matter how tightly I wrap the dress edges, the neckline loosens as I move, and I constantly have to adjust it so my chest and underwear do not end up “outside.” How can I reinforce the neckline so it does not open at the worst possible moment?
I once had this kind of “standing away” neckline fixed by my seamstress. As I remember, she said the dress line running across the hollow of the chest was a little too long and needed to be shortened with a small 1-1.5 cm dart. And I once found a handmade dress of my mom’s with hidden hooks or maybe snaps at the neckline. That is also an option in principle, but I think it works only for firm fabrics that can hold at least some shape.
Very beautiful! I have always loved styles like this, with an accent on the waist and legs showing when you take a flowing step :love: There is just one small problem with the neckline at the chest: no matter how tightly I wrap the dress edges, the neckline loosens as I move, and I constantly have to adjust it so my chest and underwear do not end up “outside.” How can I reinforce the neckline so it does not open at the worst possible moment?
 Intermediate2 hrFree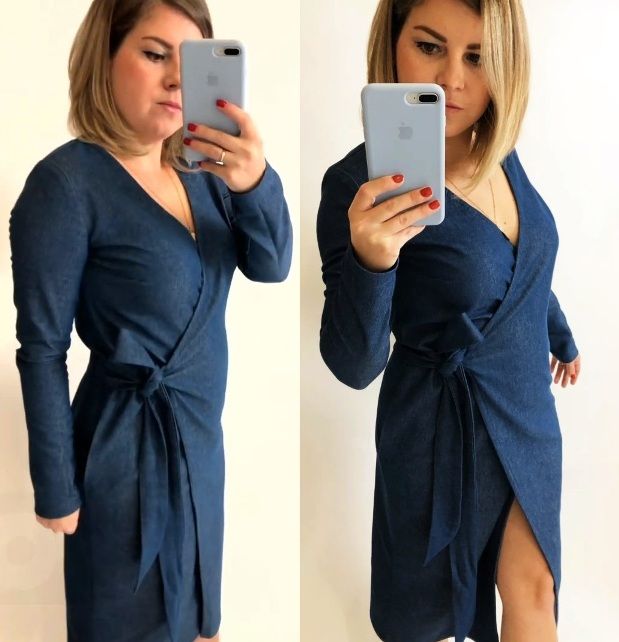


Very beautiful! I have always loved styles like this, with an accent on the waist and legs showing when you take a flowing step 😍 There is just one small problem with the neckline at the chest: no matter how tightly I wrap the dress edges, the neckline loosens as I move, and I constantly have to adjust it so my chest and underwear do not end up “outside.” How can I reinforce the neckline so it does not open at the worst possible moment?Show full quoteCollapse