How to Reupholster an Old Chair Seat: A Step-by-Step Tutorial with Photos
A step-by-step reupholstering tutorial: remove the seat, replace the foam if needed, cover it with new fabric, and secure it with a staple gun.
Beginner1 hrFree
Translated
Things you will learn
Solid wooden chairs don't have to be thrown out — you can replace the old upholstery yourself, and it works out much cheaper than buying new furniture.
Remove the seat by pressing on it from underneath or tapping the edges from below with a hammer; remove any screws with a screwdriver, and if the seat was glued down, you'll also need to clean off the leftover glue.
Cut the new fabric 5-10 cm larger than the seat's width and length; if the seat foam is worn down, it's best to replace it right away — remove the old foam with a staple remover or by hand, and attach the new foam the same way as the fabric.
Staple the fabric on in a criss-cross pattern: first at the top, then at the bottom, then on the left and right, then split each remaining quarter in half and staple that too — you'll use around 50 staples per chair, evenly spaced.
After finishing the upholstery, trim off the excess fabric at the corners and put the seat back the same way you removed it — with glue, screws, or both.
What you'll get
You'll get a wooden chair with a neatly reupholstered seat.
Materials and tools
Materials
Dense upholstery fabric of your choice
Staples for the staple gun
Foam padding, optional, if the old foam is worn down
Glue, optional, depending on how your seat is attached
Tools
Tailor's scissors
Iron
Ironing board
Staple gun
Screwdriver
Remove the chair seat
How you remove it depends on how it's attached.
Remove the seat and clean off any glue
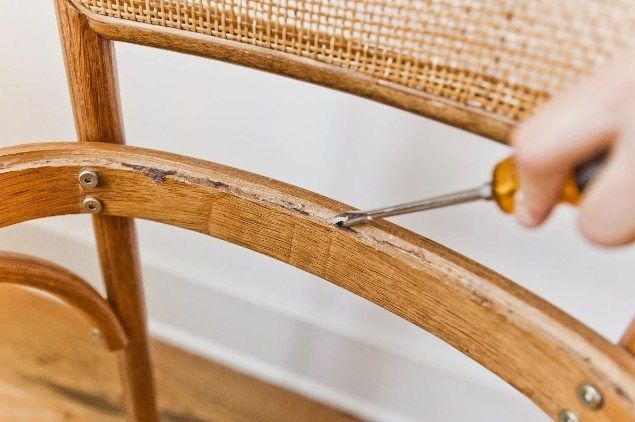
First, I removed the chair seat. Some manufacturers glue the seat down — in that case removing it isn't easy, but it's doable. Press on the seat from underneath, and if that doesn't work, tap the edges of the seat from below with a hammer. Remove any screws with a screwdriver. In my case, the seat was glued down, so I had to clean off the leftover glue.
Cut the new fabric
The fabric needs to be a bit larger than the seat.
Iron and cut the fabric with extra allowance
Next, I gave the fabric a good ironing and cut a piece for the chair. The new piece should be 5-10 cm larger than the width and length of the seat!
Replace the foam if needed
It's best to replace worn-down foam right away.
Replace the foam the same way you'll replace the fabric
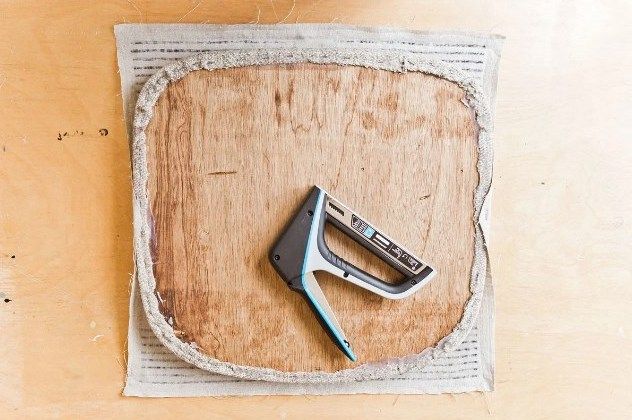
If the seat turned out to be worn down, it's best to replace the foam right away. You can remove the old foam, or simply lay a thin new layer over the old one (I chose to replace it anyway). This is done exactly the same way as the fabric upholstery. Remove the staples either with a staple remover or by hand (I used an old knife to pry them out).
Staple the new fabric on
The fabric is stapled on in a criss-cross pattern.
Position the fabric and staple it on in a criss-cross pattern
Now for the upholstery. With the fabric laid wrong side up, I placed the seat on top of it, right side down. Then I carefully folded the fabric edges over onto the seat and secured them with the staple gun. The order is as follows: staple the top first, then the bottom, then the left and right sides (criss-cross). After that, I split each remaining quarter in half and stapled that too, then went along in between — in the end I used around 50 staples per chair. Depending on the fabric and the shape of the seat, you might need even more staples, but the key here is spacing them evenly! Make sure the tension of the fabric on the seat stays even, and that any pattern on the fabric doesn't end up skewed!
Trim the excess fabric
The last step before putting the seat back in place.
Trim the excess fabric at the corners
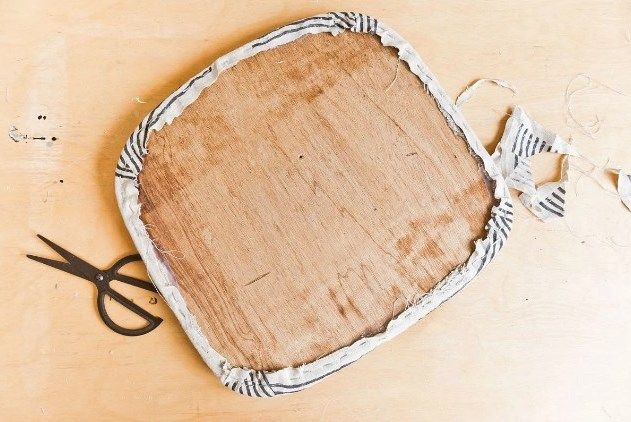
Once the upholstery was done, I trimmed off the excess fabric at the corners.
Put the seat back in place
It attaches the same way it came off.
Reattach the seat the same way you removed it
I put the seat back exactly the same way I removed it — for you that might mean glue, screws, or both.
Enjoy the result
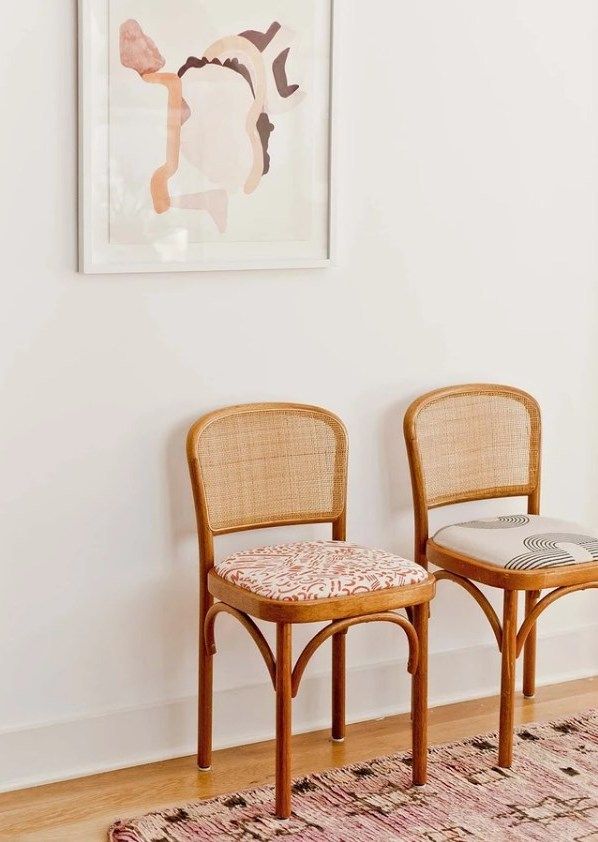
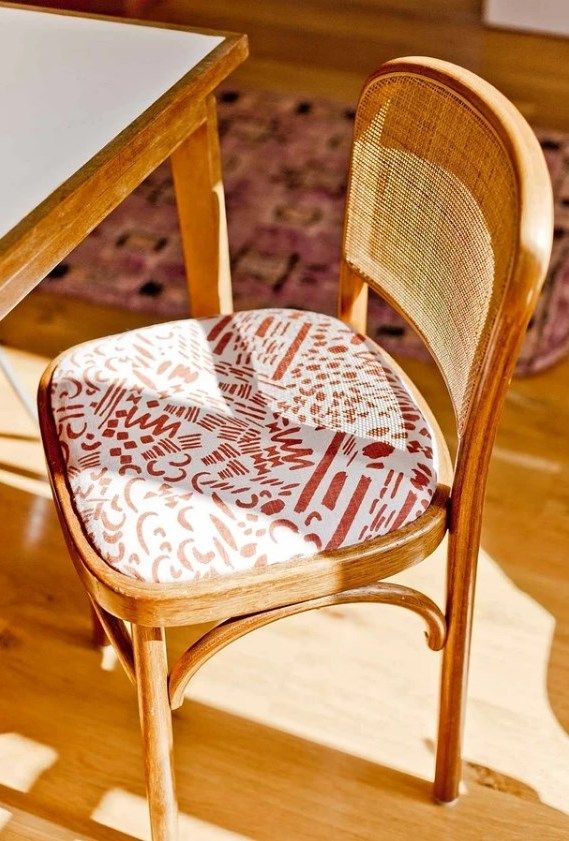
The finished chairs look great in the interior.
Take a look at the finished chairs
And that's it!
Finish and variations
Finish
Your reupholstered chair is ready
And that's it! The chair with its freshly reupholstered seat is ready and looks great in the interior.
Variations
Replace the foam too
If the seat is worn down, you can fully replace the foam or simply lay a thin layer over the old one.
Adjust the staple count to your seat's shape
Depending on the fabric and the shape of the seat, you might need more or fewer staples than in this tutorial — the key is even spacing.
After pressing on it and tapping with a hammer, the seat still won't separate from the chair frame.
Likely cause
The seat is glued down especially firmly, or there are hidden screws you haven't noticed yet.
How to fix it
Check for hidden screws and remove them with a screwdriver; if the seat is glued down, carefully tap the edges from below with a hammer, gradually increasing the force.
The fabric pattern comes out skewed
Problem
After the fabric is stapled on, the pattern looks crooked or shifted relative to the seat.
Likely cause
The fabric tension wasn't even on all sides while stapling.
How to fix it
Keep the fabric tension even on every side, and staple in a criss-cross pattern: top, bottom, then left and right.
The staples aren't holding the fabric well
Problem
After upholstering, the fabric sags slightly or pulls away from the edge of the seat in a few spots.
Likely cause
The staples were placed unevenly or there weren't enough of them for the shape of the seat.
How to fix it
Use around 50 staples per chair as a guideline, and keep them evenly spaced around the whole perimeter — add more staples wherever the fabric sags.
?FAQ
How do you remove a chair seat if it's glued down?
Press on the seat from underneath or tap the edges from below with a hammer; remove any screws with a screwdriver.
How much larger than the seat should the fabric be?
5-10 cm larger than the width and length of the seat.
Do you need to replace the foam?
If the seat is worn down, it's best to replace the foam — remove the old foam with a staple remover or by hand.
In what order should you staple the fabric on?
First the top, then the bottom, then the left and right (criss-cross), then the middle of each remaining quarter.
How many staples does one chair typically take?
Around 50 staples, depending on the fabric and the shape of the seat.
Your project
Log in to track your project, attach photos, and publish your result into the shared feed.
It turned out gorgeous, honestly! And the main thing is that the chairs fit the interior perfectly. At least the part of it that's visible in the photo.
@kisLinka, I'm not the author of the post, of course, but I have the same kind of chairs at my summer house. The weave looks like it's a natural material, similar to thin rattan. Other than that I don't know, I haven't put it to the test)) Your result got me inspired from the photos... Guess I need to reupholster mine too...
 Beginner1 hrFree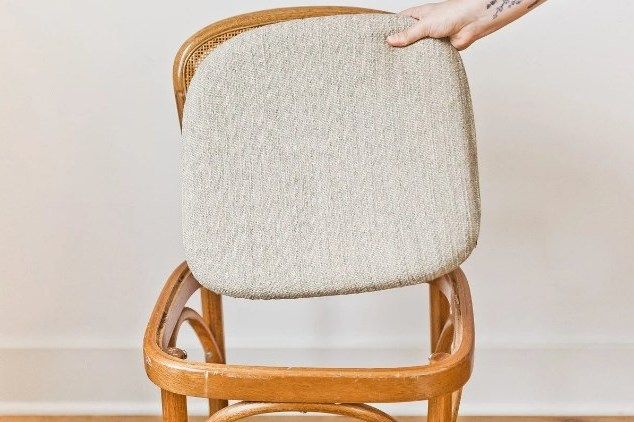


It turned out gorgeous, honestly! And the main thing is that the chairs fit the interior perfectly. At least the part of it that's visible in the photo.