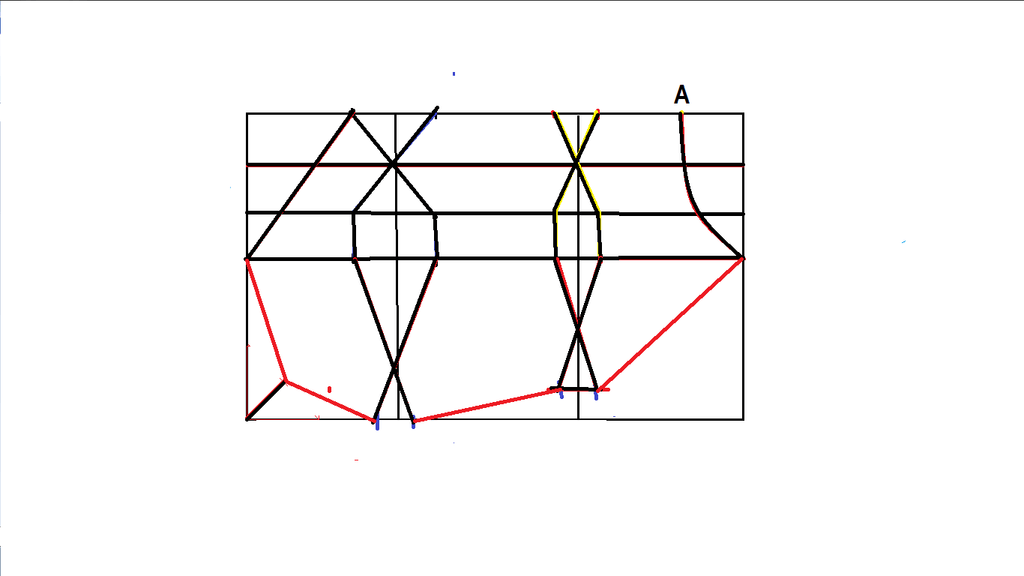
The source starts with five measurements, then uses a coefficient and dart intake to construct a rectangle and the lines for three bra-cup pieces. The drawings and numerical coefficients are illustrative only.
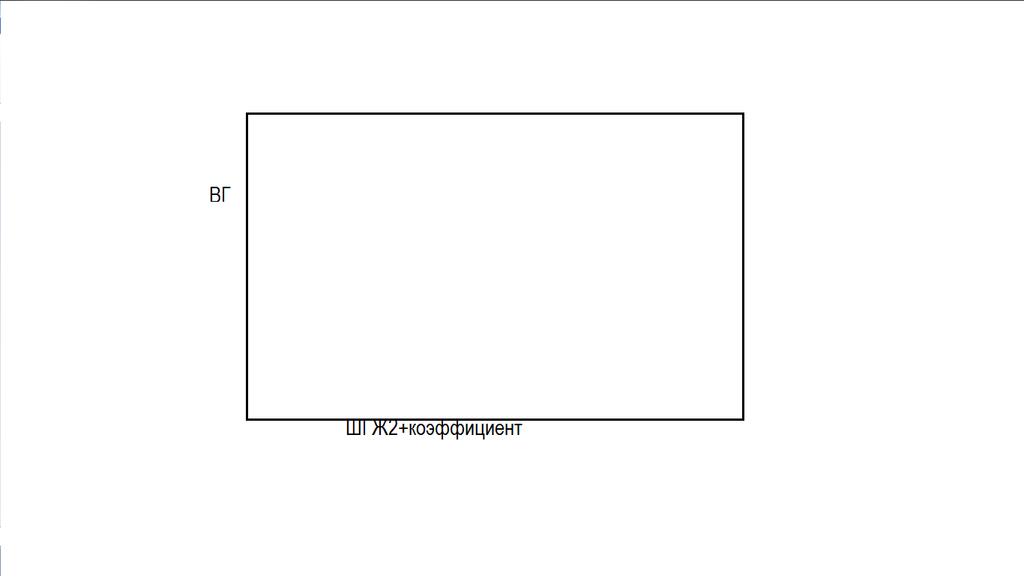
The base height equals bust height; the width equals breast width 2 + coefficient.
The drawings are not a ready-to-use pattern with fixed measurements.
Three-Piece Bra Cup Diagram
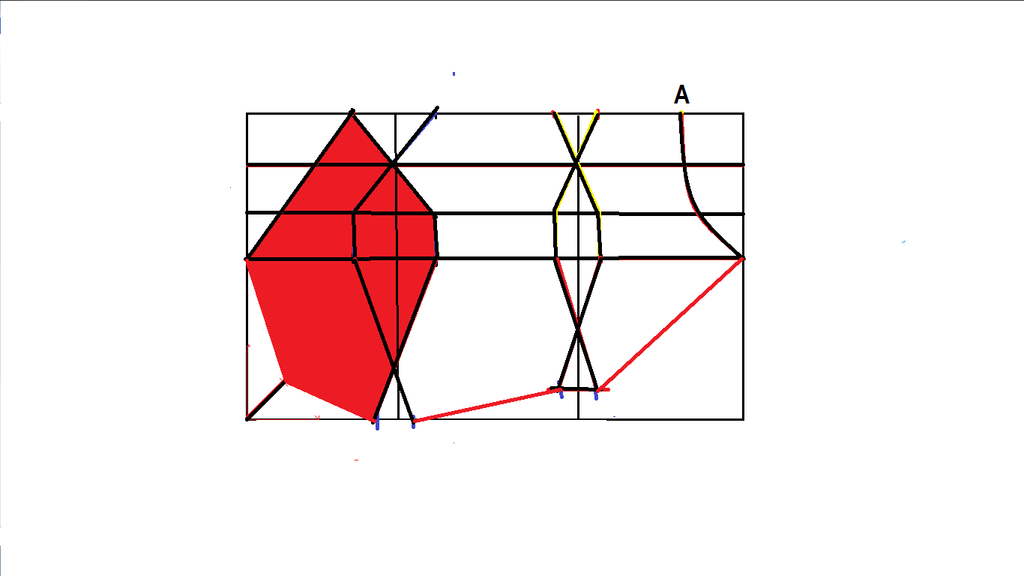
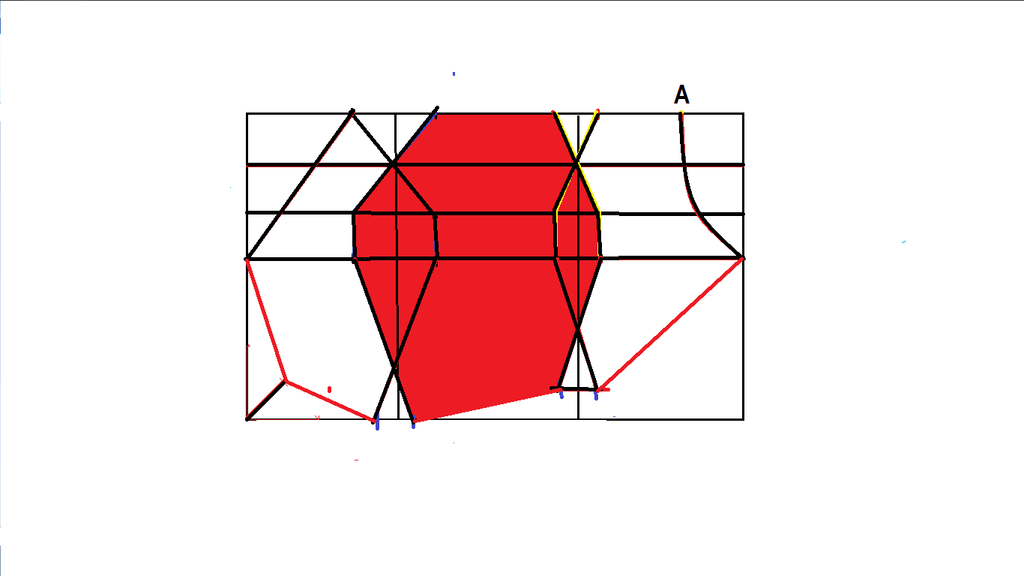
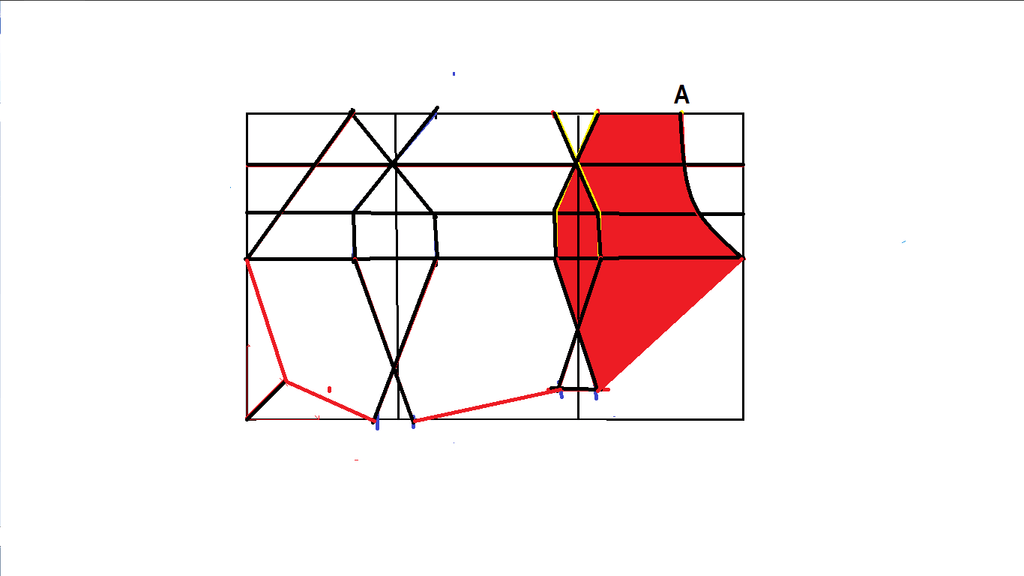
The three cup pieces overlap. This is a calculation diagram based on individual measurements, not a ready-made pattern with set dimensions.
Preparation
Record five measurements
Record bust circumference, underbust circumference, breast width 1, breast width 2, and bust height.
Keep the diagram's limits in mind
The author drew the diagrams for illustration, without exact dimensions. Coefficient examples by cup size do not replace calculating from your own measurements.
Calculate the starting values
Find the coefficient
Subtract underbust circumference from bust circumference and divide the difference by 6. The author gives only approximate guides: 2.3 for size 2–3, 2.8 for 3–4, and 3.3 for 5–6.
Do not use the guides as a size chart
Calculate the coefficient from your own bust and underbust circumferences first.
Calculate the dart intake
Starting with breast width 1, subtract the sum of breast width 2 and the calculated coefficient.
Draft the rectangular base
Set the height and width
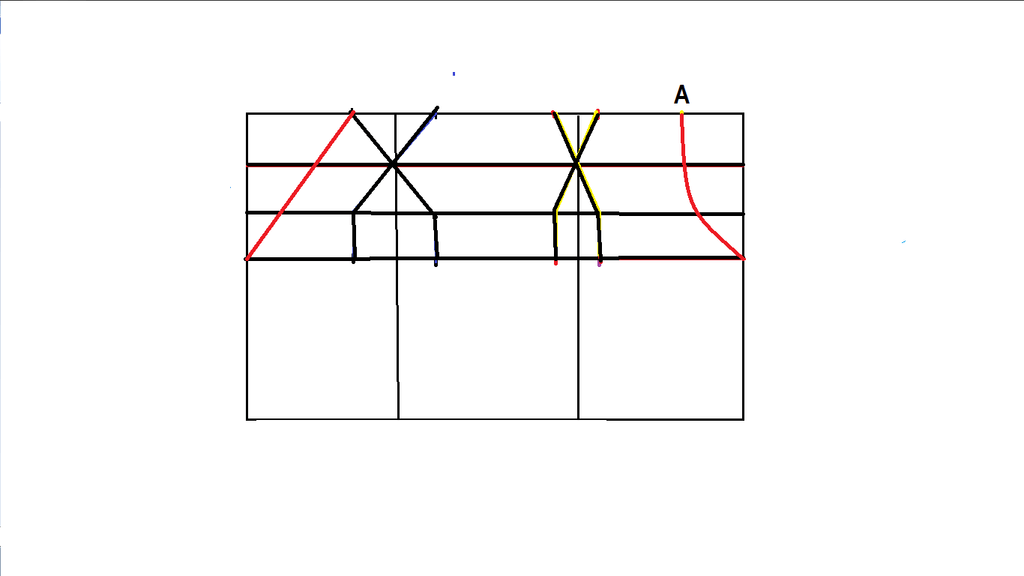
Draw a rectangle: its height equals bust height, and its width equals breast width 2 + coefficient.
Divide the base into three parts
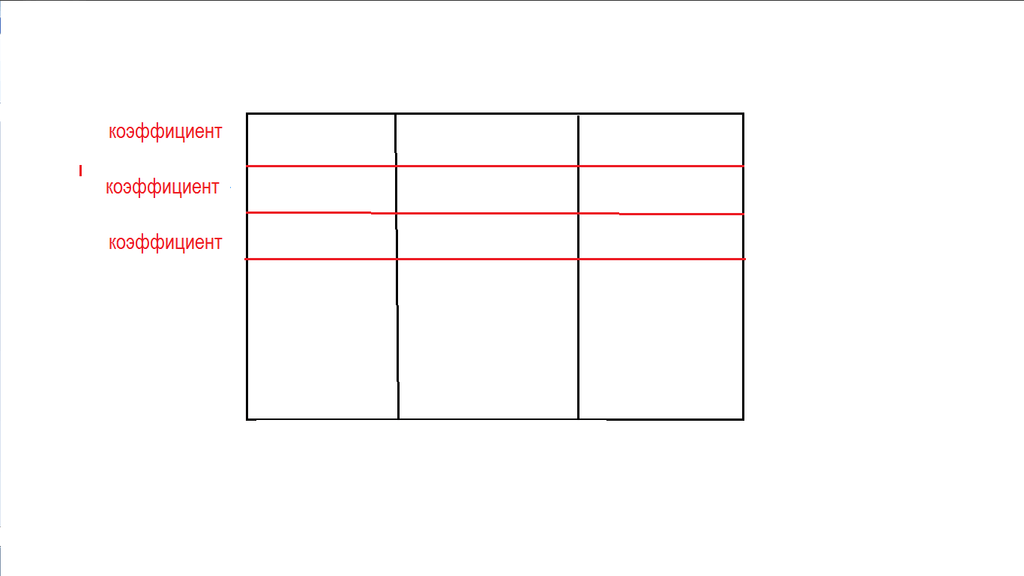
Divide the rectangle into three equal parts.
Mark off three coefficients
Starting at the top corner, mark off the coefficient three times and draw a line after each segment.
Mark the darts
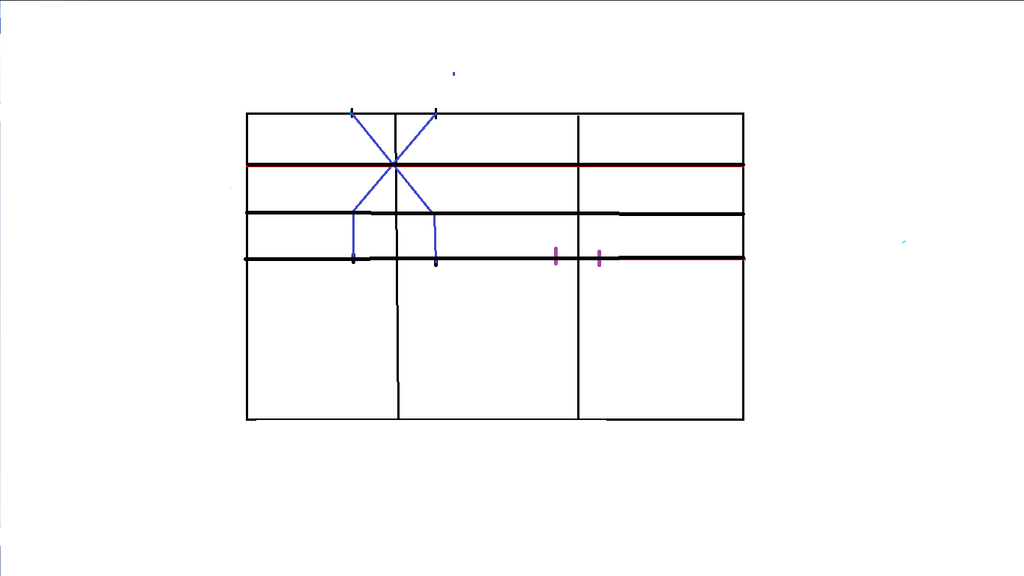
Divide the first dart intake
Divide the intake by 3 and mark off two parts on each side of the first line. In the example: 9 ÷ 3 = 3, so mark 3 cm on each side.
Mark the first dart points
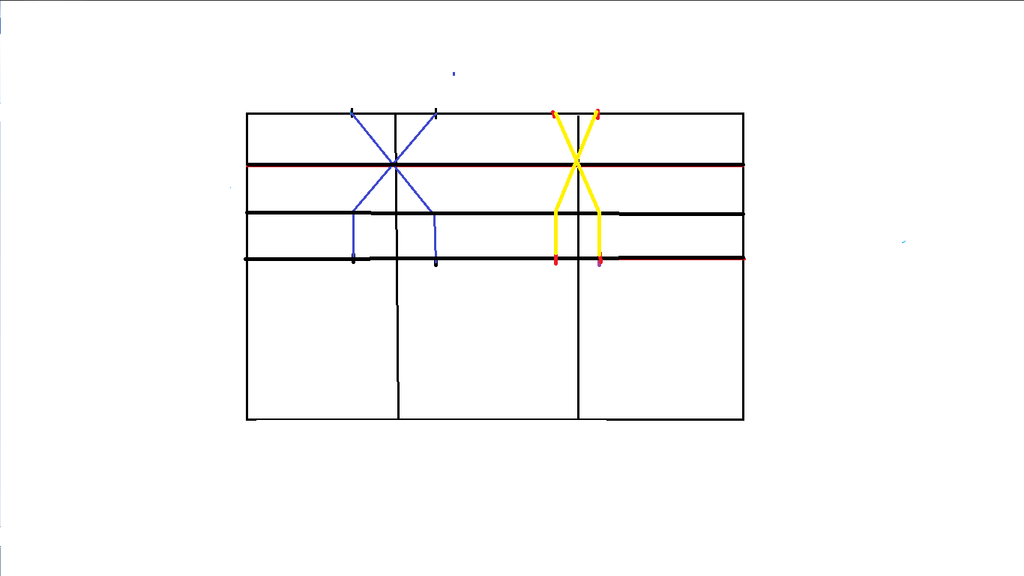
Mark points on the first and third horizontal lines and connect them as shown in the diagram.
Mark the second vertical line
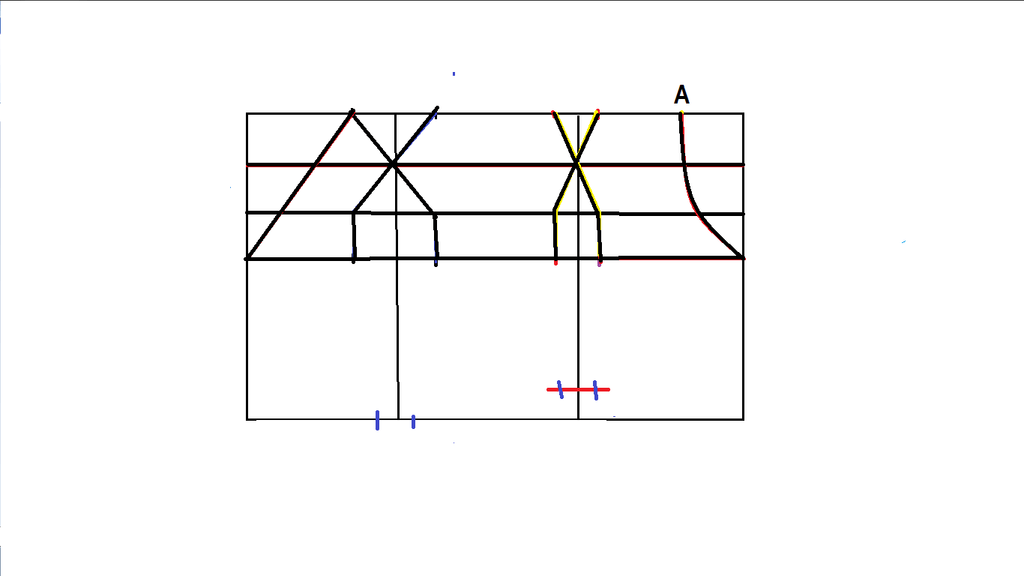
Divide the remainder in half. In the example: 3 ÷ 2 = 1.5, so mark 1.5 cm on each side.
Shape the cup lines
Mark the armhole
On the right side, shape a 2–3 cm armhole near the underarm; it is marked with the letter A in the drawing.
Draw the short line
From the second vertical line, measure 1.5 cm upward from the bottom and draw a short horizontal red line.
Mark coefficient quarters
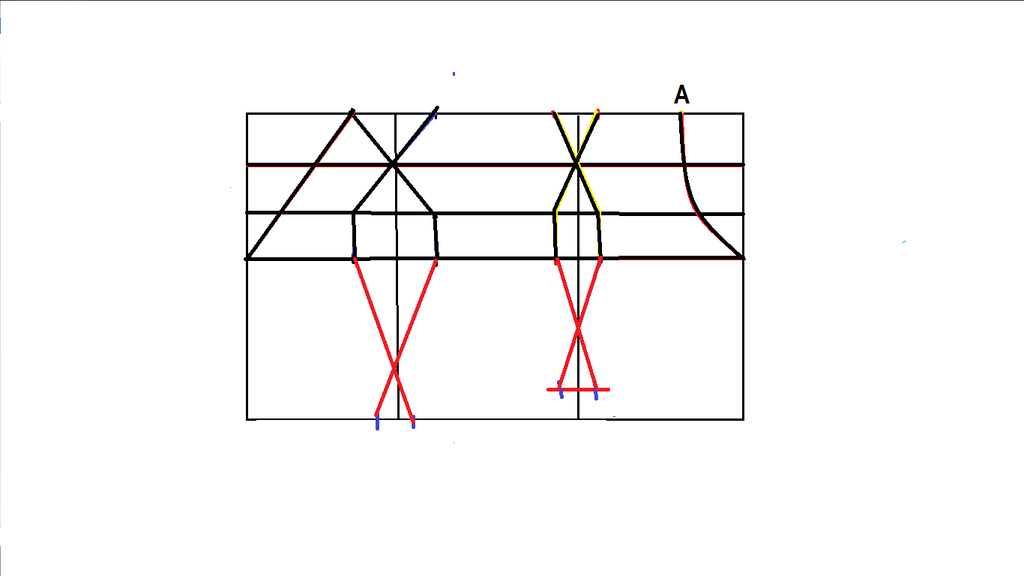
Divide the coefficient by 4 and mark one quarter on each side of every vertical line.
Connect the lines crosswise
Connect the marked lines crosswise.
Draw the angle bisector
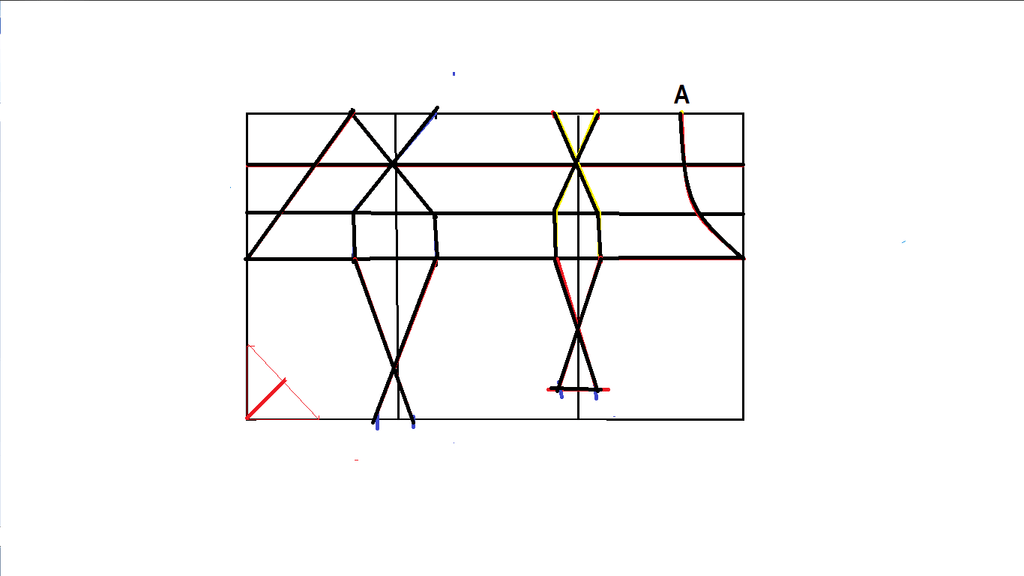
From the lower left corner, draw a 3–4 cm angle bisector. To divide the angle quickly without a protractor, mark 2 cm along both sides, connect the marks, find the midpoint of that segment, and draw a line from the corner through that midpoint. In the diagram, the bold line is the bisector and the thin lines show its construction.
Connect the points and check the pieces
Connect the points with straight lines. The finished diagrams show three overlapping cup pieces.
The diagram is not to scale
Do not measure lines on the image: the source does not provide exact dimensions for the drawings.
Finish and variations
Finish
Check the diagram components
The final diagram consists of three overlapping pieces.

 BeginnerFree