A step-by-step tutorial for a decorative plaster vase: a mix of 2 parts plaster to 1 part water, poured into a balloon, spread across the walls, dried for a couple of hours, an opening cut in, a plaster foot cast in a 1-1.5 cm ring, then sanding, painting, and varnish.
BeginnerFree
Translated
Things you will learn
Mix the plaster in a ratio of 2 parts plaster to 1 part water.
For more strength, choose plaster with a higher number in its grade marking, G-2 through G-25.
A little PVA glue in the water can be added for extra strength.
The trickiest part is spreading the plaster evenly across the balloon's walls while it sets quickly.
At the end, the vase is varnished both outside and inside.
What you'll get
A small, rounded white decorative vase on a plaster foot. You can leave it minimalist or paint it with acrylic or watercolor and seal it with varnish.
Materials and tools
Materials
Plaster, 2 parts, Look for a stronger grade: the source notes that plaster ranges from G-2 to G-25, where the number indicates strength.
Water, 1 part, Needed to mix with the plaster.
A balloon, Used as a mold for the rounded base.
PVA glue, a little, Optionally added to the water for extra strength.
Modeling clay, Used to shape the base for the foot mold.
A sheet of paper or plastic film, A surface to roll out the modeling clay on.
A flat section cut from a plastic bottle, 1-1.5 cm wide, Forms the ring for casting the foot.
Acrylic or watercolor paint, and varnish, Paint for decoration; varnish for sealing the vase inside and out.
Tools
An empty thread spool or a similar insert, Makes it easier to pour the plaster into the balloon.
Scissors, Needed to cut the flat section from the plastic bottle.
Coarse and fine sandpaper, For carefully sanding the plaster base.
A brush, For painting and applying varnish.
Preparation
Work without pausing once you've mixed the plaster
Plaster sets quickly. Get the balloon, the spool, a drying spot, and the foot materials ready before you mix the plaster.
Shape the Plaster Base in the Balloon
The vase's shape comes from the balloon. The key is not just pouring the plaster in, but spreading it across the walls in time.
Mix the plaster with water at a 2:1 ratio
Mix 2 parts plaster with 1 part water. For strength, choose a plaster with a higher number in its G-2...G-25 grade marking; if you like, add a little PVA glue to the water.
Don't wait too long
Plaster sets quickly, so it's best to have your mold and workspace ready ahead of time.
Pour the plaster into the balloon and tie it off
Insert an empty thread spool or a similar insert into the balloon to make pouring the mixture easier. After pouring, tie the balloon off securely.
The spool makes it easier to pour the plaster mixture into the balloon.
Spread the plaster across the walls
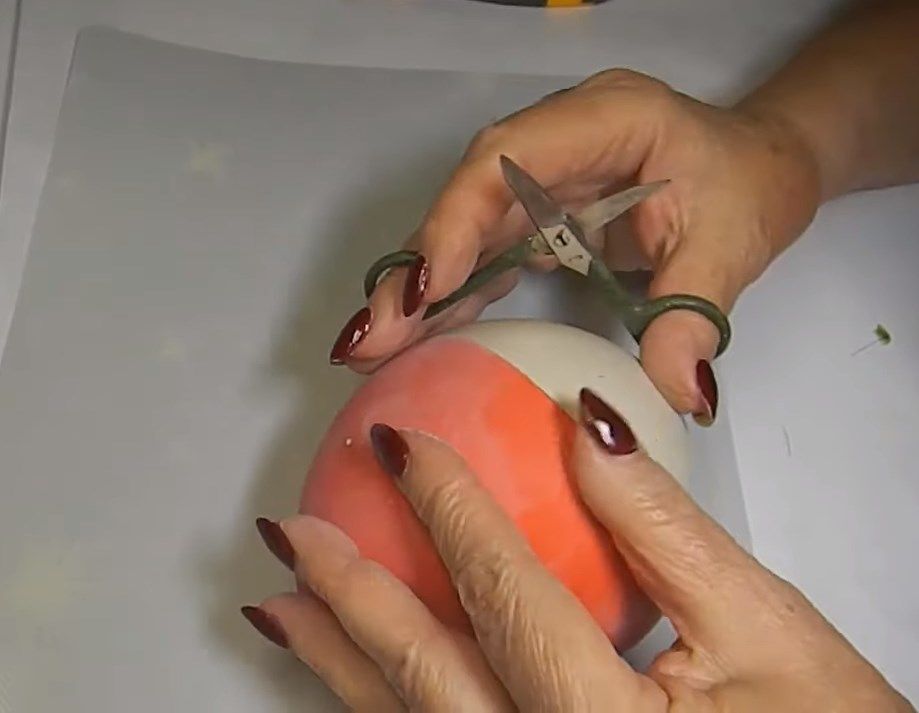
Turn the balloon in your hands until the plaster sets against the walls. This is the trickiest step: try to keep the walls as even as possible.
Evenness
A comment on the material fairly points out that getting perfectly even wall thickness on your first try may not happen.
Dry for a couple of hours and remove the balloon
Let the piece dry for a couple of hours. Once the plaster is dry, carefully remove the balloon: the base for your vase is ready.
After drying, the balloon is carefully removed, leaving the plaster base.
Shape the Opening and the Foot
After the base, you need to mark the top opening and cast a stable foot from a separate plaster pour.
Mark the vase's opening
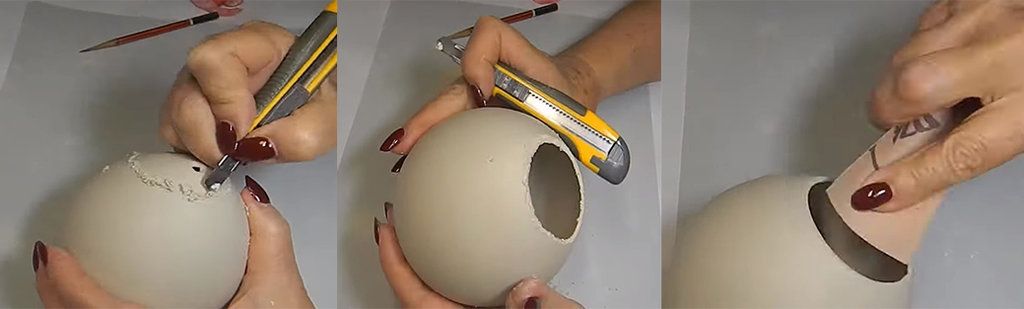
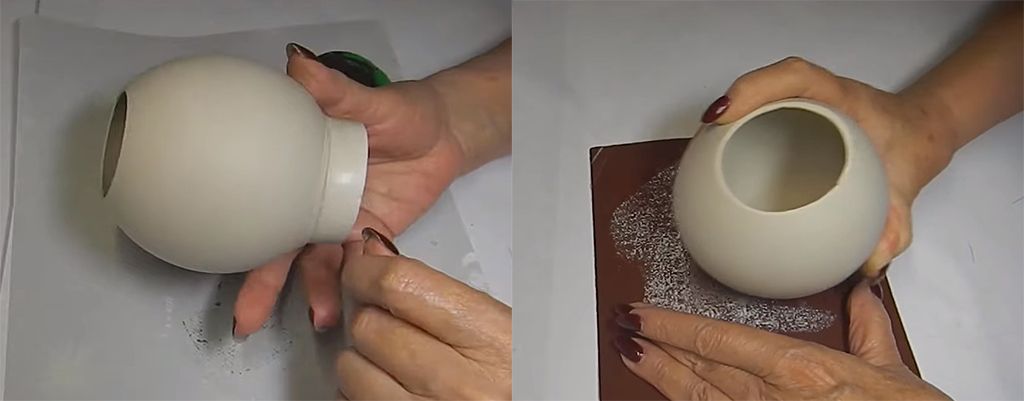
Mark the opening on the plaster ball. It can be straight or slanted — pick the shape based on how you plan to decorate it.
The opening can be straight or slanted.
Make a mold for the foot
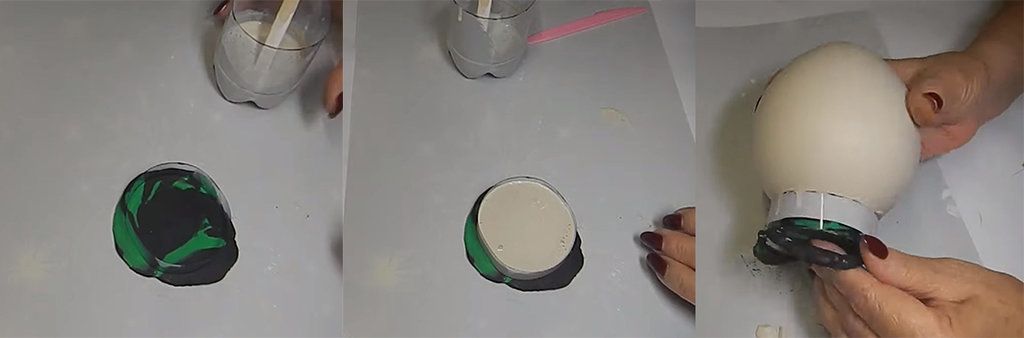
Roll out a piece of modeling clay on a sheet of paper or plastic film. Cut a flat section about 1-1.5 cm wide from a plastic bottle and press it into the clay.
Cast the foot and set the ball in place
Fill the ring with plaster right up to the edges and set the finished plaster ball into it. This is what forms the vase's foot.
The 1-1.5 cm ring is filled with plaster, and the base is set into it.
Sand, Paint, and Varnish
The finishing steps make the shape neater and protect the surface.
Sand the vase carefully
Once the piece is ready, carefully sand the vase. Start with coarser sandpaper, then switch to a finer grade.
Coarser sandpaper is used first, then a finer grade.
A fragile base
Work without pressing hard: the plaster shape can be fragile.
Paint it and seal it with varnish
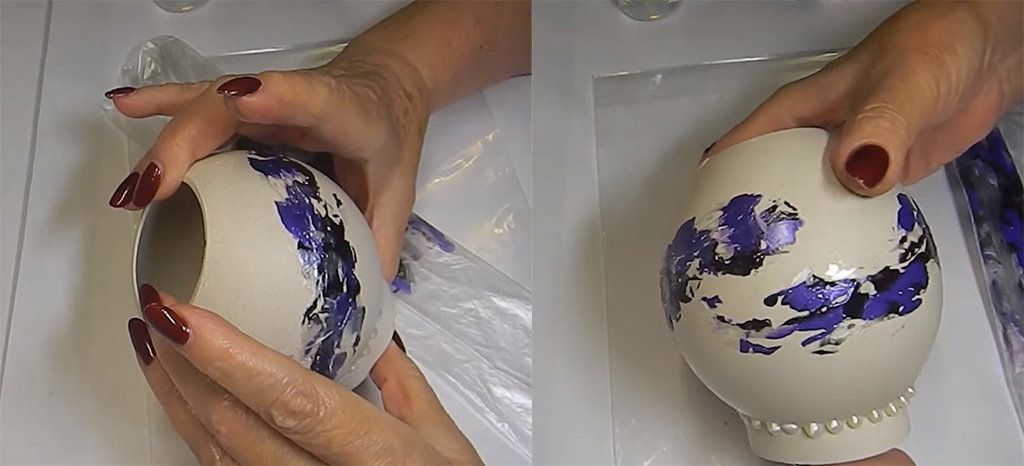
Paint the vase with acrylic or watercolor paint. At the end, seal it with varnish both outside and inside.
Acrylic or watercolor paint works well, followed by varnish.The finished rounded plaster vase.
A plain white version works too
The discussion separately noted that this shape looks stylish even left plain white.
Finish and variations
Finish
Final check
Check that the foot is stable, the opening's edge is smooth, there are no sharp chips, and the varnish is even inside and out.
Variations
Leave it white
You don't have to paint the vase: the discussion called the plain white minimalist version stylish.
A straight or slanted opening
The top opening can be straight or slanted, as noted in the source.
After removing the balloon, the plaster clearly didn't settle evenly.
Likely cause
The plaster set quickly while you were spreading it across the walls.
How to fix it
Get everything ready ahead of time, and turn the balloon in your hands right after pouring, until it sets. You can carefully sand away small unevenness afterward.
The base feels fragile
Problem
The plaster shape is easily damaged by pressure or chipping.
Likely cause
A weaker plaster grade was used, or the walls came out thin.
How to fix it
Choose a plaster with a higher number in its G-2...G-25 grade marking, add a little PVA glue to the water if you like, and sand without pressing hard.
The plaster is awkward to pour into the balloon
Problem
The mixture spills and gets onto the balloon's edge.
Likely cause
The balloon's neck is narrow.
How to fix it
Insert an empty thread spool or a similar insert into the balloon, as in the source.
The foot comes out uneven
Problem
The base doesn't look neat or doesn't hold its shape.
Likely cause
The bottle ring wasn't pressed firmly into the clay, or the plaster wasn't poured all the way to the edges.
How to fix it
Cut a flat strip from the bottle about 1-1.5 cm wide, press it firmly into the clay, and pour the plaster right up to the edges.
I want to put fresh flowers in it
Problem
It's unclear whether the plaster vase can hold water.
Likely cause
The discussion raises this question, but the source doesn't test for water resistance.
How to fix it
Seal it with varnish outside and inside, as in the source, but for water, use a separate inner container, or stick to dry decoration until the vase's water resistance has been tested.
?FAQ
What ratio should I mix the plaster in?
The source gives a ratio of 2 parts plaster to 1 part water.
What plaster should I use?
Plaster ranges from G-2 to G-25, where the number indicates strength. For a vase, it's better to use a plaster with a higher number.
Can I add PVA glue?
Yes, the source suggests adding a little PVA glue to the water to increase strength.
How long should I dry the piece in the balloon?
After spreading the plaster across the walls, let the balloon dry for a couple of hours, then carefully remove it.
Can I put fresh flowers in the vase?
The source says to varnish the vase outside and inside, but it doesn't test for water resistance. For fresh flowers, it's better to place a separate water container inside.
Your project
Log in to track your project, attach photos, and publish your result into the shared feed.
Oof, I'm scared to work with such fragile things 😮 And you really do need some experience: I don't think perfectly even walls of the same thickness are likely on the first try. So huge respect from me for all that work! (y)
Such a stylish little vase, especially just in plain white! I have a store-bought one in the same shape — it sits in the hallway, and I toss my keys in it so they don't get lost. If you varnish the plaster, do you think you could put fresh flowers in it? :)

 BeginnerFree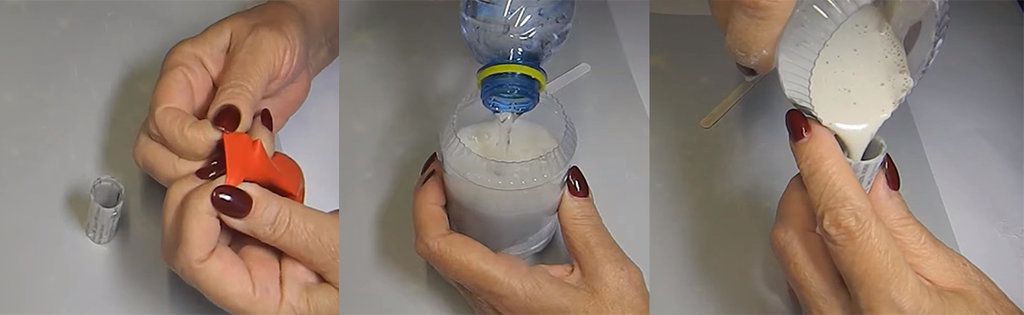


Oof, I'm scared to work with such fragile things 😮 And you really do need some experience: I don't think perfectly even walls of the same thickness are likely on the first try. So huge respect from me for all that work! (y)