DIY Knit Neck Warmer Dickey: Pattern and Sewing Tutorial
A step-by-step master class for sewing a warm neck warmer dickey from angora knit or French terry: print the universal pattern, cut the pieces, stabilize the shoulders, sew the shoulder seams, prepare the collar, and attach it using four control points.
BeginnerFree
Translated
Things you will learn
Print the pattern and check it against the scale square, otherwise the size of the dickey will be distorted.
For the main piece, use a knit such as angora knit or three-thread French terry, with or without fleece backing.
If you sew the dickey from French terry, make the collar from rib knit or kashkorse and reduce its width because these fabrics stretch more.
All working seams in the source master class are sewn on an overlocker.
What you will get
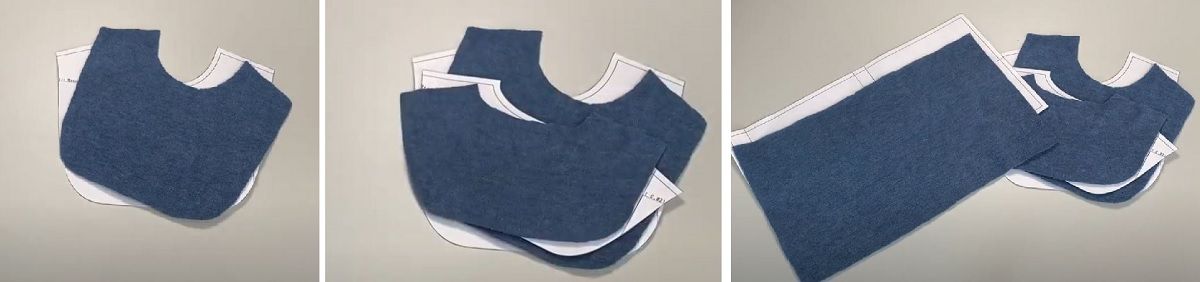
The finished dickey closely covers the neck and upper chest, so it is comfortable to wear instead of a scarf under a jacket or coat. The old source material shows a version made from soft blue knit fabric with a high folded collar.
Materials and tools
Materials
Angora-style knit fabric, works for the main dickey and the collar in the source version
Rib knit or kashkorse for the collar, relevant for the French terry version; reduce the collar width because these fabrics stretch more
Material for stabilizing the shoulder edges, the source says to stabilize the shoulder edges from the back piece side, but does not name the exact stabilizer
Tools
Printer, for printing the pattern and checking the scale square
Scissors or rotary cutter, for cutting the pattern pieces
Pins, for pinning shoulder seams and holding the collar
Tailor's chalk, for marking the center of the collar along the seam
Overlocker, in the source, the shoulders, collar, neckline, and outer edges are sewn or finished on an overlocker
Iron, for pressing shoulder allowances and the collar attachment seam
If the main dickey is sewn from angora knit, you can cut the collar from the same material. For French terry, the author recommends rib knit or kashkorse, but with a narrower collar because these fabrics stretch more.
Check the print scale
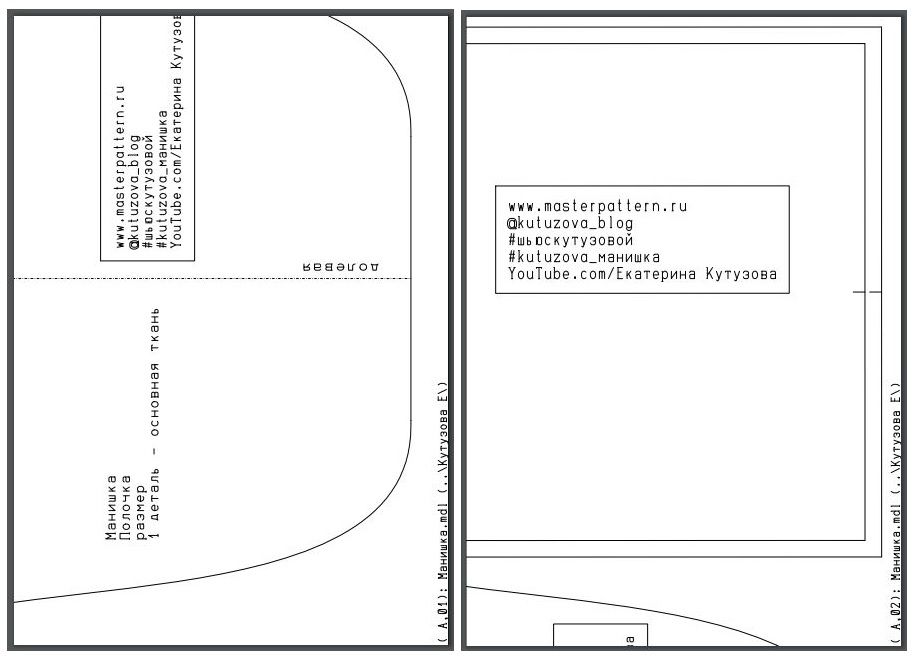
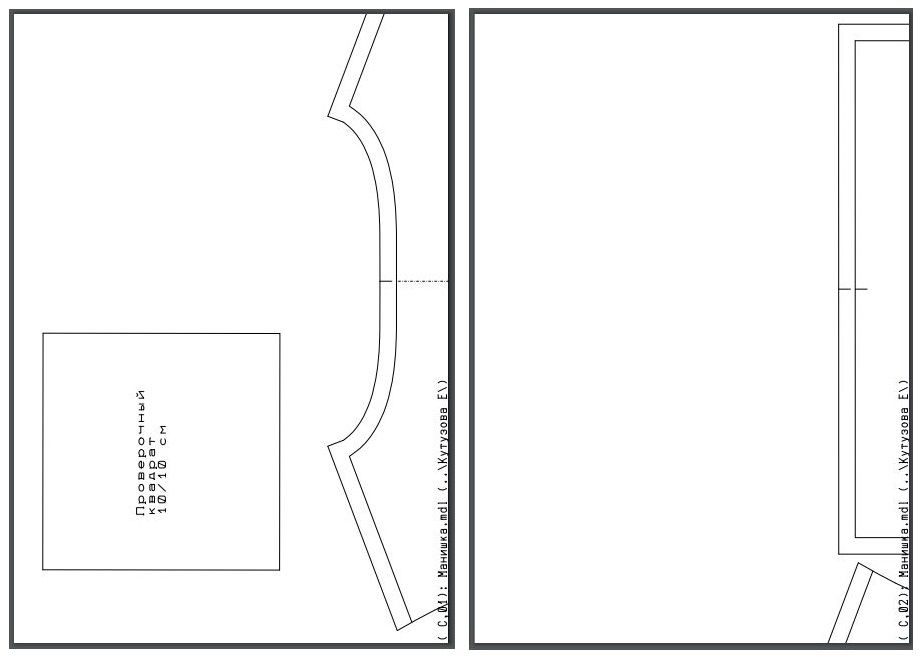
Before cutting, print the pattern and check it against the scale square on the sheet. This is the key check: the pattern is described as universal for adults and teens, but the wrong print scale will change the fit.
Pattern and cutting
Start by printing the pattern and transferring the pieces to your chosen knit fabric.
Print the pattern with the scale square
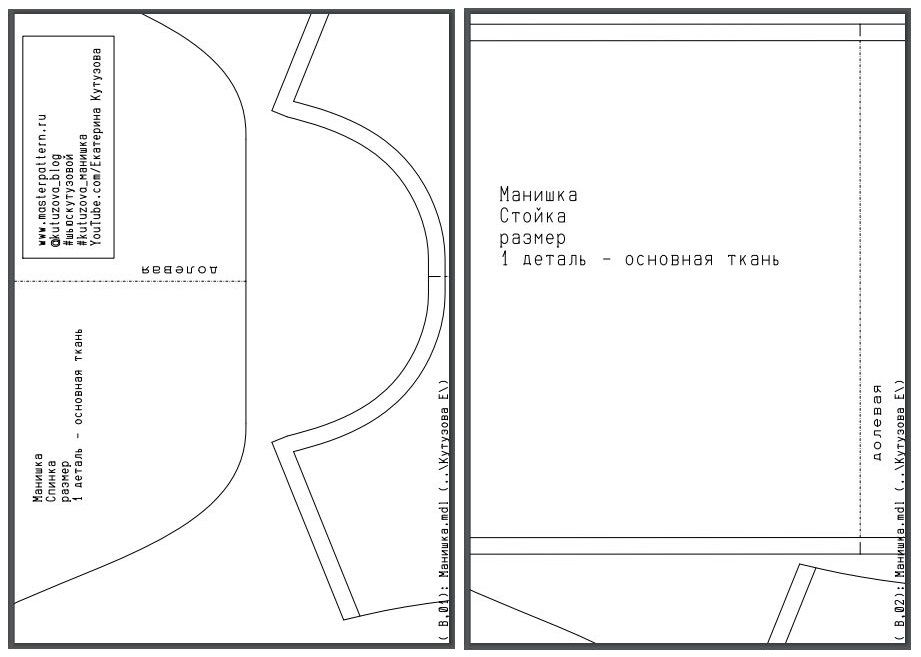
Print the pattern sheets for the future dickey and check the scale against the square. The source specifically notes that the pattern is universal and fits adults and teens.
Print the pattern sheets and check the scale.The pattern is described as universal for adults and teens.Check the print scale before cutting.
Scale check
Do not move on to cutting until the scale square on the printout matches the required size.
Cut all pieces
Lay the pattern on the chosen knit fabric and cut all dickey pieces. For the French terry version, adjust the collar in advance if you use more stretchy rib knit or kashkorse.
After printing the pattern, cut all garment pieces.
Shoulder seams
First stabilize the shoulders, then join the front and back pieces.
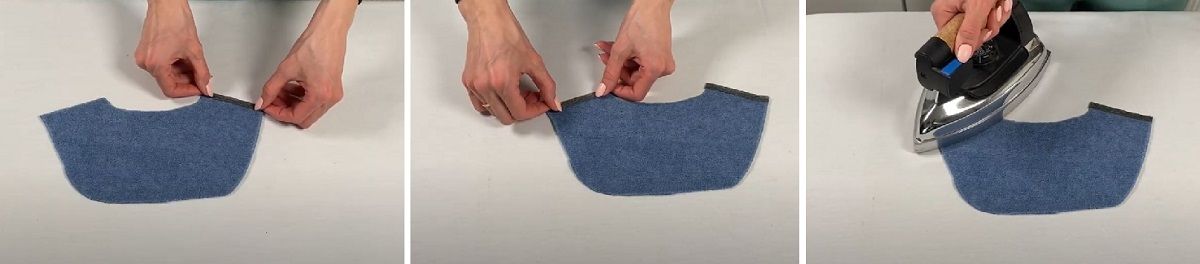
Stabilize the shoulder edges on the back piece
Stabilize the shoulder edges on the back piece. The source does not specify the exact stabilizing material, so do not change the method without testing it on a knit fabric sample.
Stabilize the shoulder edges from the back piece side.
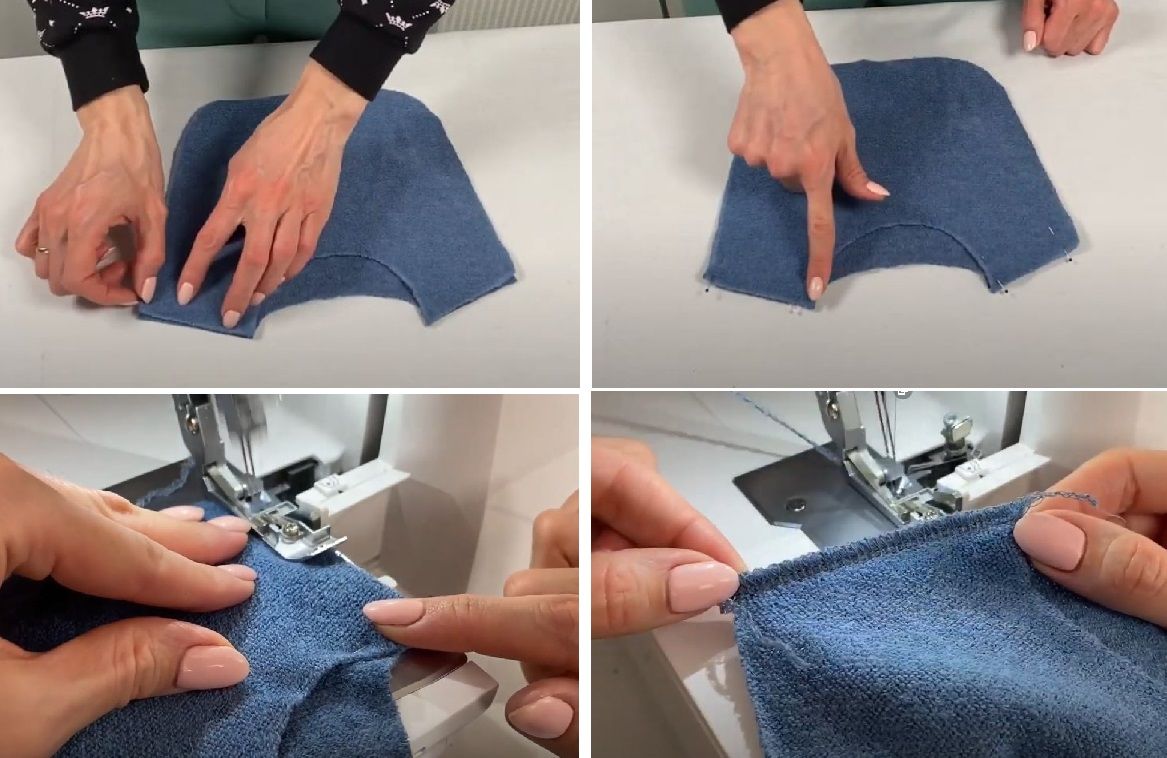
Pin and sew the shoulder edges
Place the back and front pieces right sides together, align the edges, and pin them. Sew the shoulder edges on the overlocker.
Place the pieces right sides together and sew the shoulders on the overlocker.
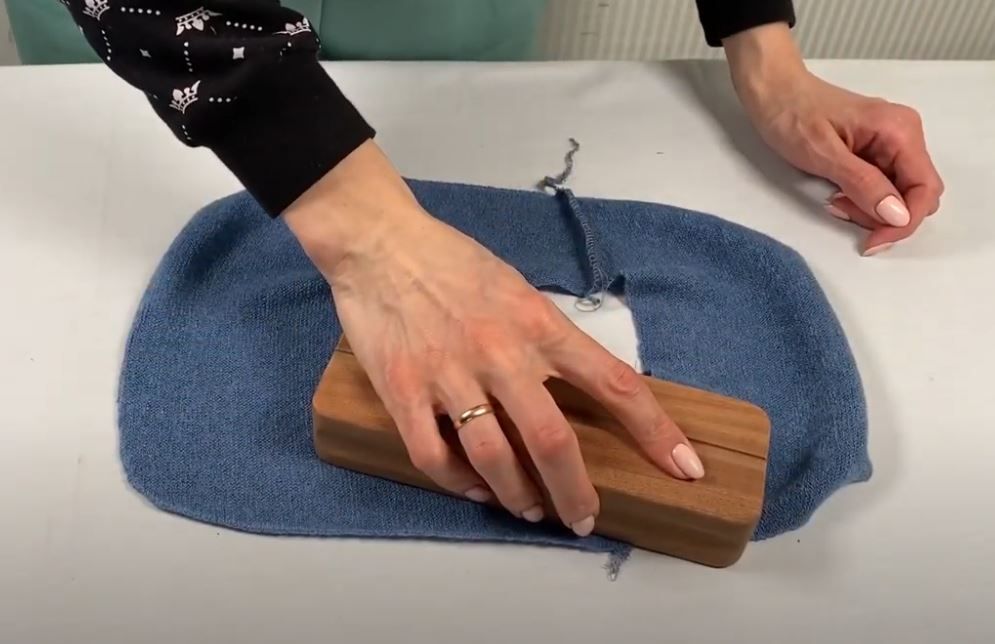
Press allowances toward the back
After sewing, press the shoulder seam allowances toward the back. This keeps the inside neater and prepares the neckline for the collar.
After sewing, press the allowances toward the back piece.
Collar
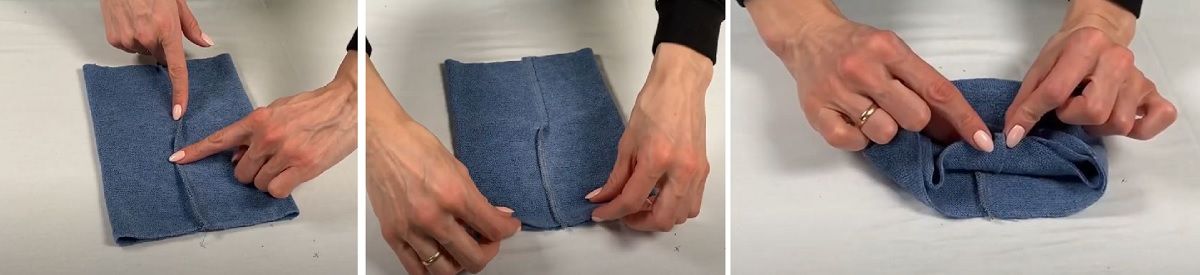
The collar is first sewn into a ring, then folded in half.
Sew the collar piece
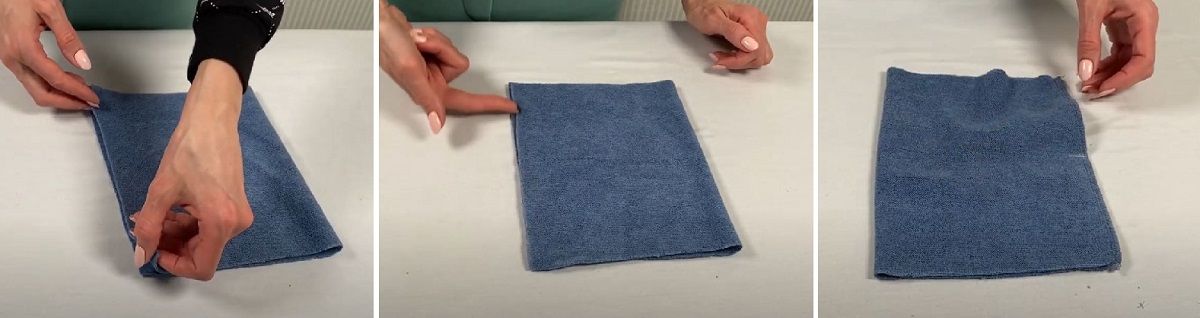
Fold the collar piece in half and sew the joining seam on the overlocker. This creates the collar ring.
First sew the collar into a ring.
Mark the center of the collar
Mark the center of the collar along the seam with chalk. Then place the collar seam side up.
Press the collar seam allowances in opposite directions to avoid bulk.
Press the seam allowances in opposite directions
Press the seam allowances in opposite directions from the center mark. Then turn the collar right side out and fold it in half.
Why press in opposite directions
This keeps the allowances from stacking in one thick spot, so the finished collar does not have unnecessary bulk.
Attach the collar and finish the edges
At this stage the collar is joined to the neckline, and the open edges are finished on the overlocker.
Place the collar inside the dickey and pin it at four points
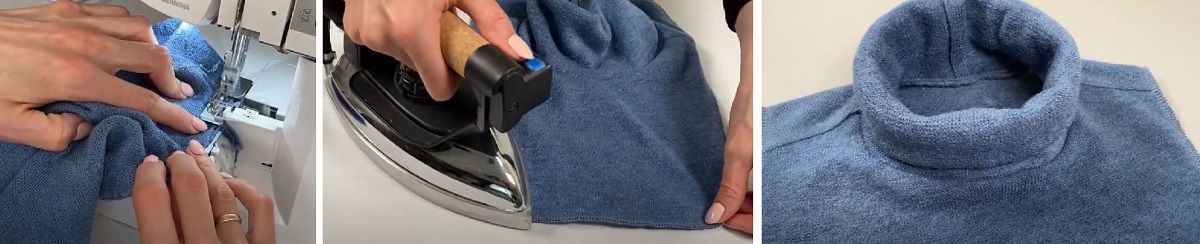
Insert the folded collar inside the main piece. Distribute it evenly around the neckline and pin it at four points: shoulder lines, center front, and center back.
Distribute the collar around the neckline by the shoulder and center lines.
Sew on the collar
Attach the collar on the overlocker. After sewing, press the seam toward the dickey.
Finish the open edges
Carefully finish the outer edges of the dickey on the overlocker. Make sure the edge does not stretch and the shape of the garment stays even.
Finish the final edges on the overlocker, then press the garment.
Finish and variations
Finish
Final pressing
After finishing the edges, remove thread scraps and press the finishing seam. In the old master class, this is the final step.
Variations
Angora knit version
A soft angora-style knit gives the look shown in the source photo: a high warm collar and a soft lower section.
French terry version
Three-thread French terry, with or without fleece backing, can be used for the main dickey. In this case, the author recommends rib knit or kashkorse for the collar, but with reduced width.
After cutting, the pieces look too small or too large.
Likely cause
The pattern was printed at the wrong scale.
How to fix it
Go back to the pattern sheets and check the scale square. If the scale does not match, print the pattern again before cutting the fabric.
The collar is too loose
Problem
The collar does not hold the neck well and seems wider than the main neckline.
Likely cause
You used rib knit or kashkorse for the collar but did not reduce the width for their stretch.
How to fix it
For the French terry version, the author recommends rib knit or kashkorse and reducing the collar width. Check the fabric stretch before final cutting.
The shoulder seams stretch out
Problem
The shoulder line loses shape after sewing or wearing.
Likely cause
The shoulder edges on the back piece were not stabilized.
How to fix it
Do not skip stabilizing the shoulder edges before sewing. The source places this step before joining the front and back pieces.
A bulky spot appears on the collar
Problem
There is extra thickness at the collar seam.
Likely cause
The collar seam allowances were not pressed in opposite directions from the center.
How to fix it
Before folding the collar in half, place the seam upward, mark the center, and press the allowances in opposite directions. The source does this specifically to reduce thickness.
The collar is distributed unevenly
Problem
After attaching, the neckline is twisted or unevenly stretched.
Likely cause
The collar was not pinned at the shoulders and at the center front and back.
How to fix it
Before sewing on the overlocker, distribute the collar around the neckline and pin it at four points: shoulders, center front, and center back.
?FAQ
What fabric should I use for a neck warmer dickey?
The source names two options: angora-style knit fabric or three-thread French terry with or without fleece backing. If you choose French terry, it is better to make the collar from rib knit or kashkorse.
Why reduce the width of a rib knit or kashkorse collar?
Rib knit and kashkorse stretch more than angora knit. That is why the author warns that the collar width should be reduced, otherwise it may come out too loose.
What size is the pattern for?
In the old material, the pattern is described as universal: it fits adults and teens. The exact size range is not specified, so checking the print scale against the scale square is important.
Can I sew the dickey without an overlocker?
The source master class describes overlocker construction: shoulder seams, collar, collar attachment, and open edges. It does not provide an alternative method for a regular sewing machine, so test any substitute technique on a knit sample first.
Why pin the collar at four points?
This distributes the collar evenly around the neckline. The source uses the shoulder lines, center front, and center back.
Your project
Log in to track your project, attach photos, and publish your result into the shared feed.

 BeginnerFree