Insulated Bottle Sleeve: Pattern and Sewing Tutorial
A step-by-step tutorial for an insulated sleeve for a 2-liter bottle: 35 x 35 cm insulation, an 11 cm bottom disk, fabric with seam allowances, a drawstring casing, an 80 cm cord, and acrylic paint decor.
BeginnerFree
Translated
Things you will learn
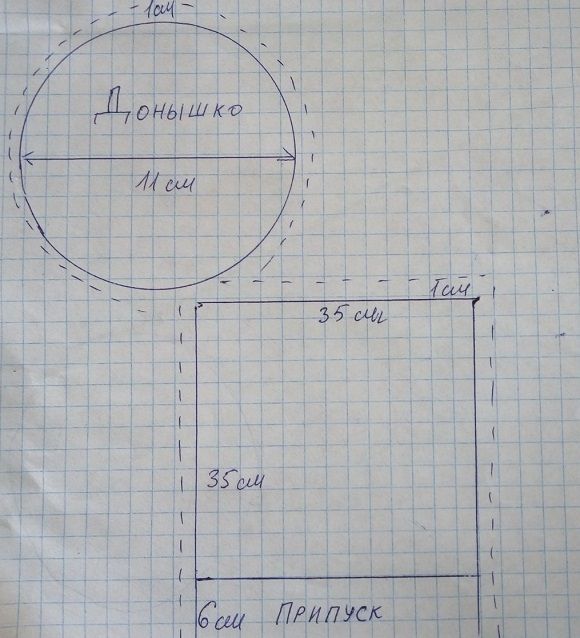
The pattern consists of a 35 x 35 cm side piece and a round bottom disk 11 cm in diameter.
For the fabric layer, add 1 cm for seams and 6 cm for the drawstring casing and hem allowance.
The inner insulating layer is assembled separately: the side seam and bottom are fixed with tape.
The outer fabric sleeve can be sewn by hand or on a sewing machine.
What you will make
You will make a soft insulated bottle sleeve: foil-faced insulating material inside, sturdy fabric outside, and a drawstring casing with cord at the top. It is a lightweight alternative to a bulky thermos for walks, cycling, or a summer bag, but without promising to hold temperature like a full thermos.
Materials and tools
Materials
Foil-faced insulating material, 0.5 m, the source mentions izoflex; the old price reference of 30-50 UAH per 1 m should be checked before buying
Wide tape, the author prefers foil tape for the insulating-layer joins
Sturdy fabric, old jeans or another sturdy fabric will work
Cord, 80 cm, for the drawstring casing
Sewing thread, for hand or machine stitching
Acrylic fabric paints, optional, for decorating
Paper for the template, optional, for tracing the design onto the sleeve
Tools
Needle, for hand backstitch, basting, and overcasting
Sewing machine, optional: all main seams can be sewn by hand
Manicure scissors, for cutting cord openings only in the top fabric layer
Cutting scissors, for fabric and insulating material
Ruler and pencil, for the 35 x 35 cm square, 11 cm circle, and decor template
Lighter, only for synthetic cord, to seal the ends
Preparation
You can sew it without a machine
The author clearly says the tutorial is suitable even for people who do not use a sewing machine. Wherever a stitch line is needed, you can sew by hand with backstitch.
Check the bottle before cutting
The source dimensions are for a 2-liter bottle. If you are sewing for a sports flask or a bottle that goes into a bicycle holder, check that the bottle with the sleeve will still fit and will not jump out on bumps.
Materials and Pattern
First prepare the insulating layer, fabric, and a simple two-piece pattern: the side piece and the round bottom.
Prepare the insulation, fabric, and cord
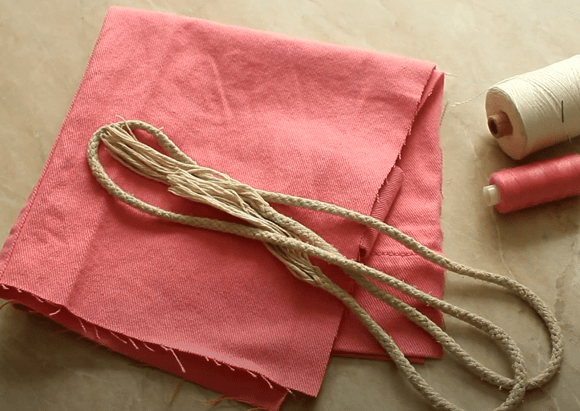
For the inner part, take foil-faced insulating material. For the outer sleeve, use any sturdy fabric, for example old jeans. You will also need wide tape, an 80 cm cord, and sewing thread.
Insulating layer, tape, and round bottom piece.Fabric, cord, and thread for the outer sleeve.
Foil tape
The author noted from practice that foil tape seals the joins in the insulating layer better. In the discussion she also clarified that the bottom is additionally held by the fabric sleeve, so several layers of tape are enough.
Draft the pattern for a 2-liter bottle
The insulating side piece is a 35 x 35 cm square. The bottom is a circle 11 cm in diameter. Cut these pieces from the insulating material without allowances. Cut the same pieces from fabric, but add 1 cm for seams and 6 cm for the drawstring casing and hem allowance.
Pattern pieces: bottom and side piece for a 2-liter bottle.
Two sets of pieces
The inner set is insulation. The outer set is fabric with allowances.
Inner Insulating Layer
First assemble the inner insert: it will sit inside the fabric sleeve and help keep the drink temperature longer.
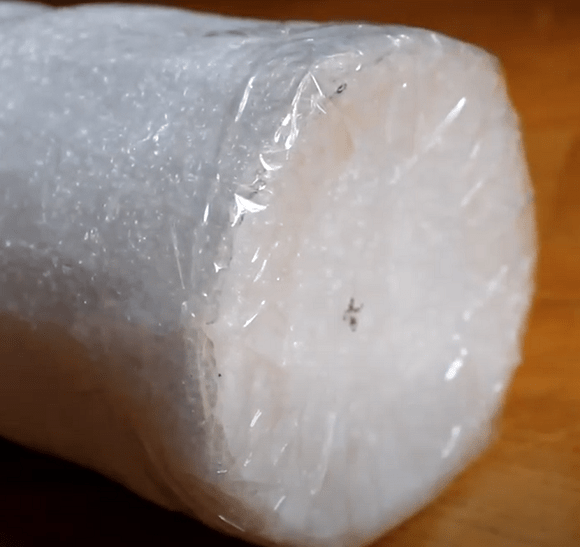
Roll the side piece into a tube
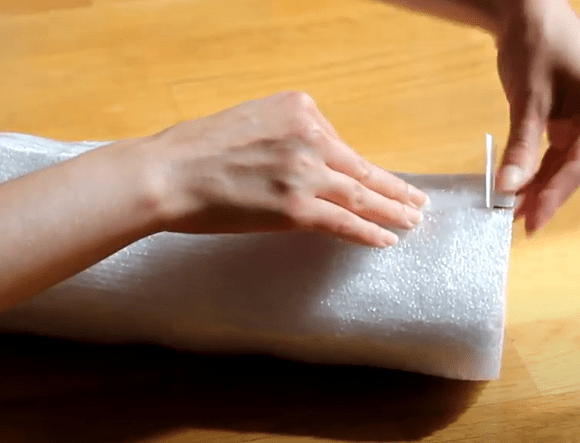
Roll the square of izoflex or another insulating material into a tube. Align the edges and tape the side seam with wide tape.
The insulating side piece is rolled into a cylinder.
Attach the bottom disk
Tape the round bottom disk to the lower edge of the tube. Check that the join holds firmly and that the inner part does not fall apart under light pressure.
The inner insulating bottom is fixed with tape.
Fabric Sleeve
The outer sleeve covers the insulating layer, forms the bottom, and creates the top drawstring casing for the cord.
Make the casing and openings
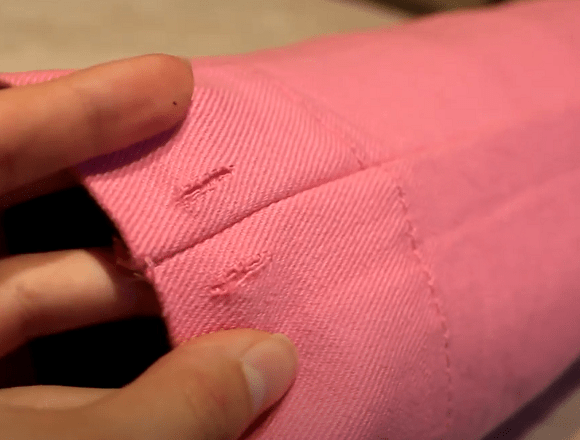
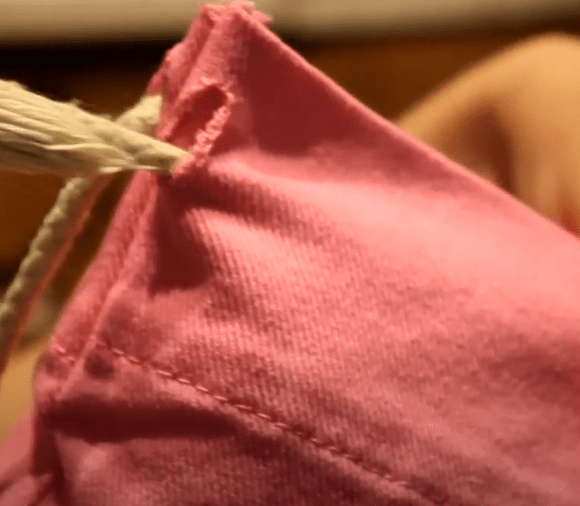
Turn under the allowance for the drawstring casing and sew it by hand with backstitch or on a machine. In two places, make openings for the cord: with manicure scissors, cut only the top layer of fabric. Overcast the openings with blanket stitch.
Cord openings in the top layer of the casing.
Top layer only
Do not cut through both sides of the casing at once, or the cord will come out in the wrong place.
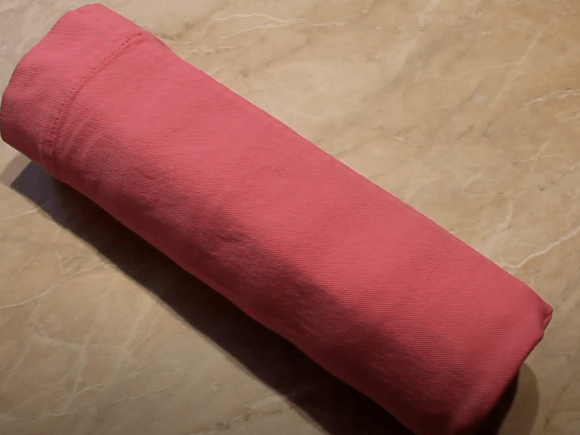
Sew the side seam
Fold the fabric in half lengthwise and sew a straight seam. If you are using a jeans leg, you can skip this step and keep the factory seams.
Outer fabric side piece after the side seam.
Sew on the round bottom
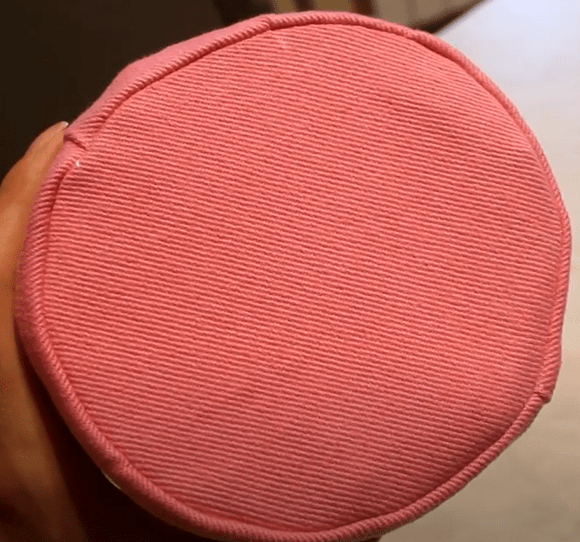
From the wrong side, baste the round bottom to the side piece, then sew it on. Clip the allowance in several places so the bottom lies neatly after turning. Overcast the edge and turn the sleeve right side out.
Sewn round bottom of the outer fabric sleeve.
Answer to a common question
If the circle sews in unevenly, baste it from the wrong side first and only then sew the main seam. Clips in the allowance help the round bottom sit without folds.
Insert the cord
Thread the cord through the casing and tie knots at the ends. If the cord is synthetic, carefully seal the tips with a lighter so they do not fray.
The cord tightens the top of the insulated sleeve.
Acrylic Paint Decor
You can leave the finished sleeve plain or decorate it with acrylic fabric paints.
Paint a design through a template
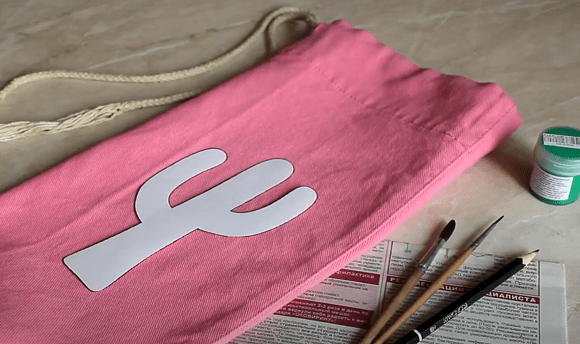
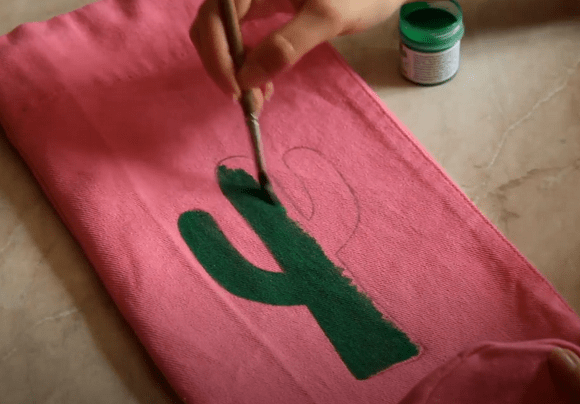
Cut a template from paper and trace it onto the sleeve. Fill the chosen area with acrylic fabric paint and let the design dry.
Template and paints for decorating the sleeve.Painting the sleeve with acrylic paint through a template.
Finish and variations
Finish
Final check
Insert the insulating layer, put the bottle inside, and tighten the cord. Check that the bottom stands evenly, the cord moves freely in the casing, and the bottle is easy to take out.
Variations
Sleeve from a jeans leg
If you use a ready jeans leg, you can keep the factory side seams and skip sewing the separate side seam.
Sports bottle or cycling flask
In the discussion, the author suggested sewing this sleeve for a sports bottle from 0.5 L to 1 L or larger. For a bicycle, check the holder size in advance.
Fabric painting
You can decorate the sleeve with a simple paper template and acrylic fabric paints, as in the original cactus example.
The bottom pulls the side piece, or folds appear after turning.
Likely cause
The circle was sewn without basting and without clipping the seam allowance.
How to fix it
First baste the bottom from the wrong side, then sew it. After stitching, clip the allowance in several places, overcast the edge, and only then turn the sleeve right side out.
The insulating layer opens at the seams
Problem
The tube or insulating bottom does not hold well.
Likely cause
The tape was applied in one weak layer or the edges were not pressed firmly.
How to fix it
Tape the side seam and bottom with wide tape, preferably foil tape. In the discussion, the author clarified that the bottom is additionally fixed inside the fabric sleeve.
The cord openings were cut through both layers
Problem
The cord comes out messily or the casing starts to spread.
Likely cause
Both fabric layers were cut instead of only the top layer.
How to fix it
Make the openings with manicure scissors only in the top fabric layer and immediately overcast them with blanket stitch.
The flask with the sleeve does not fit the bicycle holder
Problem
After sewing, the sports bottle became too wide for the holder.
Likely cause
The thickness of the insulation and fabric was not accounted for.
How to fix it
Before cutting, check the bottle together with the future sleeve thickness. For a bicycle holder, you may need a smaller flask so it both fits and does not jump out on a bump.
The cord frays
Problem
The cord ends become fuzzy soon after threading.
Likely cause
The synthetic cord ends were not sealed.
How to fix it
Tie knots at the ends. If the cord is synthetic, carefully seal the tips with a lighter, as stated in the source.
?FAQ
Can I sew the insulated sleeve without a sewing machine?
Yes. The source says the casing and straight seams can be sewn by hand with backstitch.
What are the pattern dimensions for a 2-liter bottle?
The insulating side piece is a 35 x 35 cm square, and the bottom is a circle 11 cm in diameter. For the fabric pieces, add 1 cm for seams and 6 cm for the casing and hem allowance.
Do I need foil tape specifically?
The author writes that regular wide tape can be used, but foil tape works better on insulating-layer joins. In the discussion she clarified that several layers of tape hold the bottom well.
Will the sleeve work for a bicycle flask?
Yes, but check the holder in advance. In the discussion, the author reminded readers that the bottle with the sleeve must fit the holder and not jump out on the first bump.
How do I sew the round bottom neatly?
Baste the circle from the wrong side, then sew it, clip the seam allowance in several places, overcast the edge, and only then turn the sleeve right side out.
Your project
Log in to track your project, attach photos, and publish your result into the shared feed.
Thank you for the idea! I have only been planning to sew a regular insulated bag so far (sadly, we “lost” ours during one outdoor outing last year). And this is just a great summer idea, especially when the kids run out of the house for the whole day and do not really drink plain water or other drinks. They only want compote or juice, and you know that in the heat those drinks do not “live” long.
I have the same story with my daughter! By the way, this kind of sleeve can be sewn for a sports water bottle if children ride bikes. Those bottles are very convenient, they come in any size from half a liter to a liter and more, and a sleeve for them costs as much as my whole house)))
Yes, soon it will begin - what can I drink that is colder 😋 I only have a question about fastening the bottom: does it make sense to use a hot glue gun instead of tape? It seems to me that would be more reliable, since tape often loses its properties at high or low temperatures.
I thought about the glue gun. But the bottom will not fall out anyway, it is firmly fixed inside the sleeve, and tape in several layers will hold very well, especially if you use foil tape. As for cold drinks, I suggest a proven option - champagne :giggle:
Yes, soon it will begin - what can I drink that is colder 😋 I only have a question about fastening the bottom: does it make sense to use a hot glue gun instead of tape? It seems to me that would be more reliable, since tape often loses its properties at high or low temperatures.

 BeginnerFree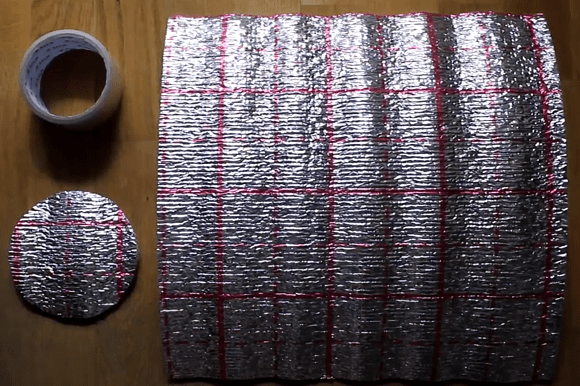


I have the same story with my daughter! By the way, this kind of sleeve can be sewn for a sports water bottle if children ride bikes. Those bottles are very convenient, they come in any size from half a liter to a liter and more, and a sleeve for them costs as much as my whole house)))