A step-by-step tutorial for crocheting a bucket bag from T-shirt yarn: a sturdy base reinforced with cord, single crochet walls, an 80 cm strap, and assembling the strap closure.
BeginnerFree
Translated
Things you will learn
The base is reinforced with a synthetic cord carried inside the single crochet stitches.
In the original model the base circle is worked to a 20 cm diameter, and the walls are worked to a height of about 30 cm, or as desired.
The strap is a crocheted length 80 cm long: once threaded through the top edge, it cinches the bag closed like a drawstring.
The author clarified in the discussion that the ridge on the walls comes from working through the back loop only.
What you'll get
The finished bag looks like a soft bucket bag, but the base holds its shape better than an ordinary crocheted base thanks to the cord. The strap is threaded through the top edge: pulling it closes the bag, and the loose ends join into a single handle.
Materials and tools
Materials
T-shirt yarn, The main yarn for the base, walls, and strap.
Sturdy synthetic cord to match the project, Carried inside the single crochet stitches on the base to make it firmer.
Optional extra reinforcement for the base, Ideas from the discussion: mesh, cork, thin plastic, or clear rigilene boning if you want a stiffer base.
Tools
Crochet hook, Choose the size based on your T-shirt yarn and the gauge you want.
Stitch marker for the start of the round, Keeps you from losing track of where the round begins.
Ruler or tape measure, To check the base diameter and the bag's height.
Scissors, To cut the cord and secure the strap ends.
The basic tutorial shows a round base. In the discussion, the author confirmed you can also crochet an oval base: the cord technique stays the same, but you'll need a different increase pattern.
Crochet a tight enough gauge
This bag is designed for T-shirt yarn and a firm gauge. Stitches that are too loose hold the cord less securely and give a softer base.
Crochet the sturdy base
The base is worked in single crochet in the round. Lay the cord alongside the working yarn and crochet over it so it ends up inside the fabric.
Start with a magic ring and the cord
Make a magic ring. At the same time, lay the synthetic cord over it and start crocheting single crochet stitches around the ring. After the first round, pull the working yarn tight.
Magic ring and the first stitches worked around the cord.
The cord should sit inside the round
Don't crochet the cord as a separate strand: lay it along the round and crochet over it with single crochet stitches.
Increase evenly around the round
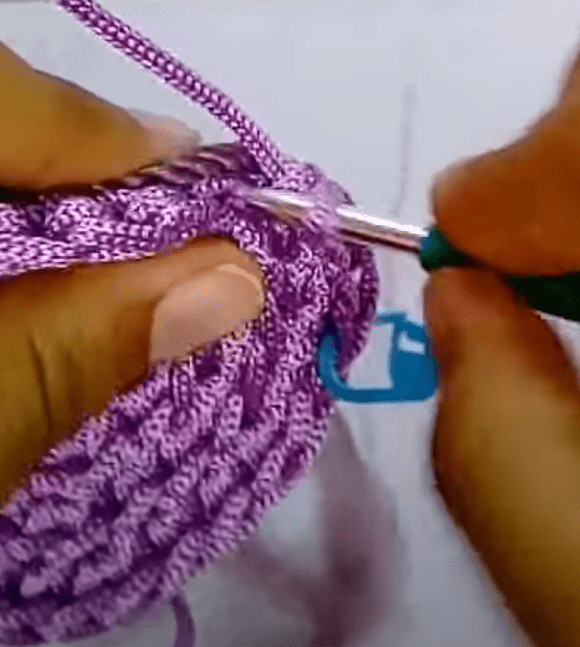
Place a stitch marker for the start of the round and keep working in the round, increasing evenly. Keep carrying the cord and crocheting over it with single crochet stitches the whole time - that's what makes the base sturdy.
The cord continues to be carried inside the round.
Need a circle chart?
If you're not yet comfortable crocheting an even circle, use the chart from the linked KomoK resource on two ways to crochet a circle.
Stop at a 20 cm diameter
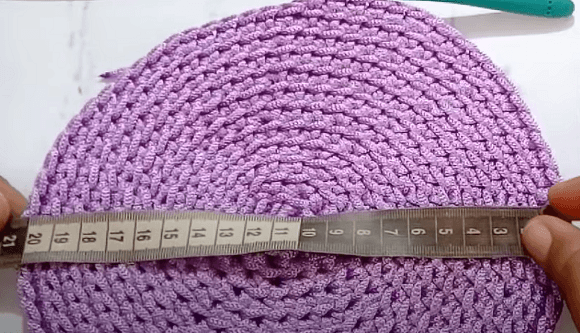
Once the base reaches a 20 cm diameter, cut the cord. Don't cut the main T-shirt yarn - you'll keep using it to crochet the walls.
At 20 cm, the cord is cut and the main yarn is left attached.
Don't cut the working yarn
The source specifically notes: cut the cord, but leave the main yarn attached and in use.
Crochet the walls
Crochet the walls in the round to your desired height
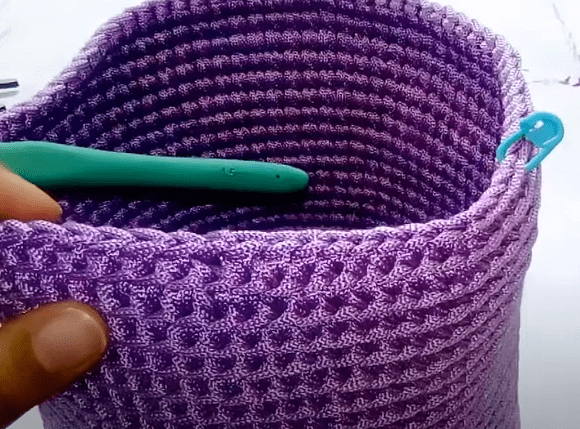
Keep working in the round, moving the stitch marker for the start of the round each time. You can adjust the height as you like; the model in the photos is worked to about 30 cm.
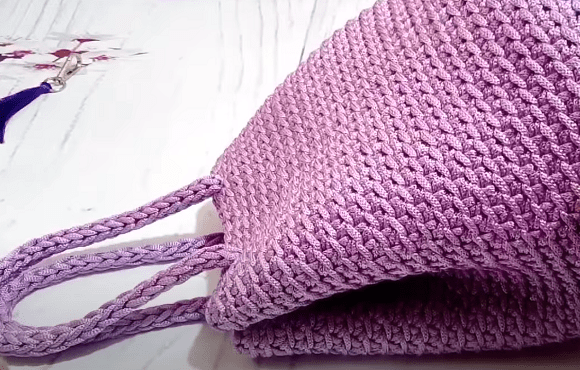
The walls are worked in the round to the desired height.
Why the ridge shows
In the discussion, the author clarified that the walls are worked through the back loop only. That's what creates the distinct ridge between rounds; regular stitches or 'V' stitches would give a different texture.
Make the strap closure
In this design, the strap also cinches the top of the bag closed. First you crochet a separate strap, then thread it through the top edge.
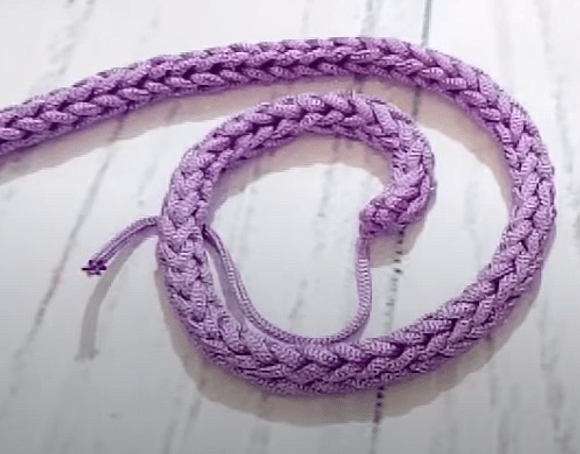
Crochet an 80 cm strap
Using any method you like, crochet a firm strap 80 cm long. Tie a knot at both ends so they don't unravel while threading.
A separate strap with knots tied at the ends.
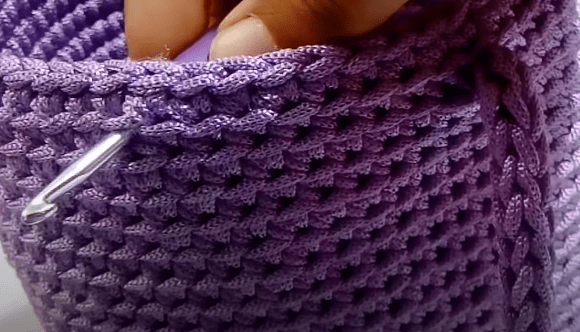
Thread the strap through the top of the bag
Using a crochet hook, thread the strap through the top of the bag, following the photos. Pull it through so one side forms a loop and the other leaves two loose ends of equal length.
The strap is threaded through the top so it cinches the bag closed.
Check the symmetry
Before securing anything, make sure the two loose ends match: once joined, they'll become part of a single handle.
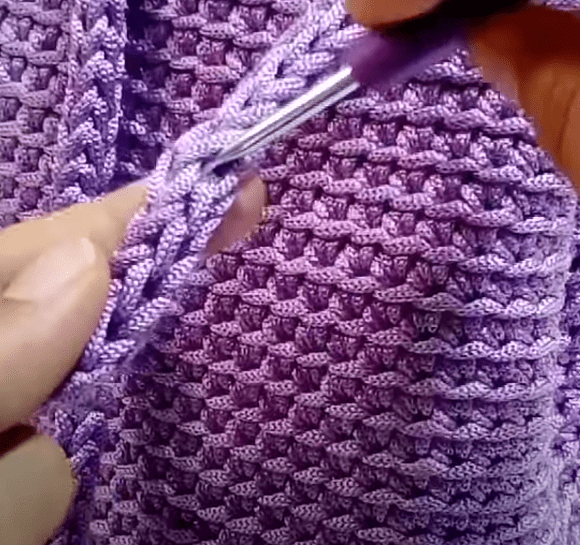
Pull the first tail end through the edge of the strap
Skip 4-5 stitches from the edge. Insert the hook into one edge of the strap, catch the tail end of the other half, pull it through, and draw it out.
The tail end is pulled through the edge of the strap to join the handle.
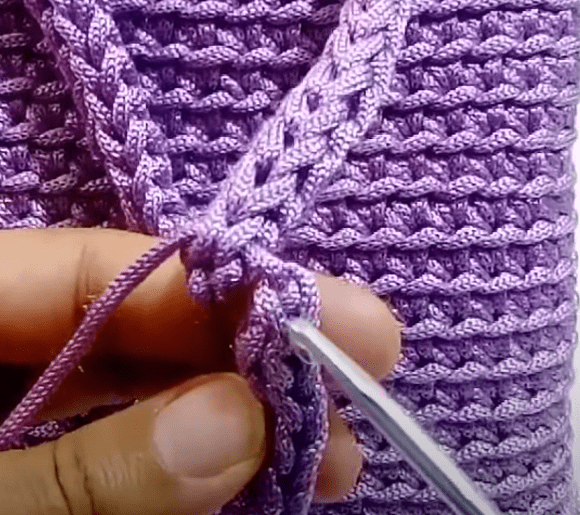
Repeat with the second tail end and secure the ends
Pull the second tail end through the same way. Secure the yarn ends and trim them. This joins the loose tail ends so the strap works as a single handle.
Both tail ends are pulled through, secured, and trimmed.
Shape the bag and choose your decoration
Shape the bag and check the closure
Shape the base, even out the walls, and pull the strap a few times to check how the top closes. If you like, decorate the bag with tassels; the source material promises a separate tutorial on making tassels.
The bag is shaped and optionally decorated with a tassel.
Finish and variations
Finish
Final check
The base should be firm, the walls even, and the strap should cinch the top smoothly. If you need the bag for heavier items, it's worth adding a separate base reinforcement from the start.
Decoration
In the original model, the finished bag has a tassel. This material doesn't cover how to make the tassel itself, so it's left here as a decoration idea.
Variations
Oval base
In the discussion, the author confirmed you can crochet the bag with an oval base as well. The cord technique stays the same, but you'll need an oval increase chart instead of a circle chart.
A different handle
Commenters suggested using a different handle or metal hardware for a sturdier version. If you swap out the strap, plan ahead for a separate closure or a way to cinch the top.
The bag doesn't hold its shape well or sags under the weight of items.
Likely cause
The fabric is crocheted too loosely, the cord is too soft, or you're planning to load the bag more heavily than the basic version was designed for.
How to fix it
Check your stitch tension and use a firmer synthetic cord. Reinforcement ideas from the discussion: add a mesh, cork, or thin plastic insert, or try clear rigilene boning - though that's an extra step beyond the basic tutorial.
The circle ripples or cups into a bowl
Problem
The base doesn't lie flat.
Likely cause
The increases aren't spaced evenly, or the circle chart you're using doesn't match your yarn's gauge.
How to fix it
Go back to a chart for an even circle: the source links to a separate KomoK resource on two ways to crochet a circle. The base should lie flat before you move on to the walls.
The walls don't show this ridge
Problem
The fabric looks different from the photos.
Likely cause
The stitches were worked normally, not through the back loop.
How to fix it
The author clarified in the discussion that she worked through the back loop only to get the ridge. You can leave regular stitches or 'V' stitches instead, but the texture will be different.
The handle came out crooked after threading
Problem
The loop on one side and the two ends on the other came out different lengths, or don't cinch the top well.
Likely cause
The strap wasn't evened out before securing the tail ends.
How to fix it
Before joining the ends, pull the strap through the top of the bag again: one side should form a loop, the other should have two loose ends of equal length. Only then pull the tail ends through the edge of the strap and secure them.
?FAQ
What size does the bag come out?
In the original model the base is worked to a 20 cm diameter, and the bag's height in the photos is about 30 cm. You can adjust the height as you like.
Why does the base need a synthetic cord?
The cord is carried inside the single crochet stitches so the base comes out firmer and holds its shape better than ordinary crocheted fabric.
Do the wall stitches need to be worked through the back loop?
Yes, the author clarified in the discussion that the ridge in the photos comes from working through the back loop only. Regular stitches or 'V' stitches are also possible, but the texture will be different.
Can the base be oval instead of round?
Yes. The author confirmed the crocheting technique stays the same, but you'll need a different increase chart for an oval.
Can the crocheted handle be replaced with hardware?
Yes, that idea came up in the discussion. But the basic strap here also works as the closure, so if you replace the handle, you'll need to plan separately for how the top of the bag will close.
Your project
Log in to track your project, attach photos, and publish your result into the shared feed.
Does the bag have a round base? I was sure it was an oval :rolleyes:. Such a nice model, very neat, and you can make the handle any way you like, not just from cord - especially if you want a sturdier bag. I'd use metal hardware; I think there was a tutorial on the forum somewhere describing a handle like that.
Of course, I'd add an extra insert to the base - mesh, cork, or thin plastic - just to be safe. But I recently heard from a friend that she uses rigilene boning to reinforce the base while crocheting it - a stiff kind of strap made of thin flat wires. She pulls out one of those thin wires and crochets it into every round of the base. The rigilene is transparent, so you can't see it 👍 Honestly, this is the first time I've heard of it, but I don't crochet much myself )) I think this trick might come in handy for youShow full quoteCollapse
Of course, I'd add an extra insert to the base - mesh, cork, or thin plastic - just to be safe. But I recently heard from a friend that she uses rigilene boning to reinforce the base while crocheting it - a stiff kind of strap made of thin flat wires. She pulls out one of those thin wires and crochets it into every round of the base. The rigilene is transparent, so you can't see it 👍
Honestly, this is the first time I've heard of it, but I don't crochet much myself )) I think this trick might come in handy for you, so look up some extra info online if you need it 😉
Thanks for the tip! I'll have to look it up - I didn't know about rigilene!
Of course, I'd add an extra insert to the base - mesh, cork, or thin plastic - just to be safe. But I recently heard from a friend that she uses rigilene boning to reinforce the base while crocheting it - a stiff kind of strap made of thin flat wires. She pulls out one of those thin wires and crochets it into every round of the base. The rigilene is transparent, so you can't see it (y) Honestly, this is the first time I've heard of it, but I don't crochet much myself )) I think this trick might come in handy for you, so look up some extra info online if you need it ;)

 BeginnerFree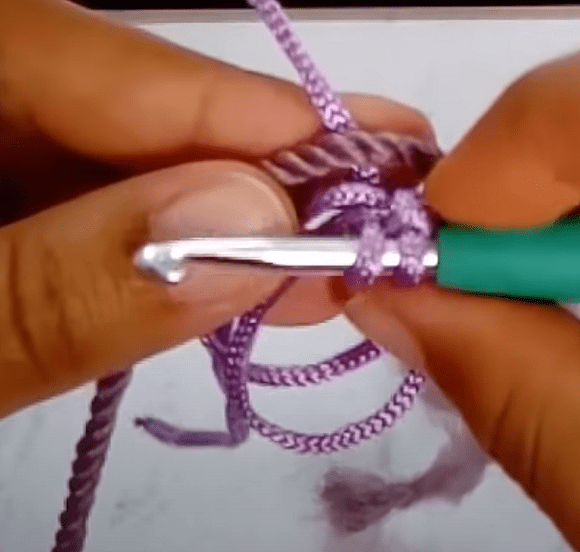


Of course, I'd add an extra insert to the base - mesh, cork, or thin plastic - just to be safe. But I recently heard from a friend that she uses rigilene boning to reinforce the base while crocheting it - a stiff kind of strap made of thin flat wires. She pulls out one of those thin wires and crochets it into every round of the base. The rigilene is transparent, so you can't see it 👍 Honestly, this is the first time I've heard of it, but I don't crochet much myself )) I think this trick might come in handy for youShow full quoteCollapse