Fold a Ribbon Rose: 2 Methods for Wide and Narrow Ribbon
Earlier I wrote about making a dimensional rose from satin “petals” (link here). But you can make a similar flower from one continuous ribbon, as explained below. I will show 2 methods for folding a rose from both wide and narrow ribbon.
BeginnerFree
Translated
Fold a Ribbon Rose: 2 Methods for Wide and Narrow Ribbon
Earlier I wrote about making a dimensional rose from satin “petals” (link here). But you can make a similar flower from one continuous ribbon, as explained below. I will show 2 methods for folding a rose from both wide and narrow ribbon.
Files and resources
link here
Main Steps
Step 1
Earlier I wrote about making a dimensional rose from satin “petals” (link here). But you can make a similar flower from one continuous ribbon, as explained below.
Step 2
Step 3
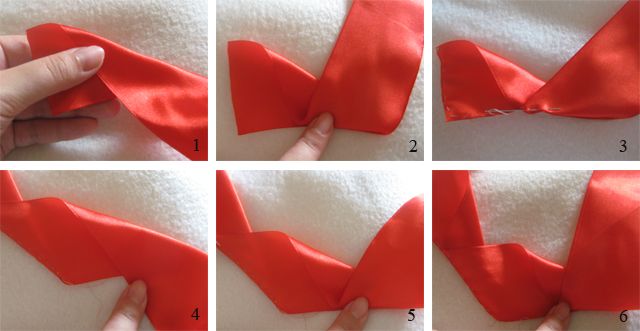
I will show 2 methods for folding a rose from any ribbon, wide or narrow. 1. Method for wide ribbon (step-by-step). Hold the ribbon with its wrong side facing you. Fold the ribbon toward you at an angle of about 30 degrees, then fold it away from you; secure both folds with a pin. Sew a running stitch from the upper corner down and then along the lower edge, catching the folds. Repeat: fold toward you, fold away from you, and secure.
Step 4
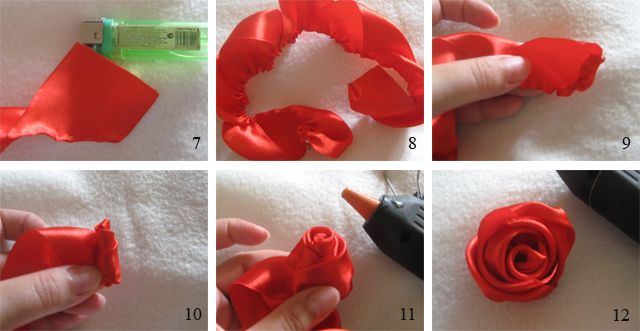
How many folds should you make? On average, 6 to 11: the more there are, the fuller the rose will be. When you reach the end of the ribbon, or decide to cut it, heat-seal the edge. Carefully pull the end of the thread used for the running stitch. This gathers the edge, which becomes the bottom of the flower. Roll up the ribbon, securing each turn with hot glue. You can sew down the free end for extra security.
Step 5
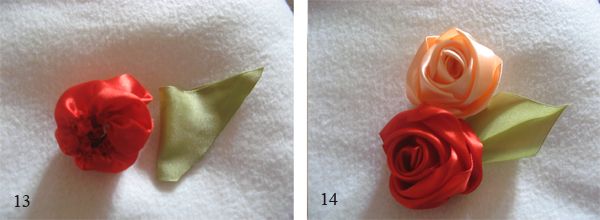
Finished flower:
Step 6
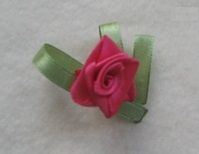
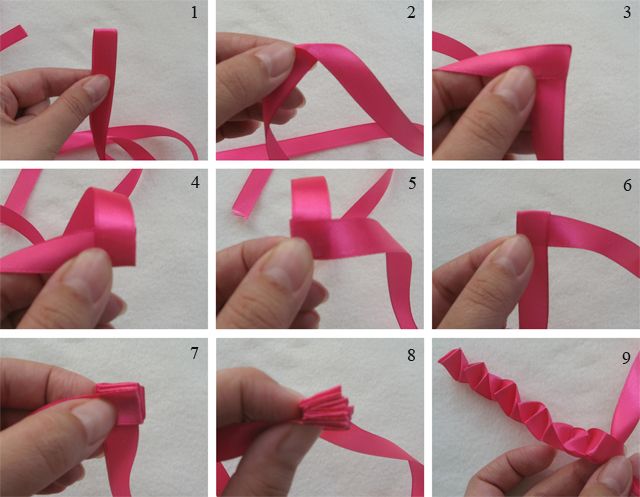
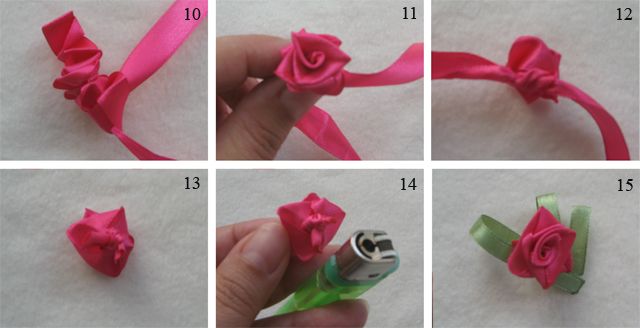
2. Method for narrow 1 cm ribbon. Plan on using about half a meter of ribbon. Cut it and fold it in half to find the center. Fold the ribbon so its halves form a right angle. Then alternately flip one end of the ribbon over the other, making a stack of little squares. When the ribbon ends, release the stack while holding both ribbon ends.
Step 7
Now comes the fun part: pull one of the ribbon “tails.” The long accordion begins to bunch up, becoming an elegant pleated rose. To keep the flower from unraveling, tie the ribbon ends in a knot, trim the excess, and heat-seal it.

 BeginnerFree