Good evening! Earlier, I told you about two varieties of folded hem edge finishes (with raw and enclosed edges). You can find diagrams for them in this topic: Folded Hem with Raw and Enclosed Edges . I sug...
BeginnerFree
Translated
Edge Finishes: Variations of Bound Seams
Good evening! Earlier, I told you about two varieties of folded hem edge finishes (with raw and enclosed edges). You can find diagrams for them in this topic: Folded Hem with Raw and Enclosed Edges . I sug...
Files and resources
Folded Hem with Raw and Enclosed Edges
Main Steps
Step 1
Good evening! Earlier, I told you about two varieties of folded hem edge finishes (with raw and enclosed edges). You can find diagrams for them in this topic: Folded Hem with Raw and Enclosed Edges . I suggest delving a bit deeper into edge finishes to discuss bound seams—their varieties, specifics, and sewing techniques. Binding with Tape This seam is used to finish edges of garment pieces and interior raw edges.
Step 2
Step 3
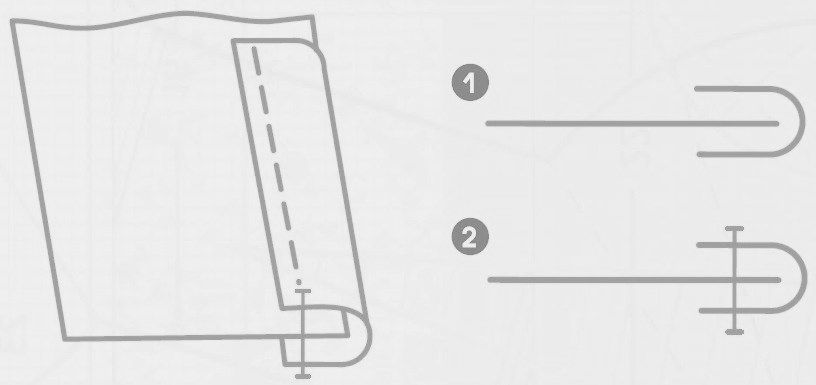
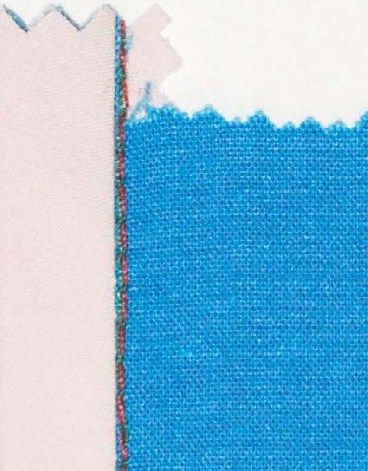
1. Align the raw edges, fold the tape in half lengthwise, and press. Wrap the tape around the edge of the piece so that the fabric raw edge sits squarely against the fold of the tape. Baste in place or pin the tape to the fabric with sewing pins. 2. Stitch parallel to the edge of the tape, 1-2 mm in from the edge. Raw-Edge Binding This seam is used to finish bottom edges and trim garment pieces.
Step 4
Step 5
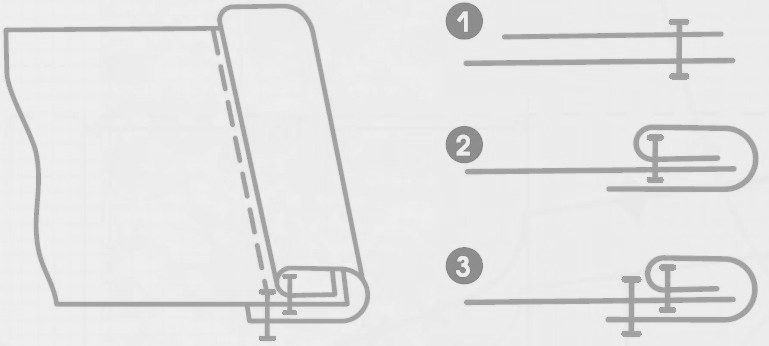
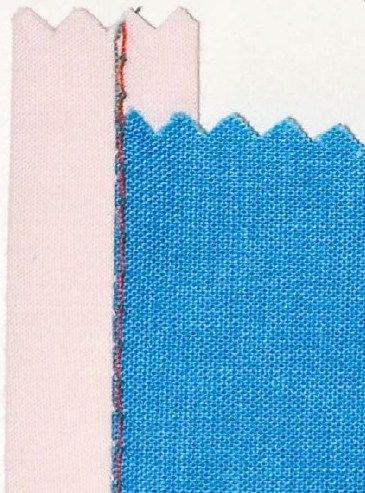
1. To work, we will need our main piece and a strip of fabric cut on the bias (at a 45-degree angle to the grainline). Place the main piece and the strip right sides together, aligning the raw edges, and stitch. The distance from the raw edge to the stitch line is chosen individually, depending on the fabric. 2. Wrap the fabric strip over to the wrong side of the main piece, enclosing the edges of both pieces. Press and, if necessary, baste. The width of the binding is chosen depending on the design. 3. Stitch directly into the seam joining the fabric strip or strictly parallel to it, 1 mm away. Enclosed-Edge Binding Enclosed-edge binding is used as decoration on garments or to finish collars, pockets, etc. First Method
Step 6
Step 7
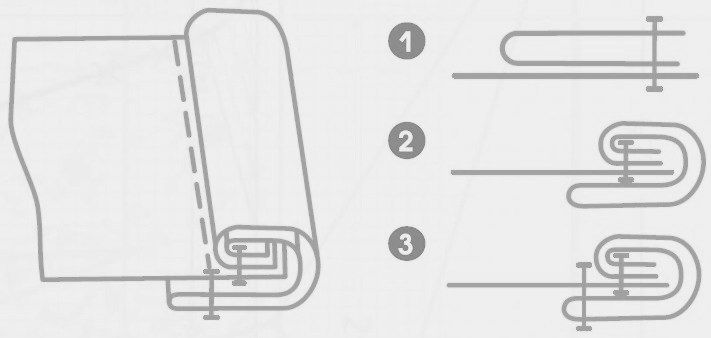
1. To work, we will need our main piece and a strip of fabric cut on the bias (at a 45-degree angle to the grainline). Fold the main piece and the strip in half, align the raw edges, and press. Place the main piece and the fabric strip, folded in half lengthwise, right sides together, align the edges, and stitch with a straight stitch. 2. Wrap the binding around the raw edges and fold it over to the wrong side of the main piece, covering the stitch line by 1-2 mm. Press and baste, if necessary. 3. Secure the finished binding with a straight stitch into the joining seam. Second Method
Step 8
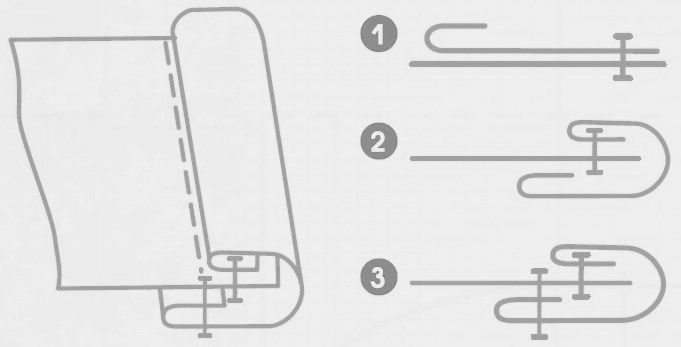
1. To work, we will need our main piece and a strip of fabric cut on the bias (at a 45-degree angle to the grainline). Place the main piece and the strip right sides together, aligning the raw edges, and stitch. Fold the other edge of the binding 3-5 mm to the wrong side, then press. 2. Wrap the binding around the edge of the main piece, turning the binding edge over to the wrong side of the main piece and covering the stitch line by 2-3 mm. Press and baste. 3. Secure the finished binding with a straight stitch into the joining seam.
 BeginnerFree