A step-by-step tutorial showing how to make a round fabric cord from bias tape and braid a basic Chinese knot button with a loop.
BeginnerFree
Translated
Things you will learn
For the fastening, you can use ready-made round cord or make a fabric cord from bias tape.
Fold the fabric strip right sides together and stitch about 0.5 cm from the fold; it's best to confirm the width on a test piece.
Before braiding, it helps to pin the cord to your work surface: the loops won't shift, and the knot comes out neater.
The knot button's size and firmness are adjusted by the cord's thickness, how tightly you pull it, and, if needed, a bead inside the knot.
What you'll get
The finished fastening has two parts: a soft loop and a full, round knot button. This kind of detail looks good on jackets, evening dresses, kimono-style capes, and other pieces that call for a decorative closure instead of an ordinary button.
More elaborate decorative fastenings once you've learned the basic knot.
Materials and tools
Materials
Round cord or ready-made fabric tube, Store-bought cord in the color you want works fine, or you can sew your own fabric tube.
Bias tape or a fabric strip, about 3 cm wide, It's best to confirm the width on a test piece; you can adjust it for the tube thickness you want.
Sturdy thread, Needed for the seam and for turning the fabric tube right-side out easily.
A bead of a suitable size, Optional; helps make the knot bigger and firmer.
Tools
A large needle, A tapestry needle works best: it's easier to turn a narrow fabric tube with a blunt tip.
A pin, Holds the cord in place on your work surface while you braid.
Scissors, Needed to neatly trim the corner before turning the tube right-side out.
A sewing machine or a hand needle, Only needed if you're making the fabric tube yourself instead of using ready-made cord.
Preparation
Make a test piece first
Before sewing onto the finished garment, practice on a separate length of cord. This makes it easier to see how tight to pull the knot and what loop size you need for the knot button.
Match the cord to your fabric
For a dressy piece, a dense, smooth cord in the same shade as the fabric, or half a shade darker, looks best. If ready-made cord doesn't match your color or texture, make a fabric tube from bias tape instead.
Make a Round Fabric Cord
If you already have ready-made round cord, you can skip this section and go straight to braiding the knot button.
Prepare a fabric strip
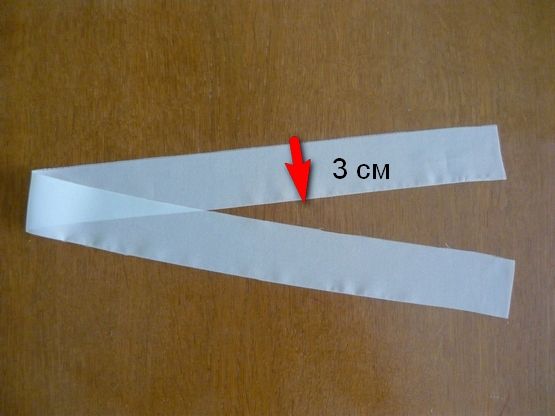
Take a piece of bias tape or a fabric strip. The width depends on the fabric and the cord thickness you want; in the example photo, the strip looks about 3 cm wide, but it's best to make a test piece before the main fastening.
The fabric strip for a handmade cord: it's best to confirm the width on a test piece.
You can adjust the size
If you need a thinner or thicker fastening, make a small test piece first: the final thickness depends on the fabric and the strip's width.
Fold the strip and stitch it
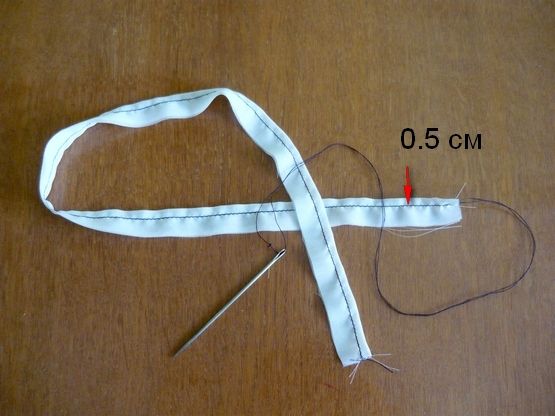
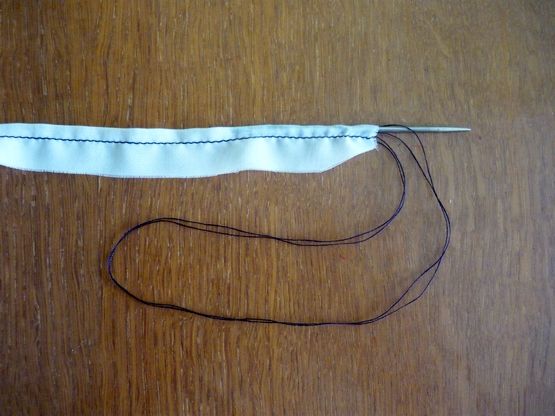
Fold the strip in half lengthwise, right sides together. Stitch about 0.5 cm from the fold. Don't cut the thread at the end of the seam — you'll need it to turn the fabric tube right-side out.
The strip is folded right sides together and stitched about 0.5 cm from the fold.
Secure the thread and prep the edge
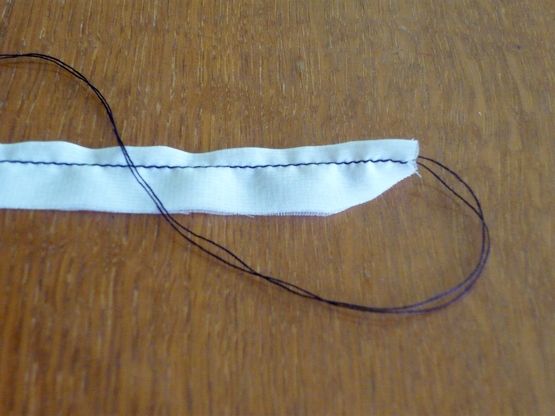
Tie a knot in the thread you left and thread it onto a large needle. Neatly trim the corner at the start of the tube so the edge slides in more easily as you turn it.
The seam thread is left in place, knotted, and used to turn the tube right-side out.
Lead with the blunt end of the needle
This lowers the risk of poking through the fabric and pulling the needle out too soon.
Turn the fabric tube right-side out
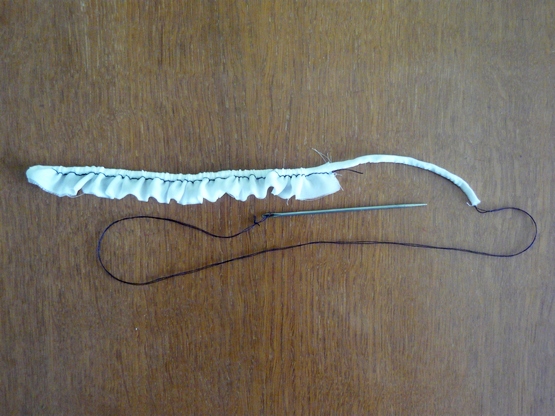
Push the needle inside the tube and gradually pull it further through. The fabric will start gathering and turning right-side out, becoming a firm, round cord.
The needle is placed inside the tube blunt end first and gradually pulled through.As the needle is pulled through, the fabric turns right-side out into a firm round cord.
Check the firmness
A good fabric cord holds a round shape and doesn't look flat. If the fabric bunches up a lot or doesn't pull through easily, it's best to make a new, wider test piece.
Braid the Knot Button
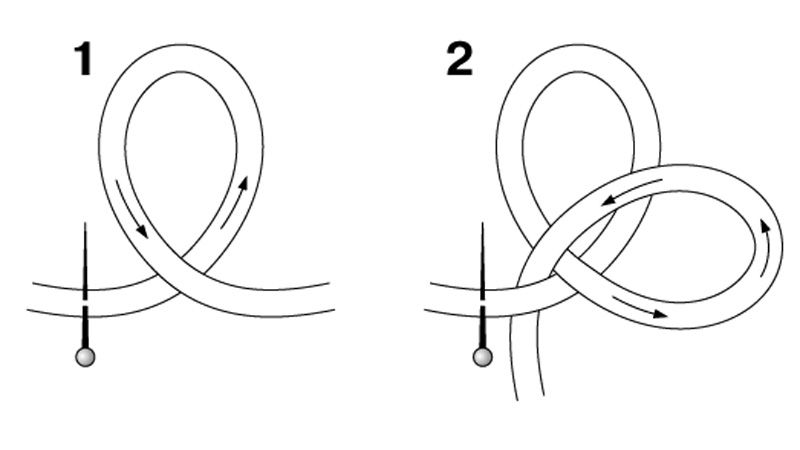
The basic Chinese knot button is built from a simple knot: first you form two loops, then the cord end passes through them and is pulled tight into a ball.
Pin the cord and form two loops
Pin the cord to your work surface. Make the first loop, then lay the second loop on top of it. Try to keep the cord untwisted from the start.
The start of braiding: the first loop, with the second loop laid on top.
Don't pull tight too soon
The loops should stay loose until every pass is done — that makes it much easier to adjust the knot's shape.
Pass the end through the loops and pull the knot tight
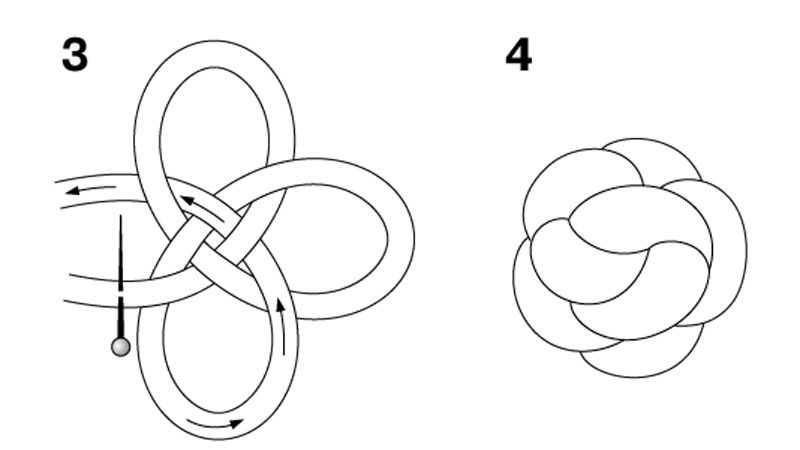
Guide the end of the cord through both earlier loops following the diagram. Then carefully pull each section of cord snug, a little at a time, until the knot gathers into a round knot button.
The final passes: the end runs through the loops, then the knot is pulled tight into a ball.
Watch for twists
If the cord twists, the knot will come out uneven. It's better to undo the knot at this stage and repeat the passes calmly.
Make the matching pair: the knot button and the loop
The fastening needs a matching loop. Form it from the same cord, and check that the knot button fits through the loop with a little resistance, but doesn't fall out on its own.
Try the Fastening on the Garment
Before sewing it on for good, it's worth checking how the decorative fastening looks and works on your actual fabric.
Check the alignment and tension
Lay the knot button and the loop on the garment, fasten them, and check the placement. The loop shouldn't pull the garment's edge tight, and the knot button shouldn't hang too loose.
Secure the ends
Once you're happy with the loop size and the knot's firmness, neatly secure the cord ends on the wrong side or inside a seam.
The finish depends on the garment
On thin fabric, keep the finish as flat as possible; on a heavier jacket, you can tuck the ends under a decorative facing.
Finish and variations
Finish
The basic fastening
The simplest version is one loop and one braided knot button. It's a good choice for a first practice piece and for understated garments without much extra decoration.
A firmer knot button
If you want a bigger or especially firm knot, you can tuck a bead of a suitable size inside and pull the cord tight around it.
Variations
Decorative compositions
Once you can tie the basic knot confidently, you can move on to more elaborate Chinese fastenings — with double loops, symmetrical swirls, and contrast-color cord.
The needle drags, the fabric bunches up, or the thread breaks.
Likely cause
The strip is too narrow for the fabric, the corner wasn't trimmed, or the thread isn't secured firmly enough.
How to fix it
Trim the corner more carefully, use a large needle, and feed the fabric through in small sections. If the tube still won't turn, make a test piece from a wider strip.
The knot button comes out uneven
Problem
The braided button looks lopsided, or part of the loops pokes out.
Likely cause
The cord twisted during the passes, or the knot was pulled tight before the pattern was finished.
How to fix it
Loosen the knot back to open loops, straighten the cord, and repeat the passes. Tighten the knot gradually, pulling different sections snug all around.
The loop is too loose or too tight
Problem
The knot button either falls out of the loop, or the fastening is hard to close.
Likely cause
The loop size was chosen before checking the finished knot button.
How to fix it
Make the knot button first, then size the loop to match it. The loop should close with a little resistance and shouldn't distort the garment's edge.
?FAQ
Can I use ready-made cord?
Yes. Ready-made round cord is the fastest option. A handmade fabric tube is worth it when the exact color, texture, or fabric match to the garment matters.
Does the strip have to be 3 cm wide?
No. About 3 cm is just a reference point from the example photo, not a required size. For thin fabric or a small knot button, try narrower; for a chunkier decorative fastening, go wider.
What garments suit this kind of fastening?
Braided Chinese knot buttons work especially well on jackets, evening dresses, capes, and kimono-style pieces, where the fastening doubles as decoration.
How do I make the knot button bigger or firmer?
Use a thicker cord, pull the knot tighter, or tuck a bead of a suitable size inside.
Your project
Log in to track your project, attach photos, and publish your result into the shared feed.
I once made buttons like this on a knitted cardigan, but I wrapped the working thread around an ordinary button instead (y) But isn't your knot button supposed to be tightened? Won't it come undone?
I once made buttons like this on a knitted cardigan, but I wrapped the working thread around an ordinary button instead 👍 But isn't your knot button supposed to be tightened? Won't it come undone?
Yes, the button does need to be secured — I forgot to mention that. There are two options here: either leave the ends long and use them to form a hanging loop shank, or trim them and make the button stand on its own. In the first case, you pull the cords tight at the base of the knot; in the second, you stitch them tightly together after trimming.
The turquoise ones in the second photo are just like the ones my mom had on a cardigan — I remember them from childhood. It was so trendy back then — yikes! Nowadays I'd only use something like that as an accent. For example, on a stylish jacket with 1-2 buttons. Any more than that and it's overkill. Interesting technique, though!

 BeginnerFree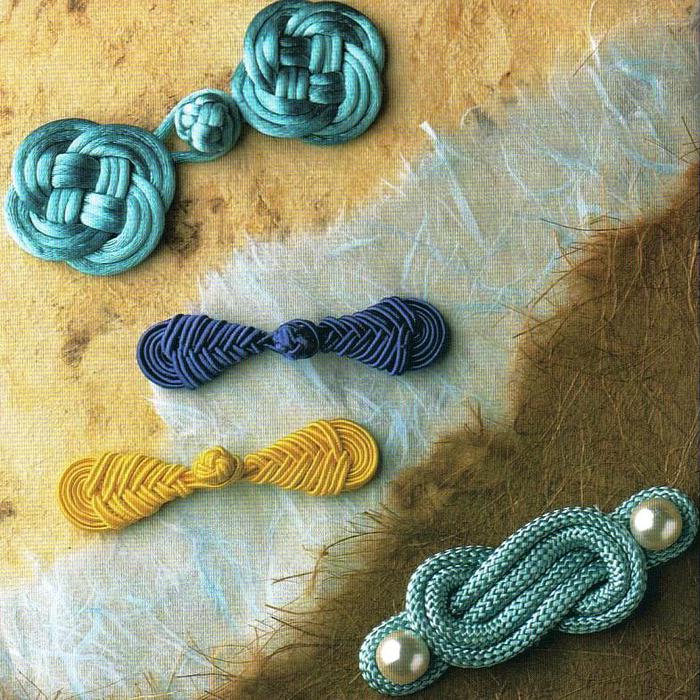


I once made buttons like this on a knitted cardigan, but I wrapped the working thread around an ordinary button instead (y) But isn't your knot button supposed to be tightened? Won't it come undone?