Beautiful Leaves: Embroidering with Beads and Satin Stitch
Satin stitch embroidery is a craft that many girls first begin learning in school during home economics classes. Nevertheless, this simple technique opens up many new possibilities! For example, you can embroider leaves with beads and satin stitch, creating dimensional
BeginnerFree
Translated
Instructions
Step 1
Satin stitch embroidery is a craft that many girls first begin learning in school during home economics classes. Nevertheless, this simple technique opens up many new possibilities! For example, you can embroider leaves with beads and satin stitch, creating dimensional, lifelike, and very beautiful decorative accents for clothing and bases for brooches.
Illustration 2
Step 3
To see how to embroider the leaves, follow this step-by-step tutorial.
What you will need:
1. Embroidery fabric, or felt if you want to make a brooch. 2. Stranded embroidery floss, used in 3 strands. 3. Cut seed beads or short bugle beads matching the floss. 4. An embroidery needle and a fine beading needle.
Starting the Embroidery
Step 1
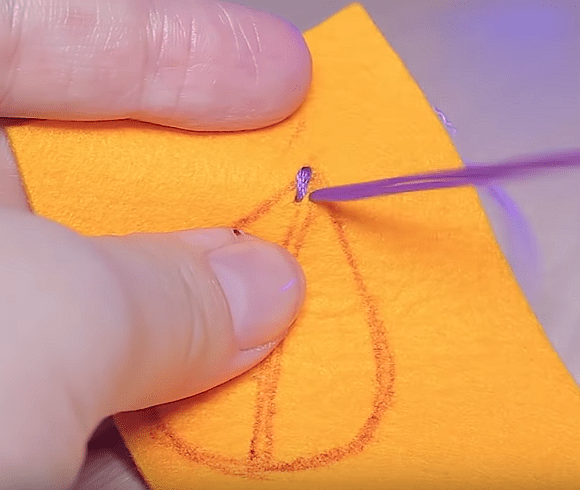
Use a pencil to trace the outline of your leaf onto the fabric or felt. The shape and size can be anything you like, depending on your idea.
Step 2
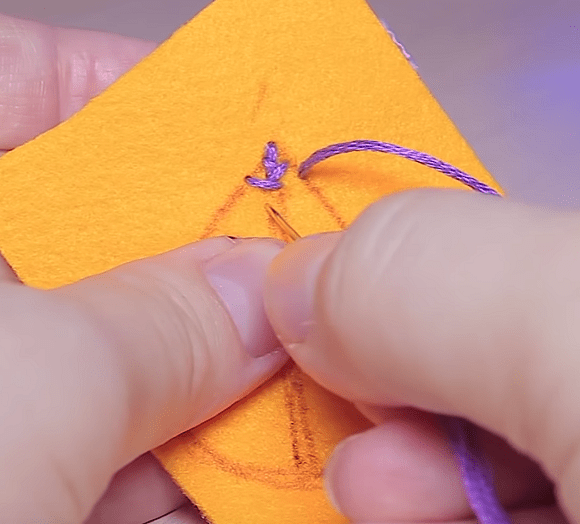
Secure the thread on the wrong side and make a short vertical stitch at the tip of the leaf. Bring the needle up to the front, stepping 1 mm to the right.
Illustration 4
Step 5
Step 3
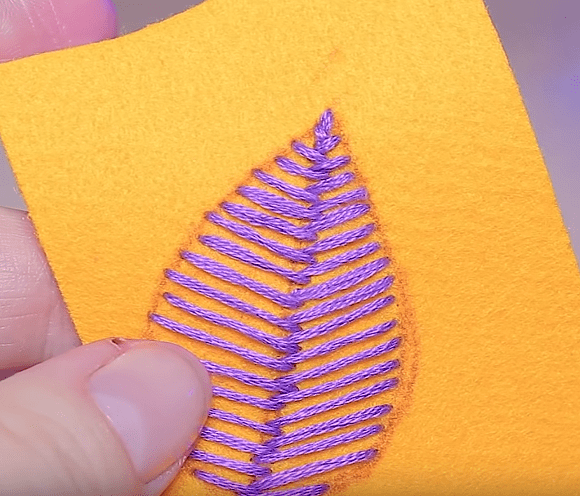
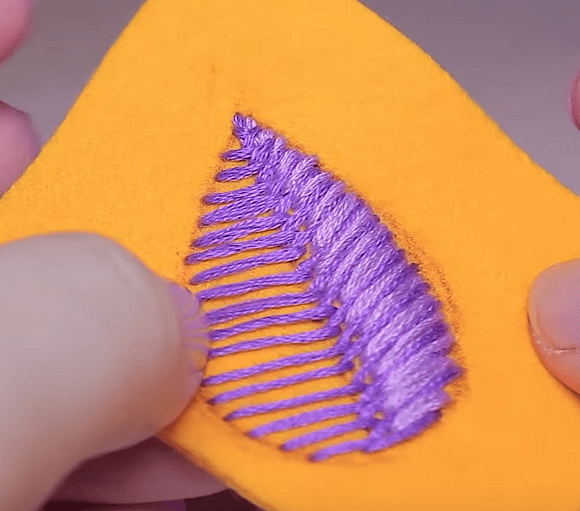
Work slanted stitches in a staggered arrangement with a slight overlap, but not packed tightly together as in standard satin stitch, keeping them evenly spaced apart.
Illustration 6
Step 7
Step 4
Fill the entire leaf with satin stitch.
Illustration 8
Step 9
Step 5
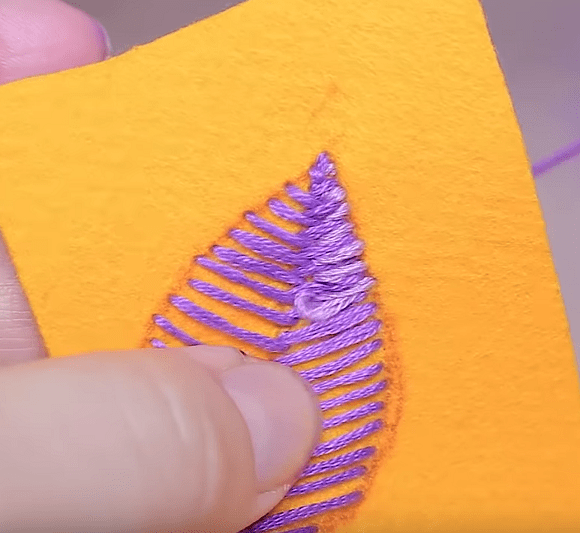
Embroider the right half of the leaf in satin stitch using the same floss, covering the existing gaps between the stitches. Stitch from the outline toward the center.
Illustration 10
Step 11
One half of the leaf is finished. It has dimension and looks very neat, and because it was embroidered in 2 stages, the threads catch the light beautifully from different angles.
Illustration 12
Step 13
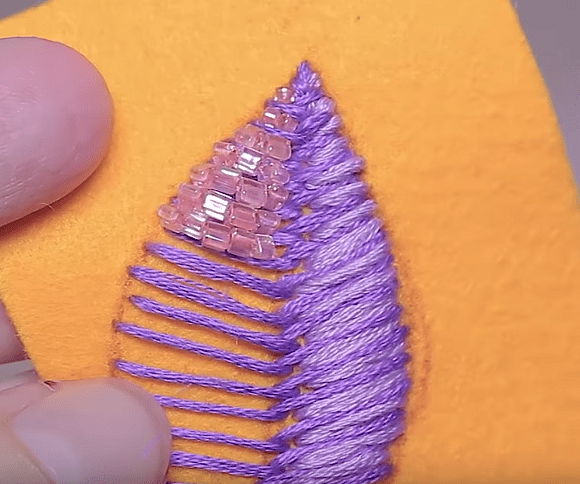
Now move on to the bead embroidery. Use fine monofilament thread or fishing line and a beading needle for this.
Step 6
Starting from the tip, make stitches by stringing beads onto the needle and filling in the open spaces between the floss stitches.
Illustration 14
Step 15
Gradually increase the number of beads, but make sure they do not sag or pucker the fabric.
Illustration 16
Step 17
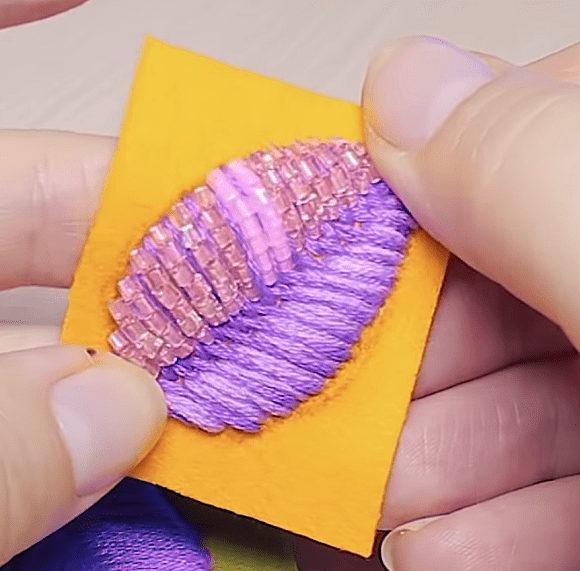
You can also use small seed beads or a bead mix in your work, or fill both halves of the leaf with beads and satin stitch.
If you plan to use the piece as a brooch, cut out the leaf leaving a small margin around the edge, glue it to cardboard, and edge it, finishing with a backing and a clasp.

 BeginnerFree