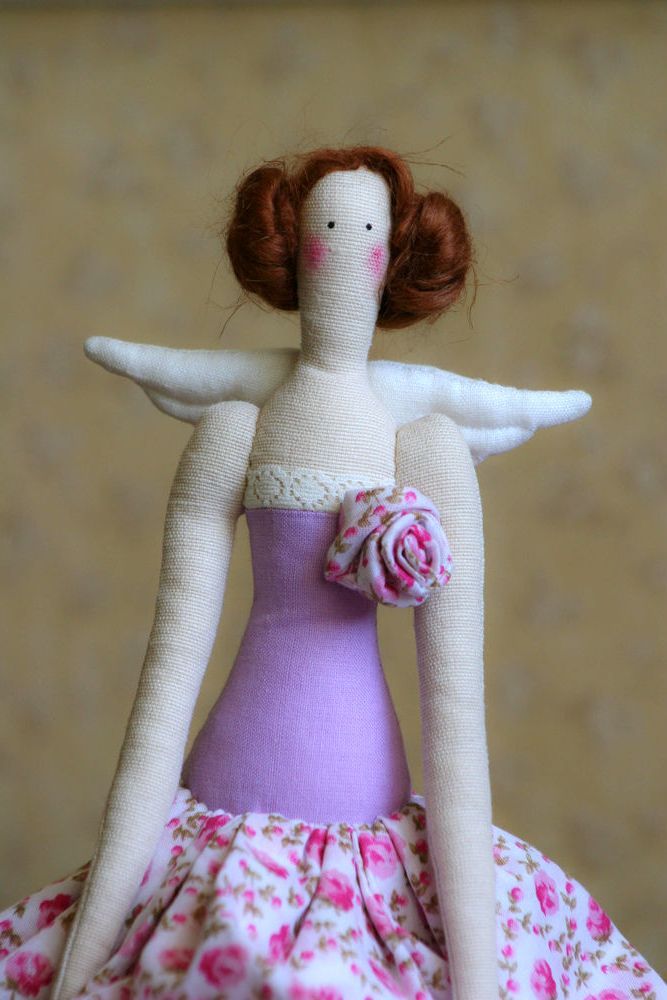
Required tools and materials: heavyweight cotton or linen fabric for the body in cream or light beige; fabric for the dress bodice, underskirt, and bloomers; white linen fabric for the wings; fine lace; hair—wefts, etc.
BeginnerFree
Translated
Instructions
Required tools and materials:
- heavyweight cotton or linen fabric for the body in cream or light beige;
- fabric for the dress bodice, underskirt, and bloomers;
- white linen fabric for the wings;
- fine lace;
- hair—wefts, yarn (mohair or felting yarn, hemp fibers);
- polyester fiberfill or hollowfiber;
- 0.8 mm wire, 25 cm;
- fabric dimensional paint or black acrylic paint;
- needle;
- pins;
- thread;
- sewing machine.
Patterns
Illustration 1
Illustration 2
Illustration 3
Step 4
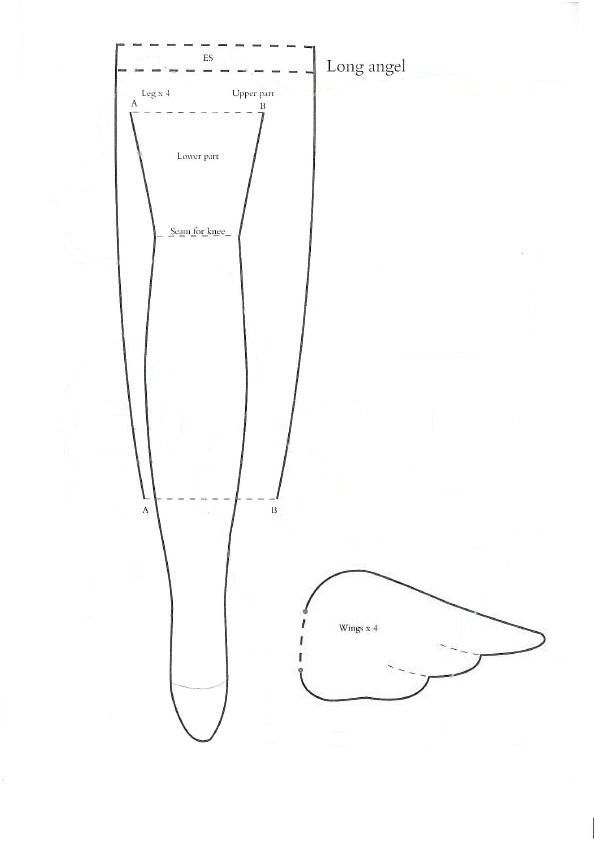
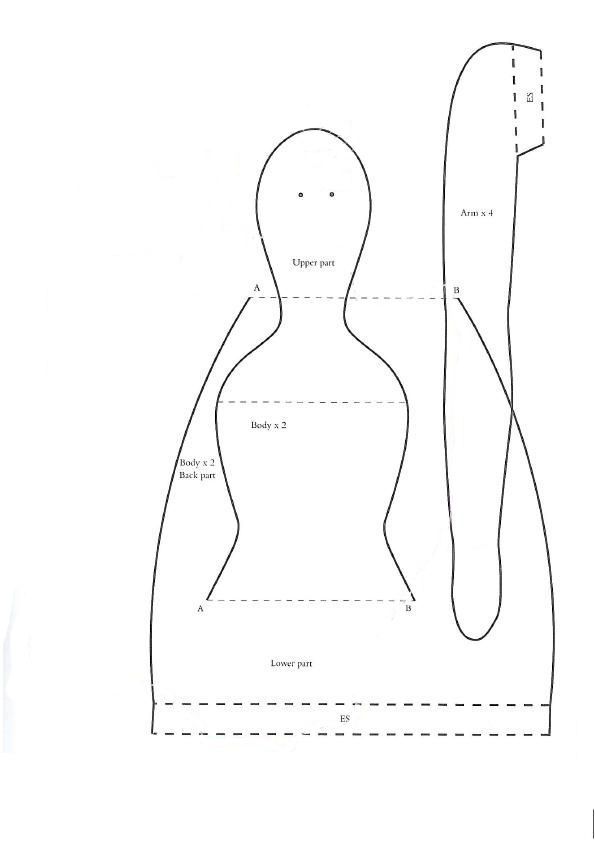
Printed at 100% scale, the patterns are designed for a 42 cm doll. You can always scale it to your desired size. 😉
DIY Tilda Doll: Master Class
Sewing the Tilda Doll
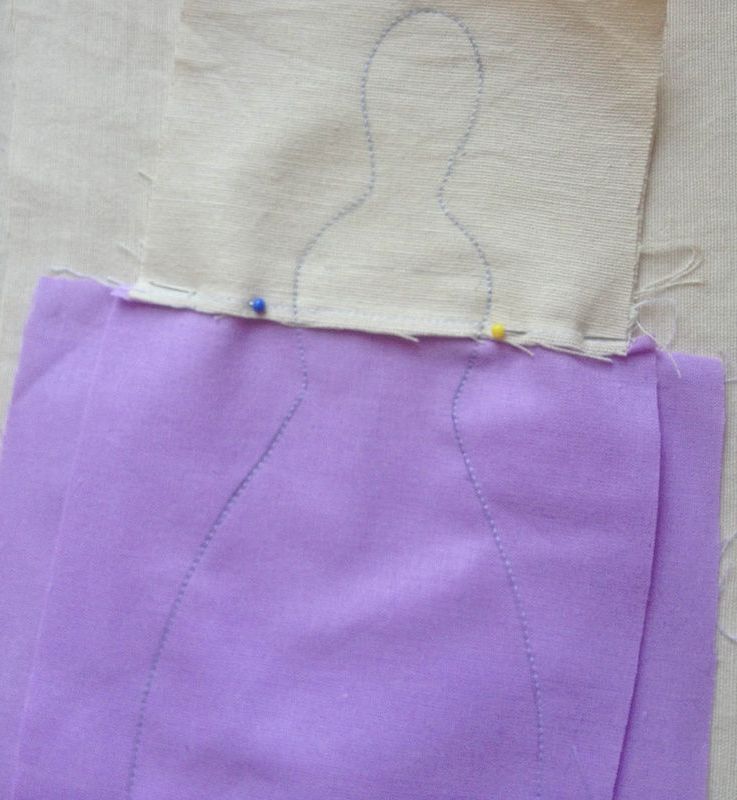
Make two identical pieces from the beige and purple fabrics. Stitch them together, inserting lace between the fabrics. Press.
Turn the fabric over to the wrong side and transfer the pattern onto the fabric, as shown in the photo:
Illustration 5
Step 6
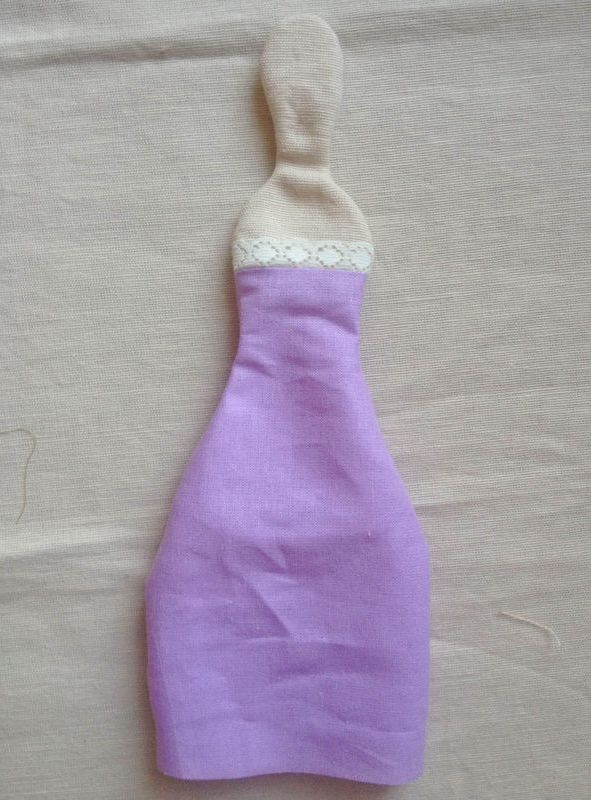
Repeat the same with the second identical piece of fabric. Cut out the pieces, adding seam allowances, and sew them together right sides facing. Leave the bottom edge open! Turn right side out.
Illustration 7
Step 8
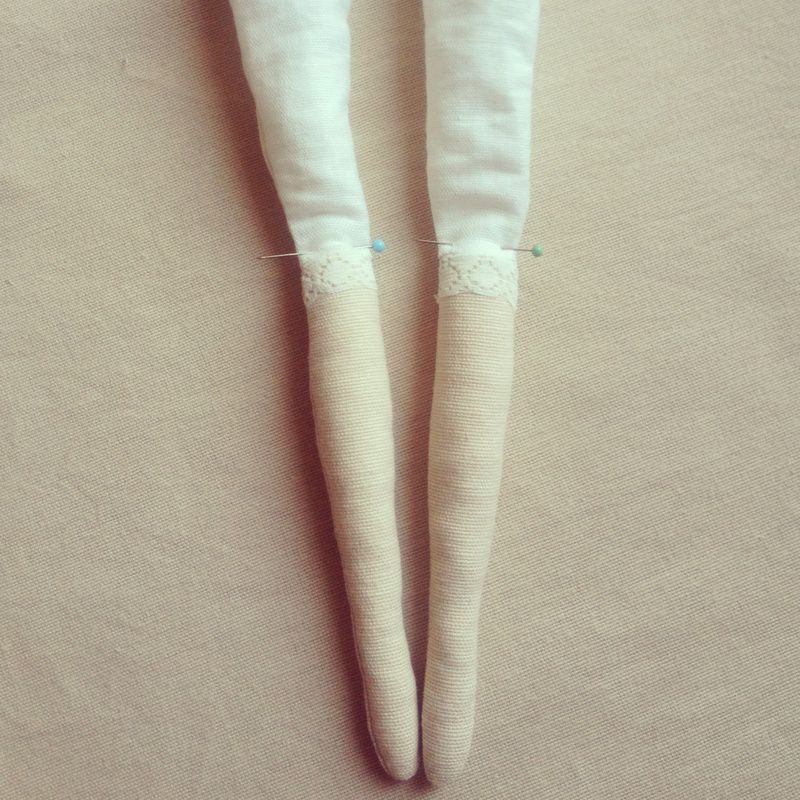
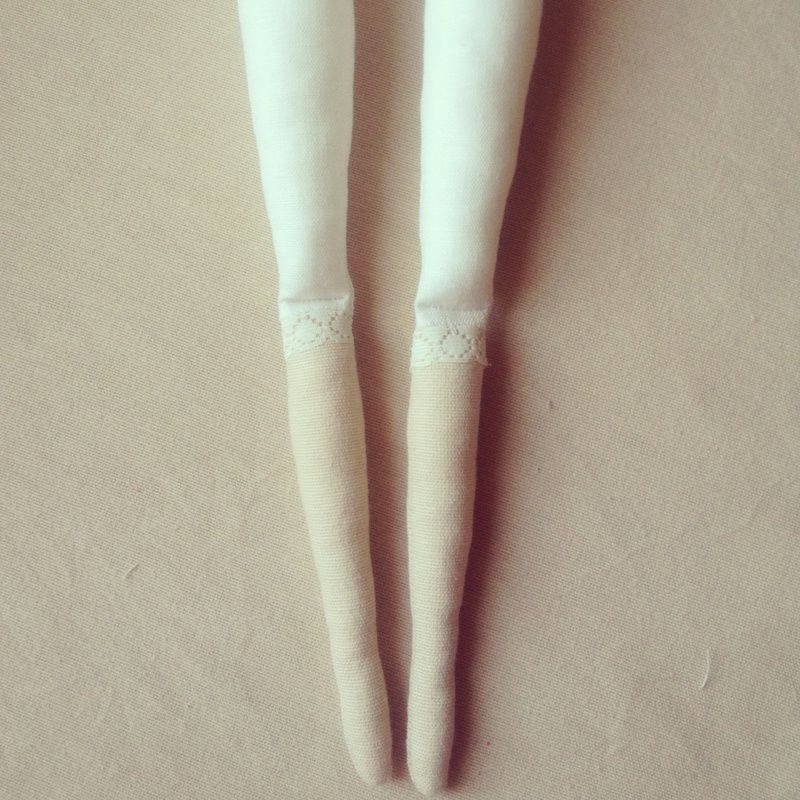
Sew the legs the exact same way: beige fabric, lace, white fabric, sew together. Transfer the pattern, cut out, sew, and turn right side out.
Stuff the legs with fiberfill. For such small parts, it is convenient to use a chopstick or a thin pencil. 😉 Be careful not to damage the seam!
Illustration 9
Step 10
To make the doll's knees bend, first stuff the legs firmly up to the knees with small pieces to avoid 'cellulite', stitch across, and continue stuffing all the way to the top.
Illustration 11
Step 12
Next are the Tilda's arms. Transfer the pattern onto the beige fabric, cut it out (don't forget seam allowances!), pair the pieces right sides facing, stitch them together, and turn them right side out through the 'armpits'.
Illustration 13
Step 14
Stuff the pieces.
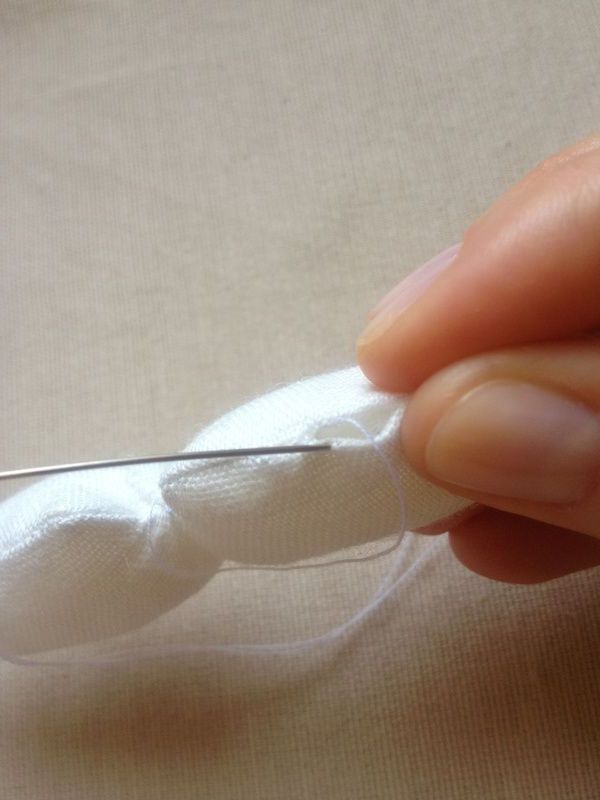
Now for the wings. Transfer the pattern onto the fabric, add seam allowances, stitch, and cut out. Leave an opening for turning! Turn the piece right side out and stuff the wings through this same opening. Sew closed with blind stitches.
Illustration 15
Step 16
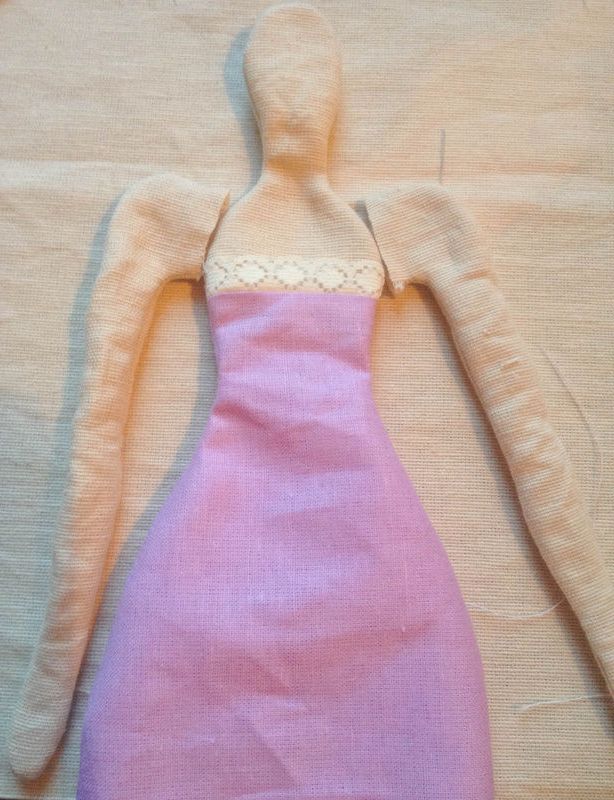
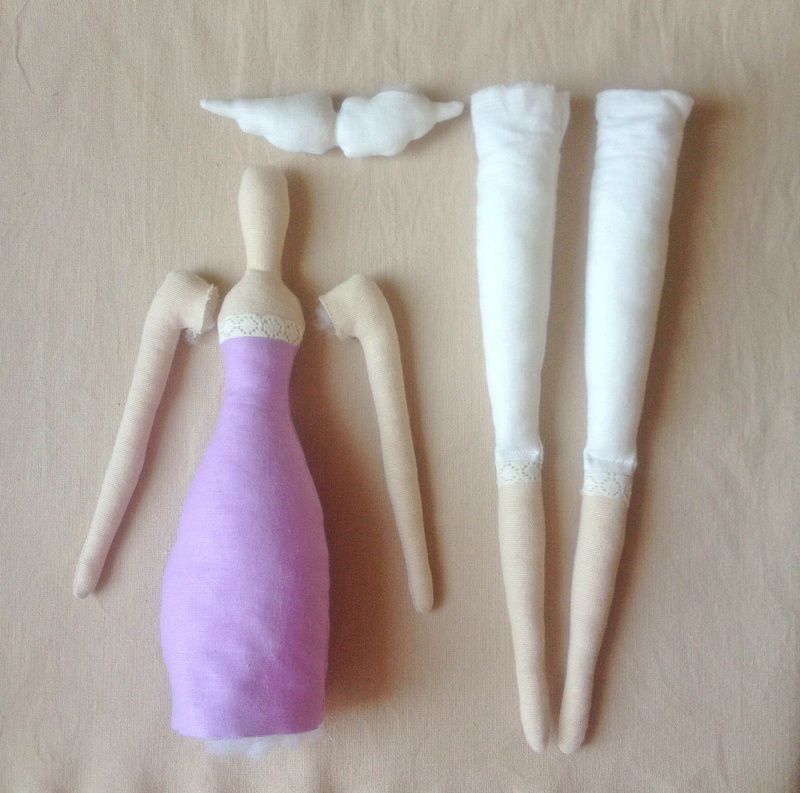
This is what the doll looks like ready for assembly:
Illustration 17
Step 18
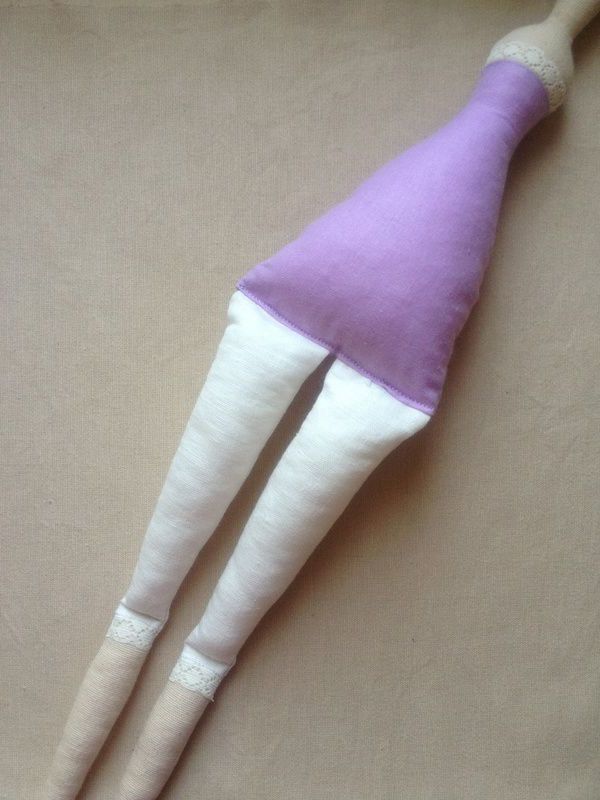
Fold under the bottom edge of the torso and baste the legs in place. Stitch across and remove the basting stitches.
Illustration 19
Step 20
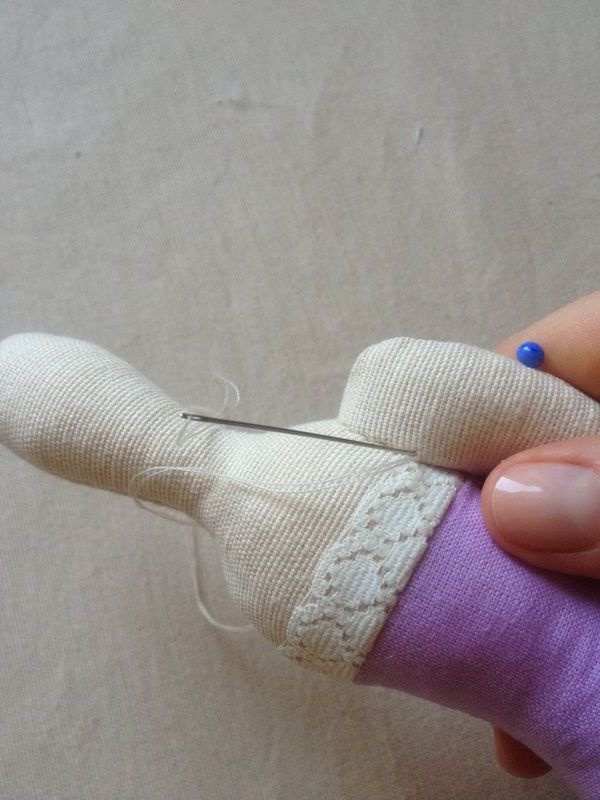
Fold the arm seam allowances inward and pin the pieces to the torso. Carefully sew the arms on using blind stitches.
Illustration 21
Step 22
Sew the wings to the back of the doll.
Clothing for the Tilda Doll
Take the fabrics for the overskirt and underskirt, as well as the trim.
Measure the desired skirt length.
Cut a piece of fabric for each skirt with a height equal to the measured length + 2 cm, and a length of 40 cm.
Fold under and stitch the hem of the overskirt. Fold under and stitch the hem of the underskirt together with the trim.
Stitch the overskirt and underskirt pieces together. Press them not exactly along the seam, but so that the overskirt piece is slightly offset and the underskirt peeks out from underneath by 1.5 cm.
Gather the skirts and distribute the pleats so that they sit perfectly between the doll's waist and hips.
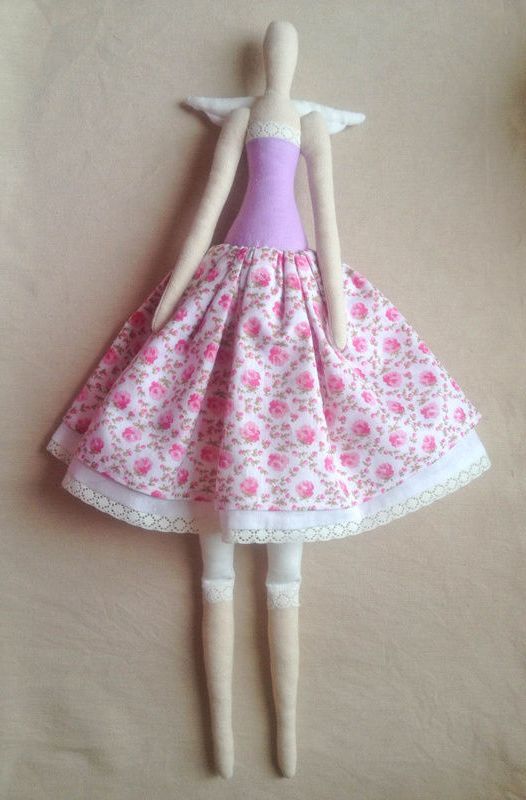
Sew on with blind stitches. Here is the result:
Illustration 23
Step 24
Next, sew a rosette brooch for the Tilda.
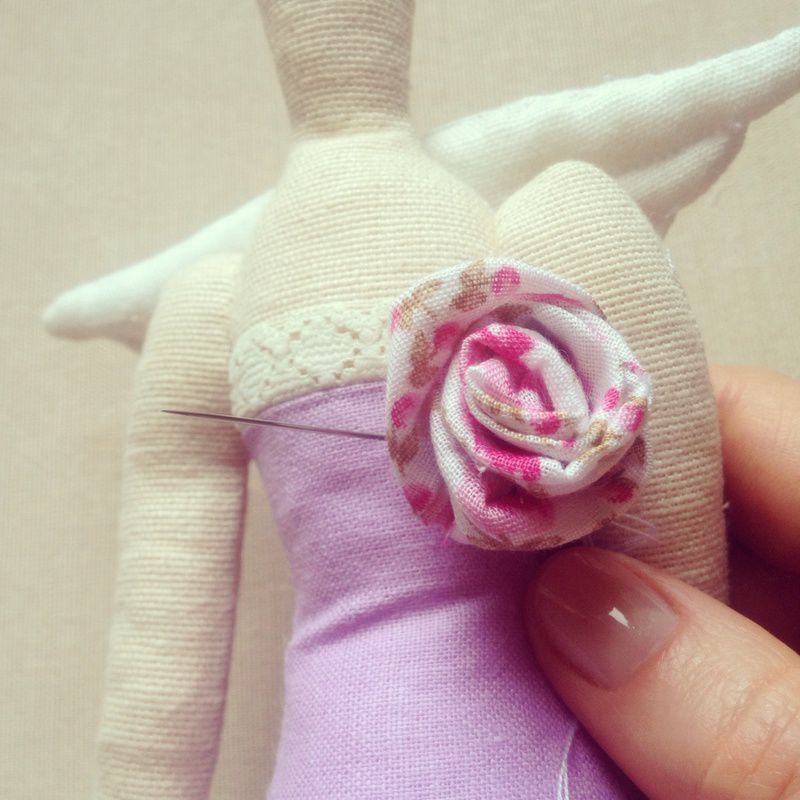
To do this, take the fabric used for the overskirt and cut a 23x5 cm strip from it. Fold it in half right sides facing and stitch along the long side and one short side. Turn right side out. Tuck the raw edges inward and sew closed with blind stitches. Roll the strip into a rosette and secure it at the bottom. Sew it to the side of the dress bodice.
Illustration 25
Step 26
Paint the eyes with acrylic paint (a toothpick works best). Let them dry.
Now for the hair. Felting fibers are used in this tutorial.
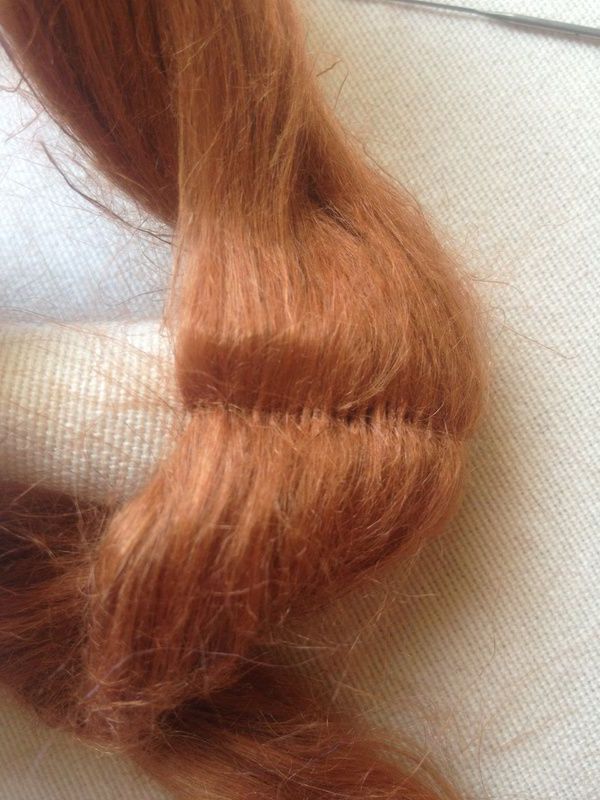
Measure the desired hair length and mark the part line. Take a felting needle and needle-felt (push into the fabric) the hairs.
Illustration 27
Step 28
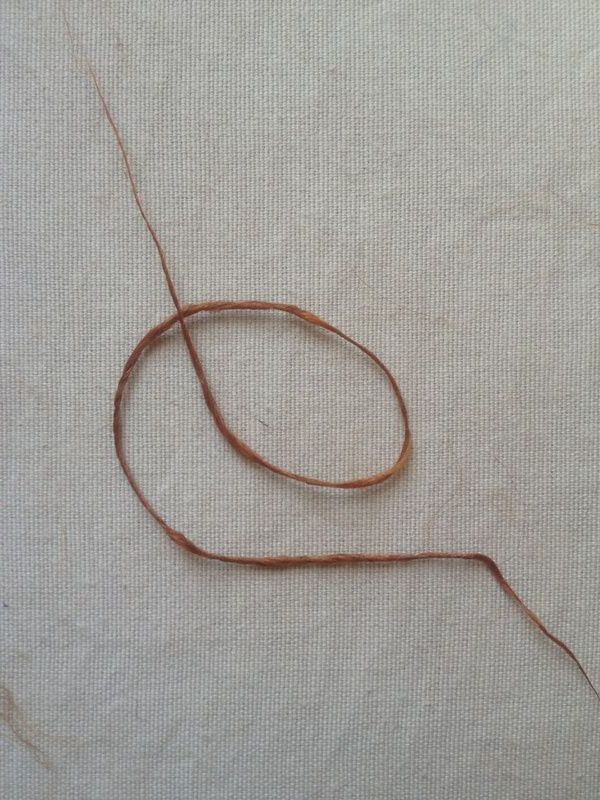
To secure the hair, take the fiber, pull out a small strand, and lay it out lengthwise. The length should be sufficient for the thread you will use to sew, that is, about 30 cm. Start twisting the fibers between your fingers as if twisting a cord; as a result, a thread will form, as in the photo. Twist this thread tighter. Thread it into a needle.
Illustration 29
Step 30
Sew the hair with this thread using short stitches along the part. Of course, you can sew the hair with any matching thread, but this way the hair will look more realistic. 😉
Illustration 31
Step 32
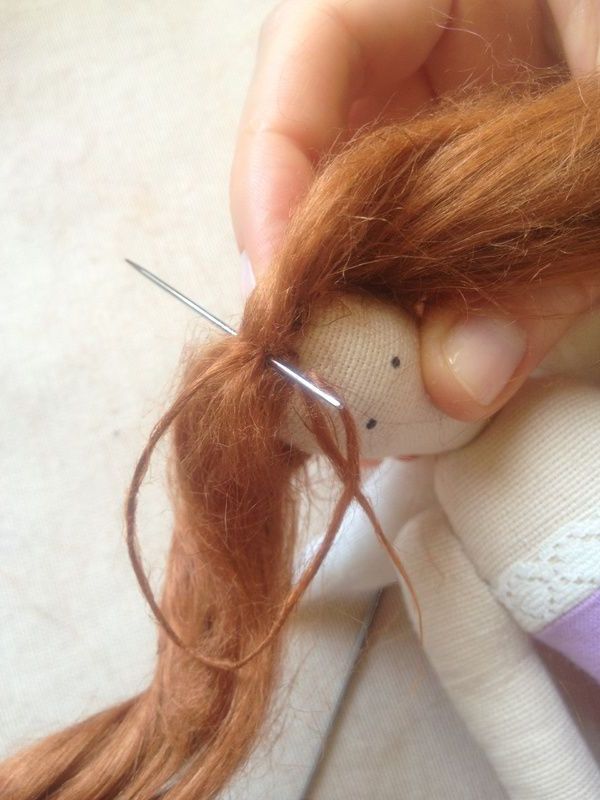
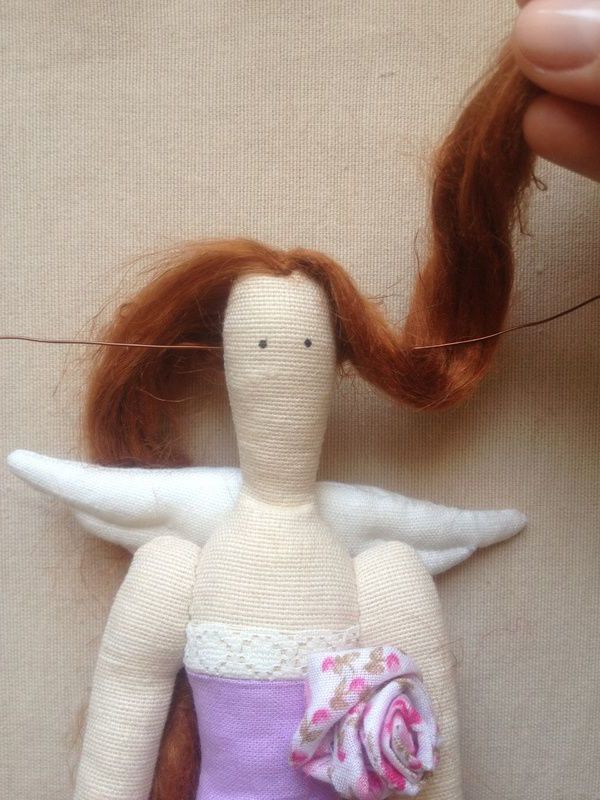
Next is the hairstyle. Insert the wire into the needle.
Pierce completely through the head, as shown in the photo.
Illustration 33
Step 34
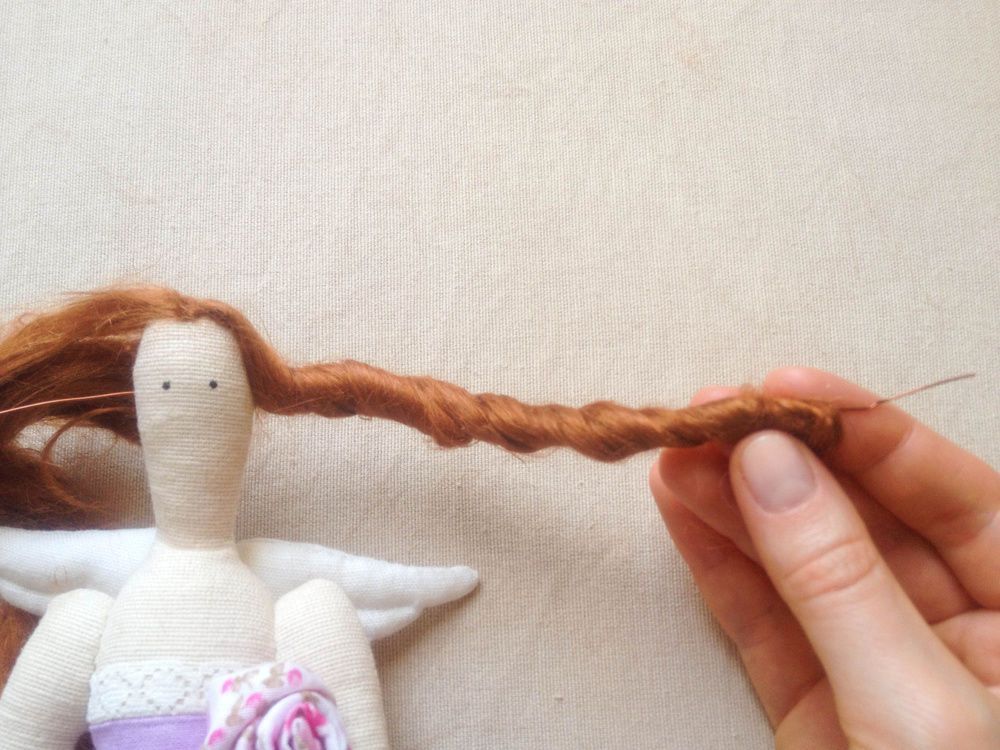
Divide the hair in half and wrap the hair around the wire. Secure the end with thread.
Illustration 35
Step 36
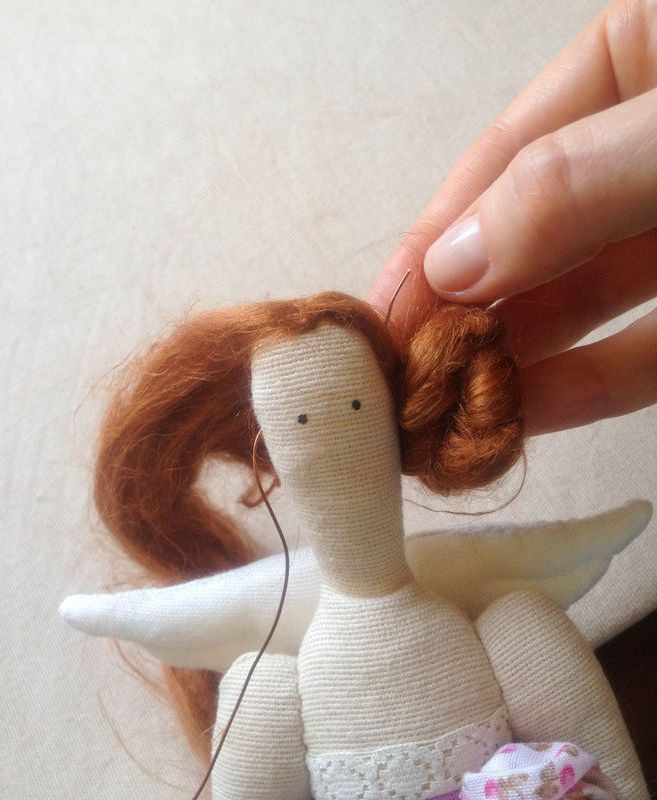
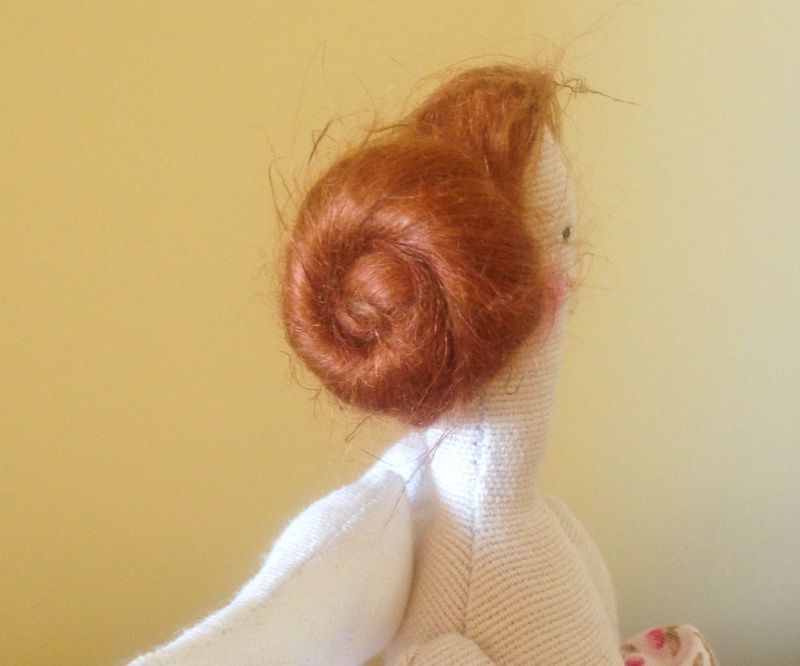
Twist the wire into a spiral coil. Secure the hairstyle with the end of the wire.
Illustration 37
Illustration 38
Step 39
Using regular blush from your makeup bag, add a touch of blush to the doll's cheeks.
 BeginnerFree