Amigurumi Face: How to Embroider the Nose and Mouth
Step by step, choose the face expression, bring the needle out at the center of the nose, embroider a dense fan-shaped nose, form the mouth and hide the thread tail under the stitches.
BeginnerFree
Translated
Things you will learn
Choose the nose and mouth shape first: it is better to decide the toy’s expression before the first stitch.
Start embroidering the nose from the center point so the shape stays symmetrical.
Build up the nose with vertical stitches, spreading them out like a fan.
Hide the thread tail under the dense embroidered nose so the securing point is almost invisible.
What you will make
The toy gets a finished face: a dense embroidered nose, a neat vertical bridge and a soft mouth line. This technique works for bears, wolf pups, bunnies, kittens and other amigurumi toys.
Materials and tools
Materials
Crocheted toy head, The piece should be stuffed and hold its shape so the stitches sit evenly.
Embroidery floss or strong embroidery thread, For bears and wolf pups, black is usually used; for bunnies and kittens, you can try pink.
Removable marking tool, Optional: helps mark the center of the nose and the mouth line before stitching.
Tools
Embroidery needle or long doll needle, The needle should pass easily through the crocheted fabric and stuffing.
Scissors, For trimming the thread tail neatly after securing it.
Preparation
Prepare the toy head
Before embroidering, check that the head is already stuffed and does not collapse too much. If the shape is soft or uneven, adjust the stuffing first: a firm, even piece makes it easier to keep the nose and mouth symmetrical.
Choose the thread color
For an expressive face, the thread color should stand out against the yarn. A black nose gives a bear or wolf pup a classic look, while pink makes a bunny or kitten look softer.
Choose the nose and mouth shape
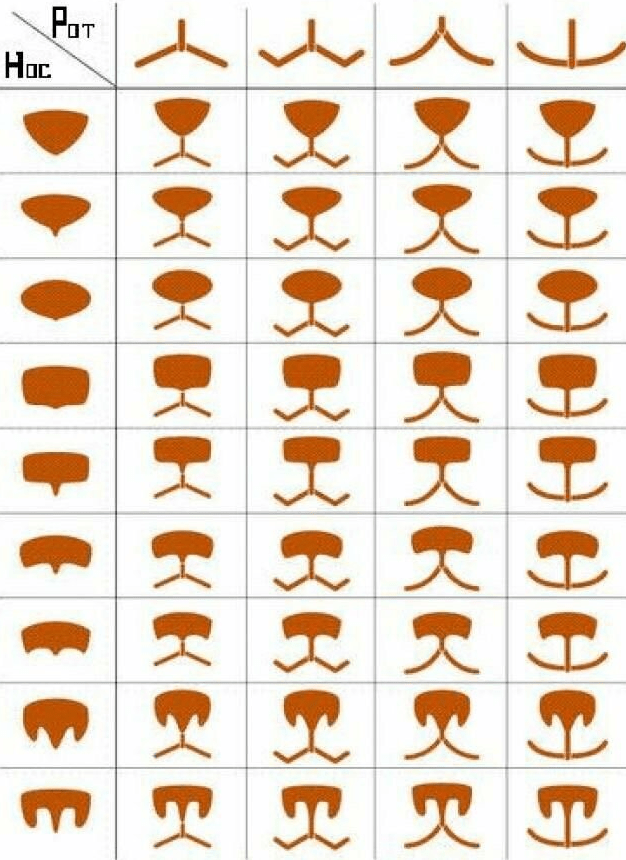
Even a simple face changes the toy’s character. Before embroidering, look at the chart and choose the version that suits your character.
Compare the expression options
The chart shows how the toy’s expression changes with different nose shapes and mouth lines. For your first try, choose a simple nose with one central bridge and a gentle smile: it is easier to keep symmetrical.
The chart helps choose the nose shape and mouth expression before stitching.
Start the nose from the center point
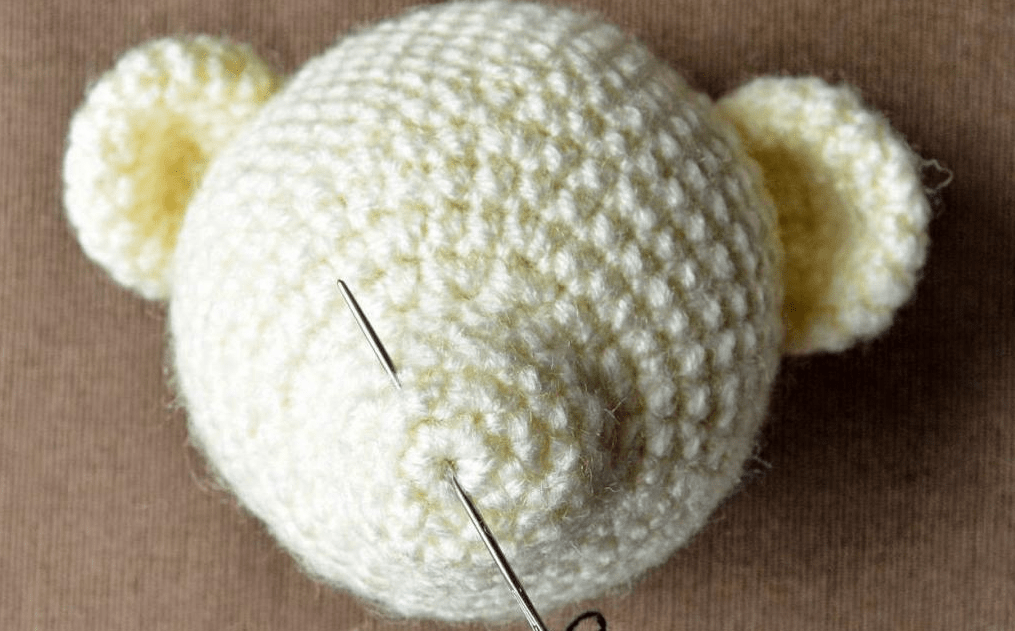
Bring the needle out at the center of the future nose
Treat the first point as the center of the nose. The whole shape will be built from it, so check its position against the eyes and the middle of the face before you continue.
Start embroidering from the center of the nose to keep the shape symmetrical.
Symmetry check
Before tightening the thread, look at the toy straight from the front. If the nose center is off, it is much easier to fix now than after the dense embroidery is in place.
Embroider a dense nose
Work vertical stitches in a fan shape
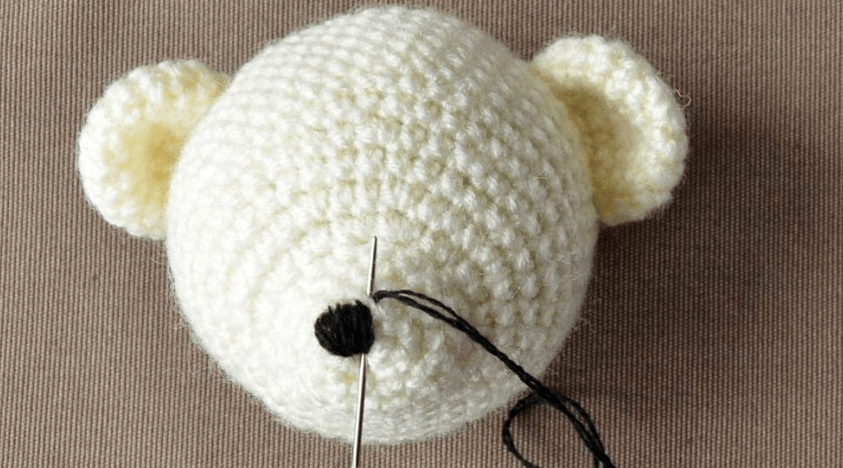
Embroider the nose with vertical stitches, gradually spreading them out like a fan from the center point. The stitches should sit next to each other without large gaps. Secure the thread under the stitches you have already made so the front stays clean.
Vertical stitches gradually form a dense nose.
Do not pull too tightly
If you pull the thread too tightly, the crocheted fabric around the nose can pucker. Tighten the stitches moderately and check the shape after each pass.
Shape the mouth
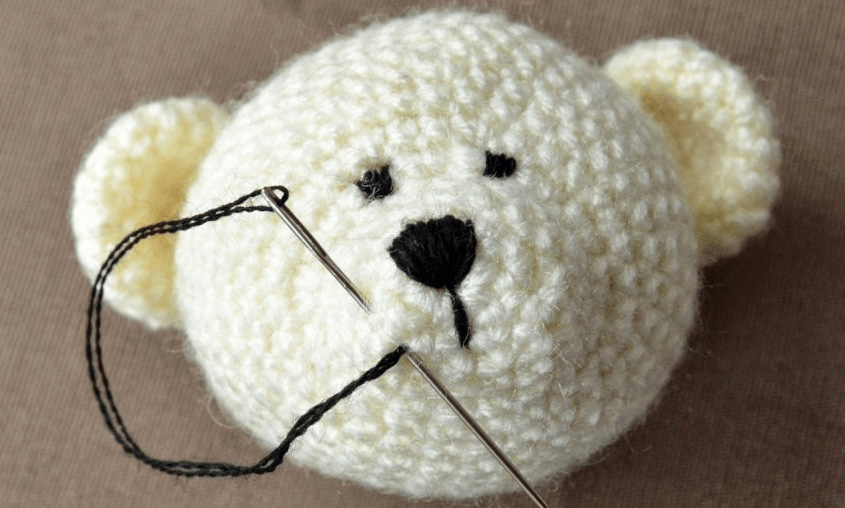
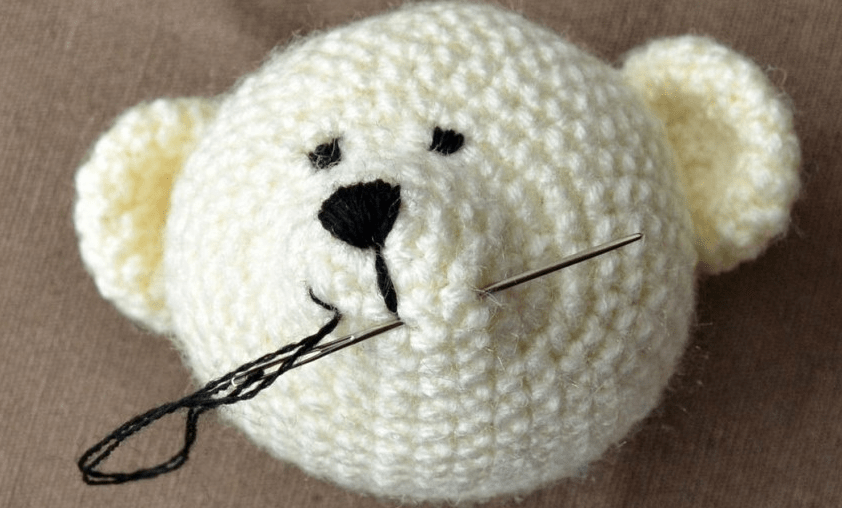
After the nose, make the vertical bridge and the two sides of the mouth. Work from the center so the line stays calm and symmetrical.
Make one vertical stitch downward
From the lower point of the nose, make one vertical stitch downward. It connects the nose and mouth and becomes the center axis of the face.
The central bridge connects the nose and mouth.
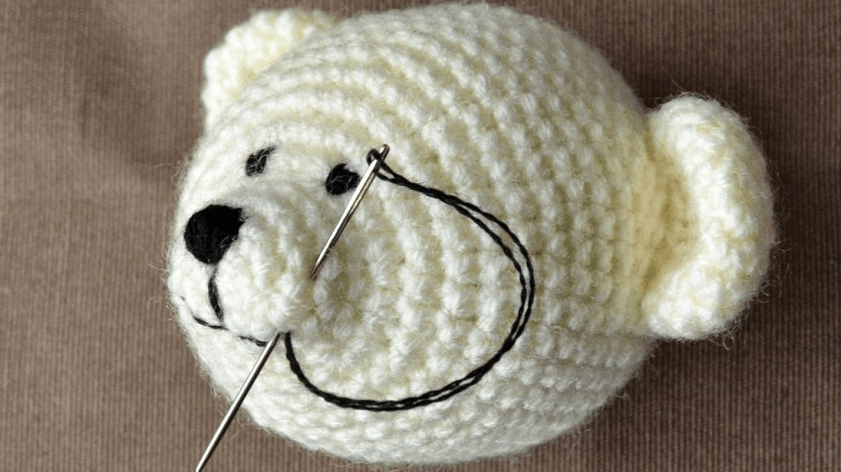
Embroider the first side of the mouth
To form the right side of the mouth, make the far stitch first. Do not make the curve too long: a short, soft line usually looks neater on a small toy.
One side of the mouth is shaped first from the center point.
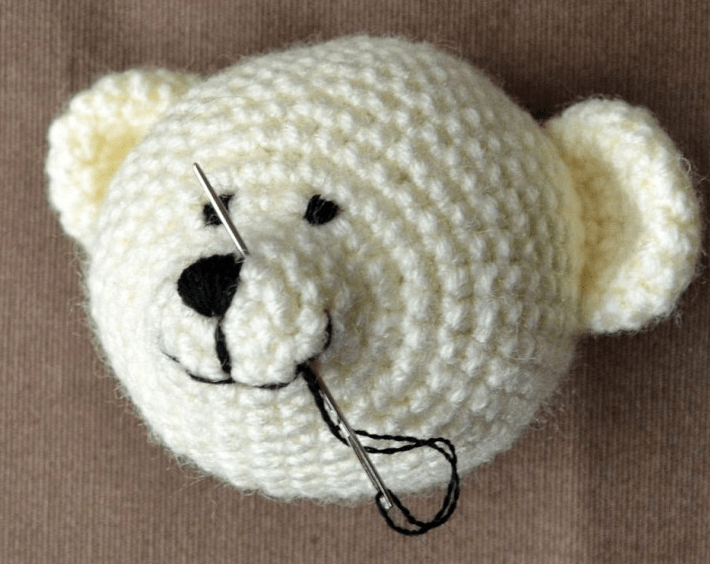
Return to the center and repeat on the other side
Bring the needle out on the opposite side and make the near stitch, then the far stitch for the second half of the mouth. Compare both sides for height and length while the thread can still be adjusted.
The second side of the mouth repeats the first in length and height.
Secure the thread invisibly
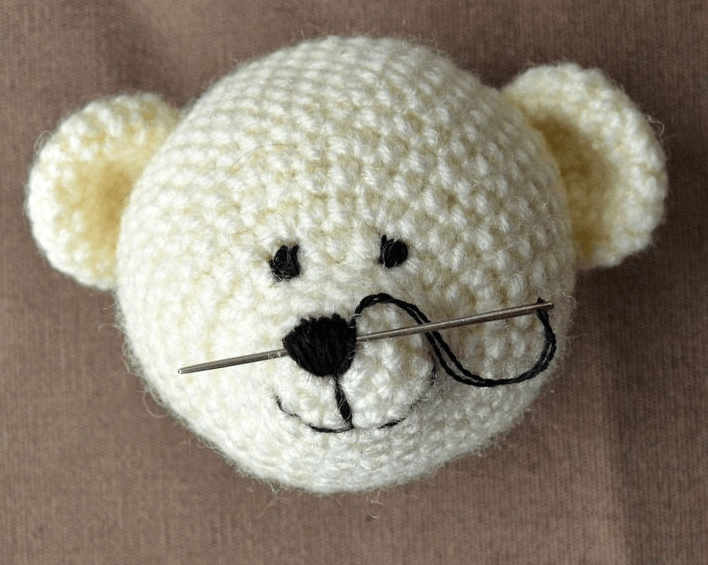
Hide the tail under the embroidered nose
To keep the finishing invisible, pass the needle through the face toward the nose and hide the floss tail under the dense layer of stitches. Under the nose, the thread holds more securely and does not spoil the look of the mouth.
The thread tail is easiest to hide under the dense nose stitches.After securing, the thread should not be visible on the front of the toy.
Secure extra carefully for a child’s toy
If the toy will be given to a child, do not leave long thread tails and check that the thread does not pull out under gentle tension.
Finish and variations
Finish
Check the face from the front and side
After securing the thread, look at the toy in daylight: the nose should be dense, the mouth should be symmetrical, and no thread tails should be visible on the front.
Save the expression chart
Keep the nose and mouth chart for future toys: by changing the nose shape, color and smile length, you can quickly create different characters.
Variations
Bear or wolf pup
For a classic bear or wolf pup, use black embroidery floss and make the nose denser.
Bunny or kitten
For a bunny or kitten, use pink thread and keep the smile short for a softer expression.
The base yarn is visible between the vertical stitches.
Likely cause
The stitches are spaced too far apart, or the thread is too thin for the chosen nose shape.
How to fix it
Add several more vertical stitches over the gaps, working from the center toward the edges. If the thread is very thin, use more strands of embroidery floss.
The mouth is crooked
Problem
One side of the mouth is higher, longer or pulled tighter than the other.
Likely cause
The work was not started from the center point, or the thread tension is uneven.
How to fix it
Go back to the central bridge, loosen or restitch the problem side. Next time, mark the outer points of the mouth first with a removable marking tool.
The thread tail is visible after securing
Problem
The end of the floss is visible near the mouth or sticks out of the fabric.
Likely cause
The thread was secured on an open part of the face instead of under the dense layer of the nose.
How to fix it
Pass the needle through the face toward the nose and hide the thread tail under the stitches that are already embroidered. Cut the thread only after checking that it does not pull out.
The expression does not suit the toy
Problem
The face looks too stern, sad or out of character.
Likely cause
The mouth shape or nose color was chosen without testing it against this specific toy.
How to fix it
Before embroidering, compare several options on the chart. For a softer expression, choose a short smile and do not make the nose too large.
?FAQ
What thread is best for embroidering an amigurumi face?
Embroidery floss or another strong embroidery thread works best. Choose the thickness to match the size of the toy: on a small face, thread that is too thick can quickly overpower the shape.
Can I embroider the nose in a color other than black?
Yes. The original master class notes that bears and wolf pups often get a black nose, while bunnies and kittens can look softer with a pink one.
Why start the nose from the center point?
The center point sets the symmetry. If you start from an edge, it is easier for the shape to skew, especially when the nose is embroidered in a fan of stitches.
Where should I secure the thread at the end?
The most invisible method is to take the thread tail under the dense embroidered nose. The thread hides there better than next to the open line of the mouth.
Your project
Log in to track your project, attach photos, and publish your result into the shared feed.

 BeginnerFree