Sock Toe on Knitting Needles: The Ribbon and Spiral Methods
Two ways to knit a neat sock toe: the ribbon method, with decreases worked every other round and then every round, and the spiral method, with the decrease shifted over by one stitch each time. The source shows an example for 16 stitches per needle and binding off the last 4 stitches.
IntermediateFree
Translated
Things you will learn
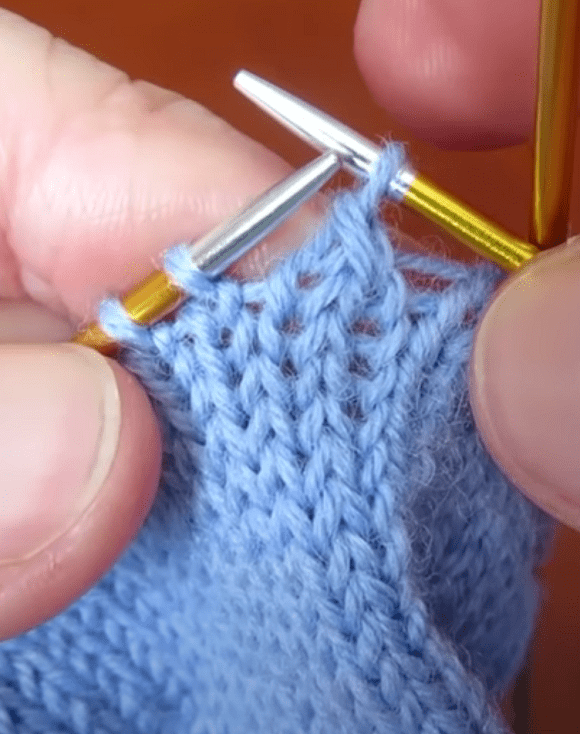
The ribbon toe is knit in the round in knit stitch, with the decreases running along a visible line between the top of the sock and the sole.
For the ribbon toe, divide the stitch count on the needle by 2: in the example, 16 stitches give 8 decreases worked every other round, followed by 8 more decreases worked every round.
At the start of a round, work the decrease as 2 stitches together with a left lean; at the end of a round, work it with a right lean.
The spiral toe is trickier: the decreases are worked on every needle every other round, and shift over by 1 stitch each time.
What you'll get
The toe comes out neat and rounded, without noticeable holes where you decrease. The ribbon method leaves visible decrease lines along the sides, while the spiral method creates a shifted decrease pattern and takes more attention.
Materials and tools
Materials
A sock knit up to the toe, the top of the foot and the sole are already split across the needles
Working yarn, the source mentions bright yarn or an original pattern for a gift version
Tools
Needles for knitting a sock in the round, the source describes working across 1 to 4 needles
Stitch markers, for the start and end of needle 1, the start of needle 2, and the end of needle 3
Preparation
Separate the top and the sole
To make things simpler, the source suggests moving the stitches from the top of the sock onto one needle, and leaving the stitches from the sole on two needles.
Knit the toe in the round in knit stitch
In the source, the toe section is always worked in the round in knit stitch. This applies to the decreases described below.
Choose your method
The ribbon toe is easier to keep track of using the side lines. The source considers the spiral version better suited to more experienced knitters: it takes attention and skill at shifting the decreases.
Method 1: The Ribbon Toe
The defining feature of the ribbon toe is decreases worked along the line that separates the top of the sock from the sole.
Place your markers
Attach markers at the start and end of needle 1, at the start of needle 2, and at the end of needle 3. These points help you keep track of the decrease lines.
Markers help keep track of the decrease lines between the top of the sock and the sole.
Split the stitches on the needle in half
The decreases happen in two stages. First, divide the stitch count on the needle by 2. The source gives this example: 16 ÷ 2 = 8. That means you work 8 decreases every other round, then the next 8 decreases every round.
Why two stages
This order gives you a rounded, neat toe instead of a sharp point.
Work the decreases with the right lean
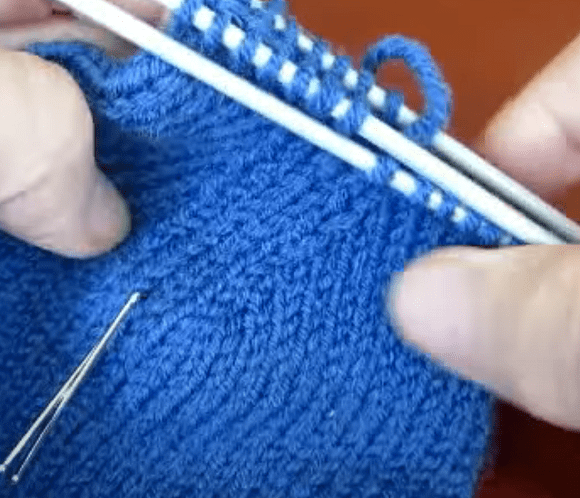
If the decrease falls at the start of a round, knit 2 together with a left lean. If it falls at the end of a round, knit 2 together with a right lean. Knit the round following each decrease round plain, with no decreases.
The decreases are worked with the right lean at the start and end of the round.
After the first half, decrease every round
Once you've worked the every-other-round decreases from the first half of the calculation, move on to decreasing every round. In the example, after 8 decreases every other round, you work the next 8 decreases in a row.
Bind off the last 4 stitches
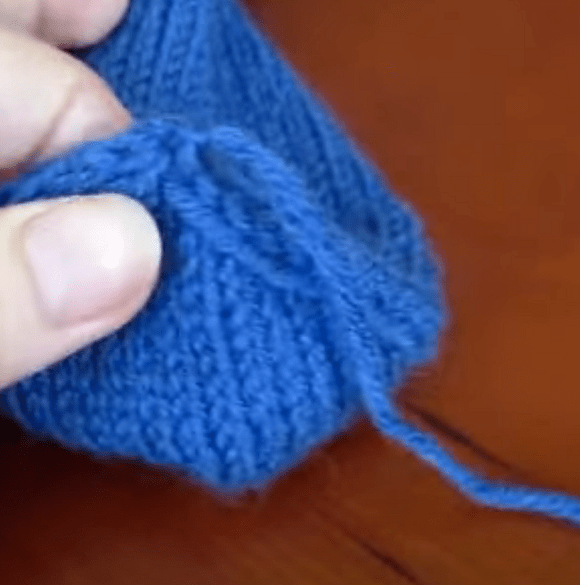
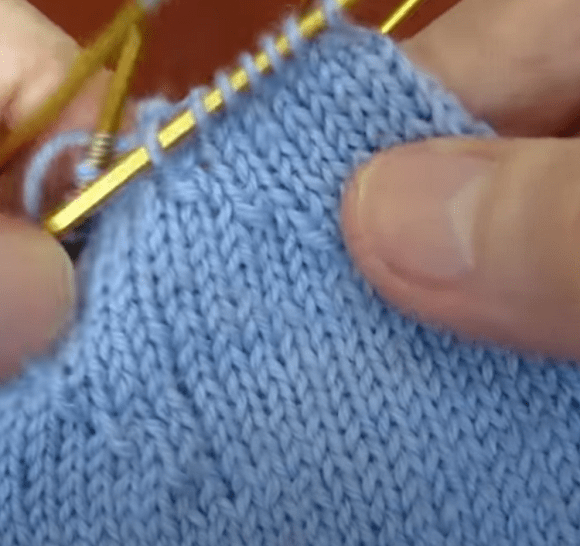
When 4 stitches remain on the needle, cut the yarn, pull it through the remaining stitches, and secure it on the wrong side.
When 4 stitches remain, the yarn is pulled through them and secured on the wrong side.
Method 2: The Spiral Toe
The spiral toe is trickier than the ribbon toe: the decreases happen on every needle every other round and shift over by one stitch each time.
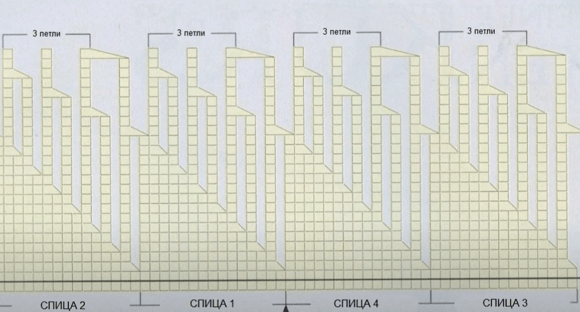
Check the chart
The source suggests following a chart for the spiral toe. It shows how the decrease shifts across the stitches on each needle.
The spiral toe is shaped by shifting decreases.The chart shows how the decrease shifts across the needles in sequence.
Skill level
This method suits more experienced knitters better, since it takes attention while you work.
Round 1: decrease at the start of every needle
In the first round, knit 2 together with a left lean, then knit the rest of the stitches on the needle plain. Repeat this on needles 2 through 4.
The first round of the spiral toe starts with a decrease on every needle.
Round 2: shift the decrease over by 1 stitch
In the second round, the decrease shifts over by 1 stitch: knit 1, then knit 2 together with a left lean.
Don't lose track of the shift
The key to the spiral toe is shifting the decrease over by one stitch every time, instead of repeating it at the same spot.
Keep moving the decrease along the needle
In the third round, knit 2 plain stitches, then knit 2 together with a left lean. Keep following this pattern until the decrease lands on the last two stitches of the needle.
In each following decrease round, the decrease shifts over by one stitch.
Return to the start of the chart and close the toe
After decreasing on the last two stitches of the needle, go back to the start of the chart: work the next decrease on the first two stitches again. Finish the same way as in the first method: cut the yarn, pull it through the last 4 stitches, bring it through to the wrong side, and secure it.
Finishing and the Second Sock
After closing the toe, it's important to repeat the same calculation and the same sequence on the second sock.
Check the shape of the toe
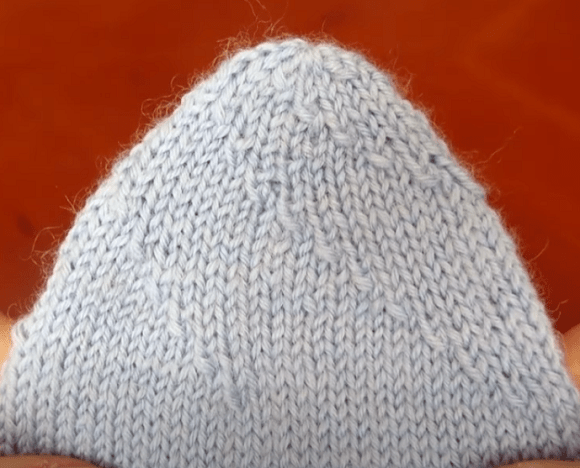
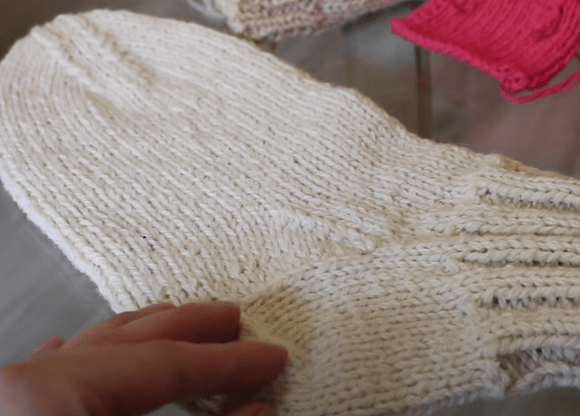
The toe should sit neatly on your foot, without unsightly holes where you decreased. If the decrease lines look even and the yarn is secured on the wrong side, the first sock is done.
The finished toe, with no noticeable holes where the decreases were worked.The toe should sit neatly on your foot.
Knit the second sock the same way
Knit the second sock identically. The source specifically notes that you don't need to redo any calculations: use the same method and the same decrease count.
Consider an idea from the discussion
A comment notes that this method looks good on light-colored yarn and could work for mittens. Treat this as an idea worth trying, not as a separate pattern.
Finish and variations
Finish
Secure the yarn on the wrong side
After pulling the yarn through the last 4 stitches, bring it through to the wrong side and secure it. This is the shared final step for both methods.
Variations
The ribbon toe
The easier option to keep track of: the decreases run along a visible line between the top of the sock and the sole.
The spiral toe
A method that needs more attention: the decrease on every needle is worked every other round and shifts over by one stitch each time.
An idea for mittens
From the discussion: this method could work for mittens, especially in light-colored yarn, though it would need its own test fitting.
The toe looks messy even though the decreases are worked correctly.
Likely cause
The decreases may have been worked without the right lean, or too abruptly, without plain rounds during the first stage of the ribbon toe.
How to fix it
For the ribbon toe, keep to the two stages: decreases every other round first, then every round. At the start of a round, work 2 together with a left lean; at the end, with a right lean.
The ribbon toe comes out too pointed
Problem
The end of the sock doesn't round off.
Likely cause
The number of every-other-round and every-round decreases was calculated incorrectly.
How to fix it
Divide the stitch count on the needle by 2. In the source's example, 16 stitches give 8 decreases every other round and 8 decreases every round.
The ribbon decrease lines drift
Problem
The decreases don't run along the line between the top of the sock and the sole.
Likely cause
The start and end of the relevant needles weren't marked.
How to fix it
Place markers at the start and end of needle 1, the start of needle 2, and the end of needle 3, as the source specifies.
The spiral toe loses its pattern
Problem
The decreases don't form a neat shift.
Likely cause
The decrease repeats at the same spot instead of shifting over by one stitch.
How to fix it
Follow the rounds from the source: round 1 — decrease right away; round 2 — knit 1, then decrease; round 3 — knit 2, then decrease; and so on the same way until the last two stitches on the needle.
The second sock doesn't match the first
Problem
The toe on the second sock looks different.
Likely cause
The decreases were recalculated or the sequence was changed.
How to fix it
Knit the second sock identically to the first. The source states that no extra calculations are needed for the second sock.
?FAQ
Which toe is easier to knit first?
The ribbon toe is easier to keep track of: the decreases run along a visible line between the top of the sock and the sole. The source describes the spiral version as better suited to more experienced knitters.
How do I calculate the decreases for the ribbon toe?
Divide the stitch count on the needle by 2. In the source's example, 16 stitches on the needle give 8 decreases every other round, followed by 8 more decreases every round.
Which way should the decreases lean?
If the decrease falls at the start of a round, knit 2 together with a left lean. If it falls at the end of a round, knit 2 together with a right lean.
When do I bind off the last stitches of the toe?
When 4 stitches remain on the needle, cut the yarn, pull it through those stitches, bring it through to the wrong side, and secure it.
Do I need to recalculate for the second sock?
No. The second sock is knit identically to the first — no extra calculations are needed.
Your project
Log in to track your project, attach photos, and publish your result into the shared feed.

 IntermediateFree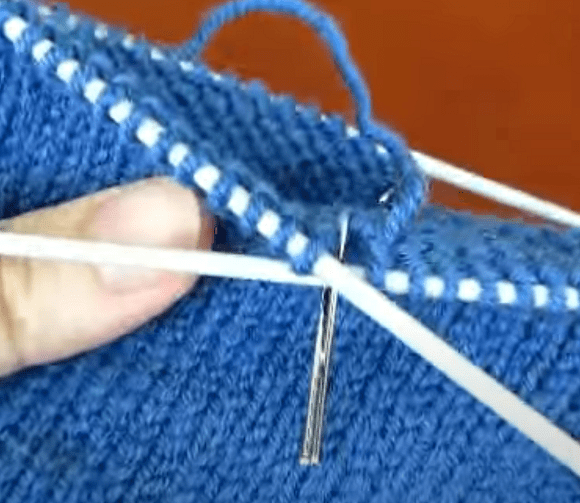


Nice method if you're knitting with light-colored yarn. I think it would work for mittens too — I need to try it.