Mosaic Crochet: Charts, Rows, Working in the Round, and from the Center
Learn mosaic crochet: how to read the chart, work it in rows, crochet it in the round, and expand it from the center — all without long floats on the wrong side.
BeginnerFree
Translated
Things you will learn
Mosaic crochet, sometimes called lazy jacquard, creates a colorwork pattern without long floats on the wrong side.
The principle is similar to knitting: you work two rows in one color, then two rows in another.
Empty chart squares get filled in on the next repeat: instead of a regular stitch, you work a double crochet two rows below.
You can work this technique in classic turned rows, from the center with increases at four corners, or in the round for rugs.
What you'll get
Mosaic crochet gives you a crisp colorwork pattern with a tidy wrong side. This tutorial shows how to read the chart, where to work chain-stitch gaps, and how to close those gaps with a double crochet that catches the bar two rows below.
Materials and tools
Materials
Yarn in your first color, 1 skein, In the classic version, you work 2 rows in one color.
Yarn in your second color, 1 skein, The next 2 rows are worked in the other color; for the in-the-round version, you can use more than two colors.
Tools
Crochet hook, Choose a size that suits your yarn.
Mosaic pattern chart, Needed for reading the colors, the repeat, the gaps, and the spots where a stitch is worked two rows below.
Files and resources
Video tutorial: mosaic crochet from the centerIn the source material, the video serves as a detailed tutorial for the from-the-center method.Video tutorial: mosaic crochet from the center
Preparation
Prep your chart and colors
Choose a chart with a clear repeat and at least two contrasting colors. In the source material, dark X's mark one color and light X's mark the other.
Read the mosaic crochet chart
In the sample, each square stands for one single crochet stitch. In more complex patterns, arrows mark the repeat — the section that repeats across the row.
Figure out the color key
Dark X's on the chart mark one color, light X's mark the other. Don't just look at the color of each square — also watch the repeat arrows: that's the section that repeats across the row.
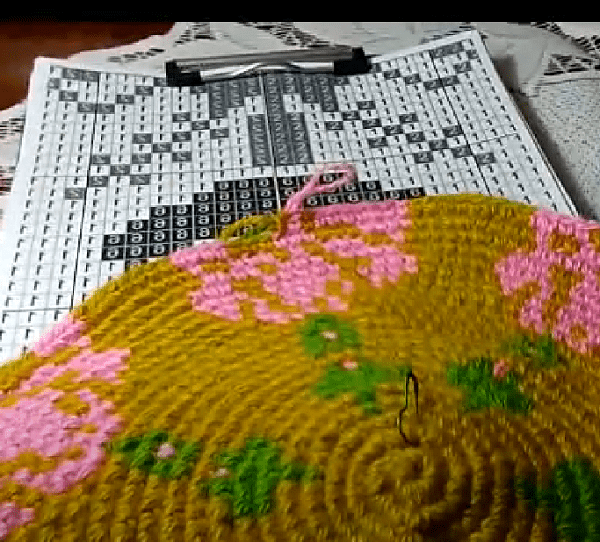
The chart shows the colors, the repeat, and where to work stitches two rows below.
Spot where to work a stitch two rows below
A small arrow means you work a double crochet two rows below the current row instead of a regular single crochet. This fills in the gaps and makes the pattern crisp.
Don't mix up the gap and the fill-in stitch
An empty gap is first formed with chain stitches, then closed on the next repeat with a double crochet that catches the bar below it.
Work the classic mosaic pattern in rows
The classic version is worked in turned rows. You switch colors every 2 rows, and the wrong-side rows are worked in the same color as the right-side row before them.
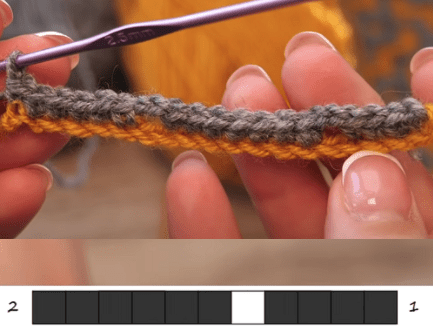
Row 1: work the base row in your first color
Work a row of single crochet in your first color, turn your work, and chain 1 to start the next row.
Row 2: start reading the chart in your second color
In the source example: 4 stitches in your second color, 1 stitch in your first color, 6 stitches again in your second color. Next, work 4 single crochets, and where the chart shows one blank square, chain 2 instead. If the chart shows 2 blank squares in a row, chain 3 instead. Then work 6 single crochets and continue this way to the end of the row.
Blank squares in the row are formed with chain stitches.
Row 3: repeat as the wrong-side row in the same color
Work row 3, and every wrong-side row after it, exactly like the right-side row, in the same color.
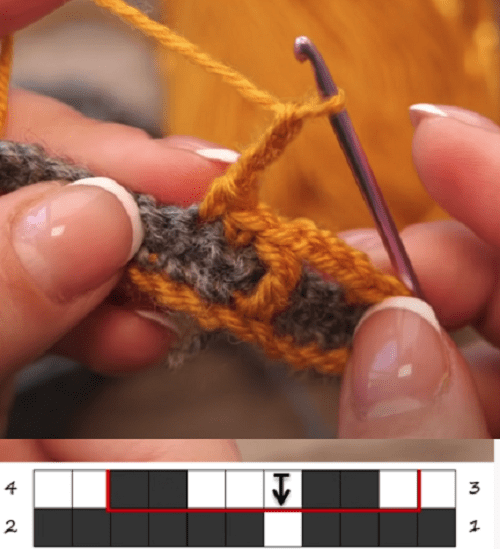
Row 4: fill in the gaps
Following the chart: 2 stitches in your first color, 2 gaps, 3 stitches in your first color, 2 gaps, and so on, repeating the pattern. Where the chart shows an arrow, work 2 single crochets, chain 3, and 1 double crochet, catching the chain bar two rows below.
The double crochet closes the gap by catching the bar below it.
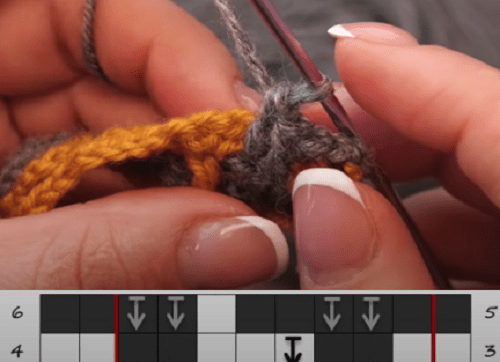
Row 5 onward: keep following the pattern
Work every stitch shown on the chart as a single crochet, and work chain stitches wherever the chart shows a gap. From row 6 onward, keep following the same principle.
The following rows continue with the same principle.
Work the mosaic pattern from the center
This version works well for a decorative pillow cover, a bedspread, a throw, or a chair cushion. In principle, it's similar to a granny square.
Expand the fabric at four corners
The fabric grows outward from the center at exactly 4 corners. You switch yarn colors the same way as in the classic version: every 2 rows. This gives you a pattern on the right side and a tidy wrong side.
The fabric expands outward from the center at four corners.
Use the video for a detailed walkthrough
In the source material, the from-the-center version has its own dedicated video tutorial. It's helpful if you want to see the fabric expanding in real time.
Work mosaic crochet in the round
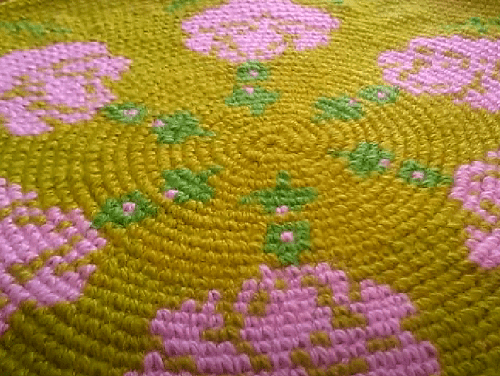
The in-the-round version is used for rugs and other pieces where the fabric expands outward in a circle.
Switch yarn every 2 rows
In the in-the-round version, you also switch yarn every 2 rows. You can use more than two colors, and the chart marks where to increase and how many stitches to add to expand the fabric.
In the in-the-round version, the chart shows the increases and color changes.
Hide the unused yarn on the wrong side
To avoid floats, catch every yarn that isn't being worked in the current row and carry it along under your hook. This makes the fabric denser and the wrong side neater.
Watch your tension
If you pull the unused strands too tight, the circular piece can pucker. If you leave them too loose, the wrong side will look uneven.
Where to use mosaic crochet
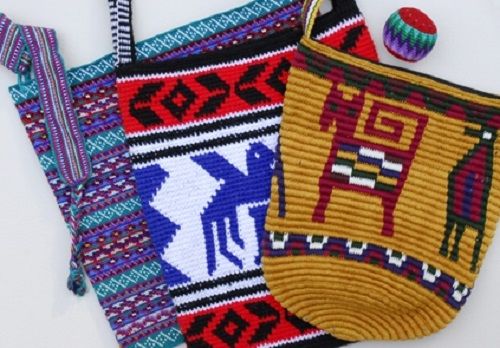
The source material suggests using this technique for both accessories and home decor. The photos in this section are shown as examples of finished pieces.
Bags, cases, and wallets
Mosaic patterns work great for bags, phone cases, and wallets: the pattern comes out dense and eye-catching.
Examples of bags and accessories with a mosaic pattern.
Cowls, hats, mitts, and scarves
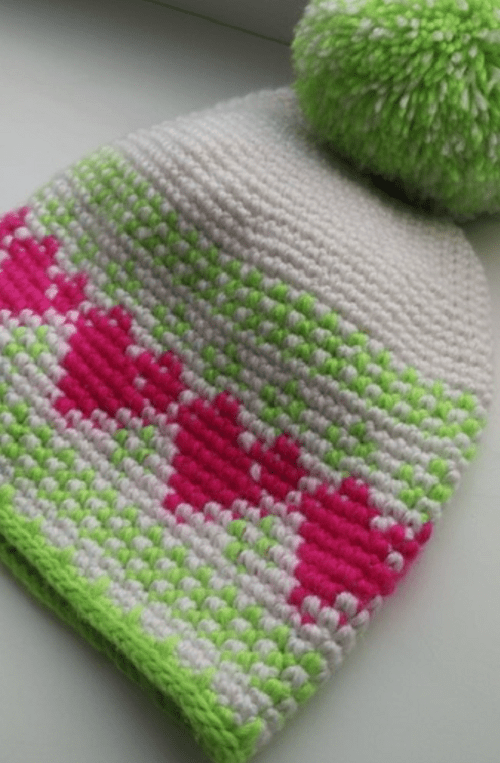
You can use the technique for seamless cowls and hats worked in the round, as well as for mitts, scarves, and wraps.
The mosaic technique works for hats, cowls, and mitts.
Pillows, throws, and yarn scraps
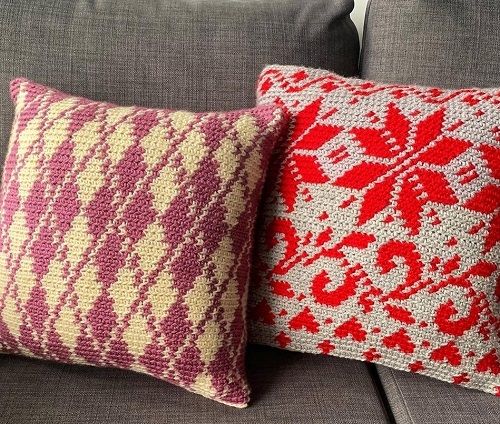
Mosaic crochet looks great on throw pillows, including for a kid's room. This technique is also a great way to use up leftover yarn and make everything from bracelets to clothing for the whole family.
Mosaic crochet looks great on home decor pieces.
Finish and variations
Finish
Check your swatch
After a few repeats, check both the right side and the wrong side: the pattern should look crisp, and the unused yarns shouldn't form long floats.
Variations
More than two colors
In the in-the-round version, you can use significantly more than two colors. It's important to hide the unused yarns on the wrong side so the fabric stays neat.
From the center for home decor
The from-the-center version is especially handy for pillow covers, bedspreads, throws, and cushions, where the fabric grows outward from the middle.
After the chain-stitch gaps, the pattern looks full of holes instead of mosaic.
Likely cause
The double crochet two rows below was skipped at the spot marked with a small arrow.
How to fix it
First form the gap with chain stitches, then close it on the next repeat with a double crochet, catching the chain bar two rows below.
The pattern gets thrown off across the row
Problem
The repeated pattern doesn't match the chart.
Likely cause
The repeat wasn't read as a repeating section, or the blank squares were miscounted.
How to fix it
Mark the repeat on the chart with arrows separately. For one blank square, chain 2; for two blank squares, chain 3, as noted in the source material.
Floats show up on the wrong side of the in-the-round piece
Problem
The unused yarns hang loose on the wrong side.
Likely cause
The yarns not being worked in the current row aren't being carried under the hook.
How to fix it
In the in-the-round version, catch and carry the unused yarns under your hook. This removes the floats and makes the fabric denser.
?FAQ
What is mosaic crochet?
It's sometimes called lazy jacquard crochet: a colorwork pattern created without long floats on the wrong side. Usually you work two rows in one color, then two rows in another.
How do you read a mosaic crochet chart?
Each square on the chart represents one single crochet stitch. Dark and light squares mark different colors, arrows highlight the repeat, and a small arrow marks where to work a double crochet two rows below.
What do I do with the blank squares on the chart?
In the source material, one blank square gets 2 chain stitches, and two blank squares in a row get 3 chain stitches. Later, the gap is closed with a double crochet that catches the bar two rows below.
Can you work mosaic crochet in the round?
Yes. In the in-the-round version, you switch yarn every 2 rows, the chart shows where to increase and how many stitches to add, and you carry the unused yarns under your hook.
What kinds of projects suit mosaic crochet?
The source material lists bags, phone cases, wallets, cowls, hats, mitts, scarves, wraps, throw pillows, blankets, and cushions.
Your project
Log in to track your project, attach photos, and publish your result into the shared feed.
I mastered lazy jacquard on knitting needles a long time ago — it's a real lifesaver for knitting socks. I haven't tried it with a crochet hook yet, I'll have to learn this new technique.

 BeginnerFree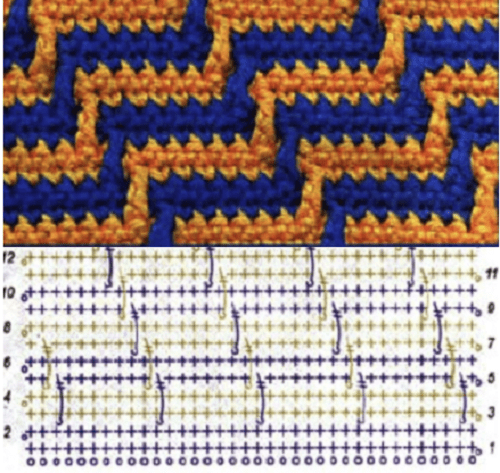


I mastered lazy jacquard on knitting needles a long time ago — it's a real lifesaver for knitting socks. I haven't tried it with a crochet hook yet, I'll have to learn this new technique.