A step-by-step tutorial showing how much yarn to buy, how to calculate stitches from a swatch, how to knit the ribbing and stockinette stitch, how to work the crown decreases, and how to properly wash a fluffy hat.
BeginnerFree
Translated
Things you will learn
For a fall women's hat, about 100 g of yarn with roughly 300 m of yardage is enough; for a winter version, budget for about 50 g more.
Stitches are calculated from a washed swatch: multiply the gauge per cm by the head circumference, then account for how much the fabric stretches.
The hat is knit in the round: first 1x1 ribbing on size 3.5 needles, then stockinette stitch on size 4.5 needles up to about 20 cm before the decreases.
A final wet finish opens up the yarn's fluff and makes the piece softer and warmer.
What you'll get
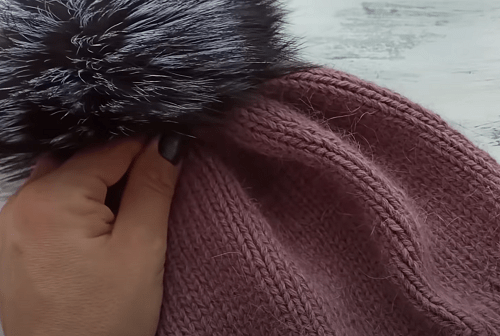
You'll get a simple fluffy hat without a cuff. The shape holds thanks to 1x1 ribbing at the bottom, the main body is knit in stockinette stitch, and the crown closes over a few rounds of decreases. You can leave the style plain or decorate it with a pompom and a decorative tag.
The pompom can be attached with a ribbon or a snap button.
Materials and tools
Materials
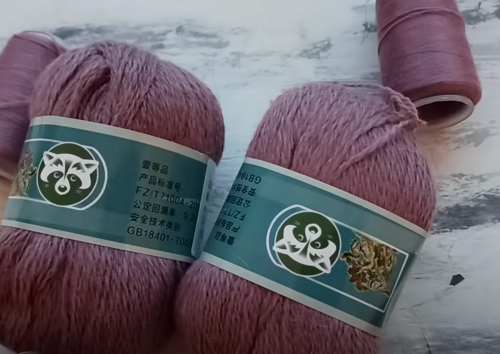
Mink-down, mohair, or angora yarn, 100 g, For a fall hat, the example uses yarn with about 300 m of yardage per 100 g.
Fine spool thread in a matching color, 2 strands, Used together with the main yarn if it comes included in the set or matches the shade.
A mild detergent or hair shampoo, Needed for the final wet finish.
A terry towel, 1 pc., Helps blot out extra moisture without wringing the piece.
A pompom or decorative tag, Optional, used to decorate the finished hat.
Tools
Size 3.5 circular needles, For the 1x1 ribbing.
Size 4.5 circular needles, For the main body in stockinette stitch.
Double-pointed needles, Handy for the last rounds of the crown, once there aren't many stitches left.
A marker for the start of the round, Helps you keep track of where the round starts during the decreases.
A needle with a large eye, For gathering the remaining stitches and securing the yarn end.
Before calculating your stitches, knit a swatch in plain stockinette stitch, wash it in warm water, and lay it flat to dry. This matters for fluffy yarn: after washing, the fabric can open up and its gauge can shift a little.
Calculate Your Yarn and Stitch Count
The example gives the calculation for a women's hat with a 56 cm head circumference. If your size is different, keep the formula itself and recalculate the stitches from your own swatch.
Work out how much yarn you need
For a fall hat, 1 skein weighing 100 g with about 300 m of yardage is enough. Knit it held double, adding 2 fine spool threads in a matching color if they come included with the yarn. For a winter version, use about 50 g more and knit it held triple or quadruple.
The fall version uses about 100 g of yarn; the winter version needs more.
Check the thickness before casting on
How many strands you hold together depends on the specific yarn's thickness. If the fabric comes out loose, knit your swatch with more strands.
Work out your gauge from the swatch
Measure how many stitches fit into 10 cm of your swatch. For example, if you get 18 stitches in 10 cm, the gauge is 1.8 stitches per cm.
Don't calculate from an unwashed swatch
Mohair, angora, and mink down change noticeably after a wet finish, so calculating from a dry, unfinished swatch can give you an inaccurate size.
Calculate your cast-on
Multiply your head circumference by the gauge. For 56 cm and a gauge of 1.8, that's 56 × 1.8 = 100 stitches. Then account for how much the fabric stretches: for a looser knit, subtract about 10%, or around 10 stitches. In the example, that leaves 90 stitches.
An even number for the ribbing
Since the hat starts with 1x1 ribbing, the final stitch count needs to divide by 2. Round it to the nearest even number if you need to.
Knit the Ribbing and the Main Body
Cast on and knit the ribbing
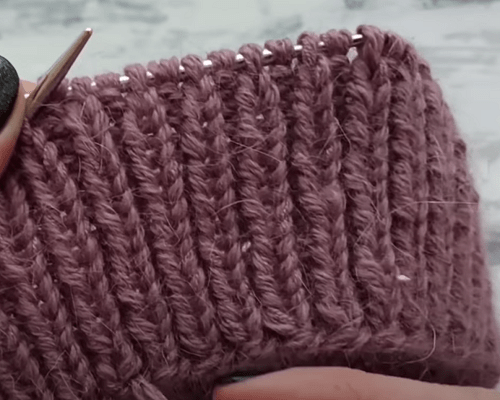
For the triple-strand version, cast on 90 stitches on size 3.5 circular needles, join into a round, and knit 1x1 ribbing with no seam. The ribbing should be 5-7 cm tall.
1x1 ribbing shapes the bottom edge of the hat.
Switch to stockinette stitch
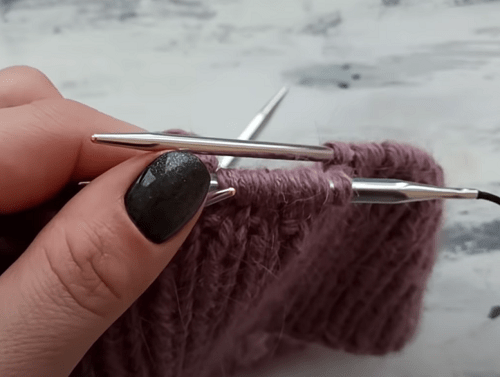
Change to size 4.5 needles and knit every stitch from here on in stockinette stitch, in the round. Keep going until you reach about 20 cm from the start of the hat to the start of the decreases.
After the ribbing, the main body is knit in stockinette stitch.
Keep an eye on the height before the decreases
If you want a deeper fit, try the hat on before starting the crown. In the example, about 20 cm is worked before the decreases.
Shape the Crown
The decreases are worked in the round. Mark the start of the round so you don't lose track of the sequence.
Work the first decrease round
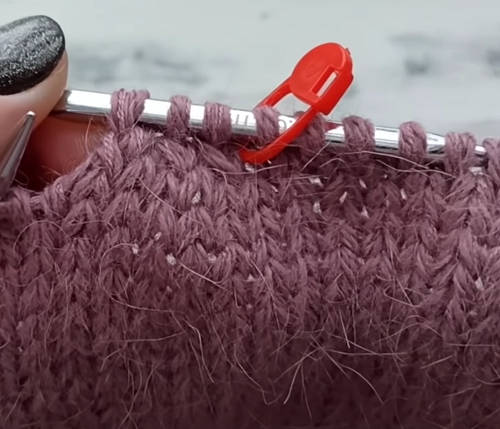
In the first round after the marker, repeat: knit 2 together, knit 1. Knit this way to the end of the round.
The marker helps you track the decreases around the round without losing your place.
Work the remaining crown rounds
On round 2 and every even round, knit plain. On round 3, knit every stitch as 2 together. On round 5, switch to double-pointed needles and again knit every stitch as 2 together.
Switch to double-pointed needles in time
Once there aren't many stitches left, circular needles start getting in the way. Double-pointed needles help you close the crown evenly without stretching the stitches.
Gather the remaining stitches
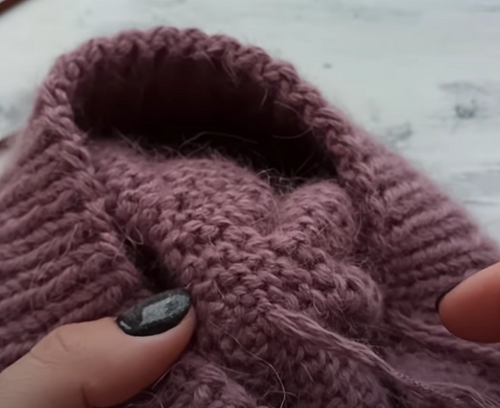
Gather the remaining stitches with the working yarn using a needle, and secure the yarn end on the wrong side.
The remaining stitches are gathered with the working yarn and secured from the inside.
Finish and variations
Finish
Wet finishing
Be sure to wash the finished hat with a mild detergent or hair shampoo. Then wrap it in a terry towel and roll it up to blot out extra moisture. After this treatment, fluffy yarn becomes fuller and warmer.
Decoration
For a more finished look, add a pompom made of natural fur, attaching it with a ribbon or a snap button. For a plainer version, you can leave the hat undecorated or sew on a small tag.
Variations
A warmer winter version
For a winter hat, use about 50 g more yarn and knit it held triple or quadruple. Be sure to check your swatch's gauge first, since the stitch count may change.
A cuffed version
If you want a hat with a cuff, use this tutorial as a base for your calculations, and check the extra video in the resources section for the cuffed version.
After casting on, the fabric can stretch more than expected.
Likely cause
The stretch percentage wasn't factored in, or the calculation was done without a finished swatch.
How to fix it
First calculate your stitches from a washed swatch, then subtract about 10% for how the fabric stretches. For 1x1 ribbing, round the total to an even number.
The crown is awkward to close
Problem
It gets hard to knit the last decrease rounds on circular needles.
Likely cause
There aren't enough stitches left for the length of the cable.
How to fix it
On decrease round 5, move the knitting onto double-pointed needles, knit the remaining stitches together in pairs, then gather them with a needle.
The yarn didn't fluff up and looks flat
Problem
The finished hat looks less fluffy than expected.
Likely cause
The final wet finish was skipped, or the piece was wrung out hard after washing.
How to fix it
Wash the hat with a mild detergent or hair shampoo, wrap it in a terry towel, and roll it up to blot out extra moisture without wringing.
?FAQ
How much yarn do I need for a hat like this?
For the fall women's hat in the example, 100 g of yarn with about 300 m of yardage is enough. For a winter version, it's better to budget for about 50 g more.
How many stitches do I cast on for a 56 cm head circumference?
In the example, the gauge from the swatch is 1.8 stitches per cm. 56 × 1.8 = 100 stitches. After subtracting about 10% for stretch, that leaves 90 stitches — this figure is for the triple-strand version.
Why does the stitch count need to be even?
The bottom edge of the hat is knit in 1x1 ribbing, so the stitches need to divide by 2. If your calculation gives an odd number, round it to the nearest even one.
Why wash the finished hat?
A wet finish opens up fluffy yarn, makes the hat softer, and helps remove extra moisture without deforming it, as long as you use a towel instead of wringing.
Your project
Log in to track your project, attach photos, and publish your result into the shared feed.

 BeginnerFree