A step-by-step tutorial for a knitted rounded hem: work the ribbing, choose how strong the curve should be, set aside the center stitches, shape short rows with yarn overs at the turns, and repeat until every stitch is knitted.
BeginnerFree
Translated
Things you will learn
The curve is shaped with short rows only, with no separate piece and no later edging with a crochet hook or knitting needles.
You can choose any stitch pattern for the main fabric; the author demonstrates the technique in stockinette stitch after the ribbing.
For a gentle lift at the sides, the source suggests leaving 2/3 of the stitches for the center section.
For a noticeable curve, the example leaves 10 center stitches out of 60.
Yarn overs are made at the turns, then knitted together with the stitch, and the process continues until every stitch on the needle has been worked.
What You'll Get
The lower edge of the piece comes out smoothly shaped: the center stays lower while the sides rise. This edge works well for a sweater or any other piece that needs a soft, rounded silhouette.
Materials and tools
Materials
Yarn for the main piece, The source doesn't specify an amount: use the same yarn the piece is knitted from.
Tools
Knitting needles, sized to match your chosen yarn and pattern
Cheesecloth for steaming, the author recommends lightly steaming the finished edge through cheesecloth
Preparation
Choose a Stitch Pattern
The author notes that the pattern for the piece can be anything; the example shows the technique on a sweater knitted in stockinette stitch.
Decide How Strong the Curve Should Be
If you only want to lift the side sections slightly, leave 2/3 of the stitches for the center section. For a noticeable curve, the example leaves 10 center stitches out of 60.
Ribbing and Working Out the Center
First knit the usual lower edge, then decide how many stitches will stay in the center section.
Cast On and Knit the Ribbing
Cast on the required number of stitches and knit the ribbing. In the author's example this is a 2x2 rib, but you can choose any ribbing, including a lace one.
The example begins with 2x2 ribbing.
Choose the Center Stitches
Decide how strong the curve will be. For a gentle lift at the sides, leave 2/3 of the stitches in the center section; for a noticeable curve, the author gives the example of 10 center stitches out of 60.
Example From the Source
With 60 stitches, a noticeable curve starts with 10 center stitches. This is the author's example, not a universal formula for every size.
Short Rows
From here, stitches are brought into work gradually. Yarn overs are used at the turns so the row continues without a sharp break.
Knit the First 25 Stitches and the Center
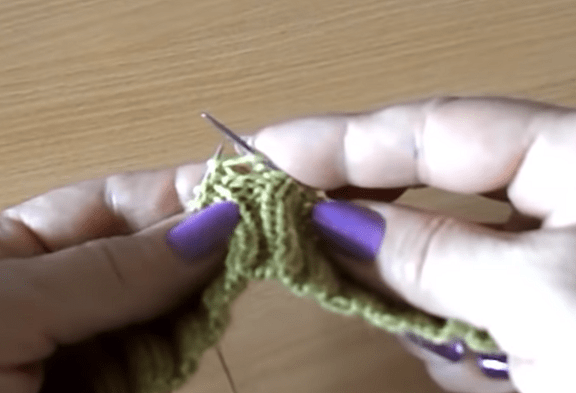
In the example, knit the first 25 stitches in 2x2 ribbing, then switch to stockinette, knit 10 center stitches as knit stitches, and turn the work.
After the ribbed stitches, 10 center knit stitches are worked and the piece is turned.
On the Purl Side, Make a Yarn Over
On the purl row, make a yarn over, purl the 10 center stitches, then purl 3 more stitches from the ribbing. Then turn the work again.
Knit the Yarn Over Together With the Stitch
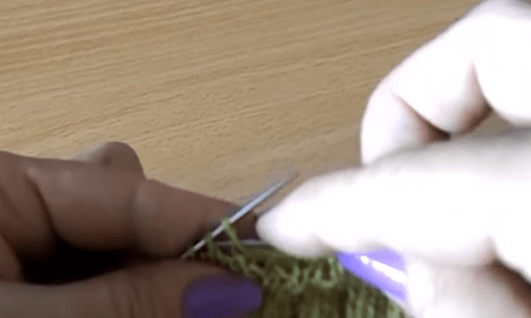
Make a yarn over, then knit all the center stitches. Knit the last stitch — the yarn over from the purl row — together with the stitch, then knit 2 more stitches from the ribbing.
The yarn over from the purl row is knitted together with the stitch.
Don't Skip the Yarn Over
The source specifically describes the yarn over at the turn and knitting it together with the stitch in the next row.
Repeat Until You've Knitted Every Stitch
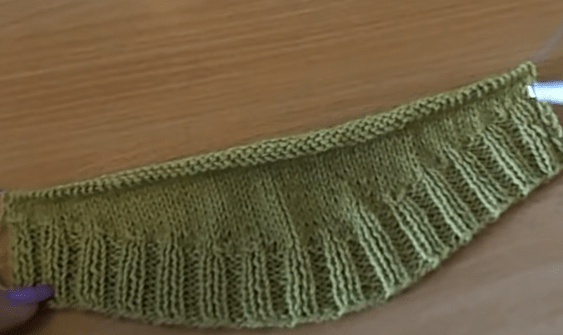
Keep repeating the steps described above, gradually bringing the ribbing stitches into work. Continue until every stitch on the needle has been knitted.
The stitches have been gradually brought into work, and the edge is now rounded.
Finishing
After the short rows, the edge already has the shape you want; all that's left is to carefully set the fabric.
Lightly Steam the Edge Through Cheesecloth
The result is a smoothly shaped rounded lower edge. The author recommends lightly steaming the finished piece through cheesecloth.
Finish and variations
Finish
Check the Shape
The center should stay lower, and the side sections should rise smoothly, without a sharp angle.
Steaming
Steam only lightly and through cheesecloth, as the source instructs, so you don't stretch out the lower edge.
Variations
A Different Ribbing
Instead of 2x2 ribbing, you can choose a different rib or a lace variant: the source explicitly allows any pattern for the lower edge.
Gentle or Noticeable Curve
The strength of the curve is adjusted by the number of center stitches: 2/3 of the stitches give a soft lift at the sides, while the example of 10 out of 60 gives a more noticeable arc.
The side sections barely rose relative to the center.
Likely cause
Too many stitches were left for the center section, or the gentle-lift option was chosen.
How to fix it
Check against the source's logic: 2/3 of the stitches give a gentle lift, while for a noticeable curve the author leaves 10 center stitches out of 60.
The Curve Looks Too Sharp
Problem
The center noticeably drops down, and the transition to the sides comes out steep.
Likely cause
Too few stitches were left for the center section relative to the overall width.
How to fix it
For a softer silhouette, use the source's option with a larger center section — for example, aim for 2/3 of the stitches for a gentle lift at the sides.
It's Hard to Tell Where to Turn the Work
Problem
Stitches from the ribbing are brought in unevenly, and the row gets thrown off.
Likely cause
The transition from the first 25 stitches in ribbing to the 10 center knit stitches in the example was missed.
How to fix it
For a practice swatch, follow the author's example literally: 25 stitches in ribbing, 10 knit stitches, turn, then a purl row with a yarn over and 3 stitches from the ribbing.
Noticeable Holes Appear at the Turns
Problem
The turn points look loose.
Likely cause
The yarn over at the turn was skipped, or wasn't knitted together with the stitch in the following knit row.
How to fix it
Keep to the sequence described: make a yarn over at the turn, then knit the yarn over from the purl row together with the stitch.
The Edge Doesn't Lie Flat After Knitting
Problem
The curve is there, but the fabric looks wavy or untidy.
Likely cause
The stitches haven't been set yet after the short rows, or not all the stitches were finished.
How to fix it
Finish knitting every stitch on the needle as the source instructs, then lightly steam the finished piece through cheesecloth.
?FAQ
Do I need to add edging to the lower edge with a crochet hook or knitting needles afterward?
No. The whole point of the technique in the source is to shape the curve with short rows, with no separate piece and no additional edging.
Can I use a different stitch pattern?
Yes. The author writes that you can choose any pattern; the example shows the technique in stockinette stitch after the ribbing.
How many center stitches should I leave?
For a gentle lift of the side sections, the source suggests leaving 2/3 of the stitches. For a noticeable curve, the example leaves 10 center stitches out of 60.
What do I do with the yarn over after the turn?
According to the instructions, the yarn over from the purl row is knitted together with the stitch in the following knit row.
How do I finish the edge after the short rows?
Repeat the steps described until you've knitted every stitch on the needle, then lightly steam the finished piece through cheesecloth.
Your project
Log in to track your project, attach photos, and publish your result into the shared feed.

 BeginnerFree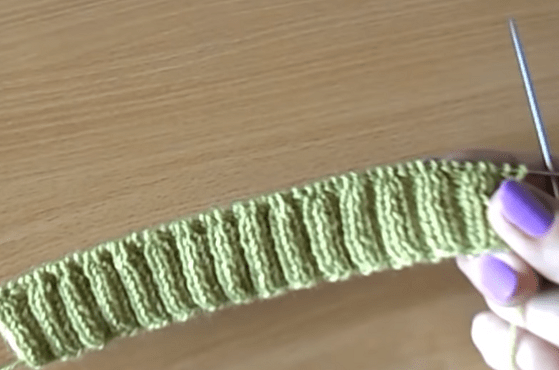

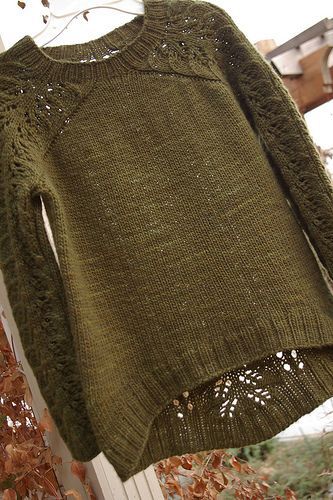


Yeah, there's a similar method, it's easy to knit too, I'll post a tutorial soon. And the little sweater is cute, I liked it!