A tutorial for shibori earrings: bead a bezel around a rivoli crystal, prepare felt petals with shibori ribbon, embellish them with beads and bicones, make a suede or leather backing, and attach an ear wire.
Beginner2 hrFree
Translated
Things you will learn
Shibori appeared in Japan in the eighth century and involves a unique fabric-dyeing method: knots are tied at precisely chosen spots on the fabric beforehand, producing an original, one-of-a-kind pattern; a shibori ribbon like this is often used as a base for jewelry.
Working with shibori ribbon takes patience and some existing craft skills; for the earrings you'll need about 10 cm of shibori ribbon, bicone and rivoli beads, plain round seed beads, moldable felt, scraps of faux leather or suede, glue, needles, scissors, flat-nose pliers, ear wires, and a solid metal jump ring.
Start by beading around a rivoli bead: string beads into a ring, then work a second row in a zigzag pattern through every other bead, a third row the same way, and one more round row in a different color, then gently pull the circle in and set the crystal into the resulting beaded bezel.
Cut mirror-image petals from the felt, attach pieces of shibori ribbon to them with small stitches around the edge, sew on the beaded crystal, then embellish the petals with beads and bicones with no fixed rules — you can stitch the little crystals around the edge or between the folds to form interesting waves.
For the back, cut a piece with a seam allowance from suede or leather, attach a jump ring to the top point for the future ear wire, glue the backing to the top piece, stitch beads around the edge over the allowance, and attach the ear wire to the ring.
What you'll get
You'll get an original pair of shibori earrings with a beaded bezel around a rivoli crystal and bead-and-bicone embellishment.
Materials and tools
Materials
Shibori ribbon, about 10 cm
Bicone and rivoli beads
Plain round seed beads
Moldable felt
Scraps of faux leather or suede, for the backing
Ear wires
A solid metal jump ring
Glue
Tools
Needles
Scissors
Flat-nose pliers
Bead a bezel around the rivoli crystal
Start by beading around the rivoli bead to make a bezel for it.
String the first row of beads
Start by beading around the rivoli bead. Thread a needle, tie a knot, and string on beads. Once you've strung the right number, pass the needle back through the 1st bead to close the ring.
Starting the beaded bezel
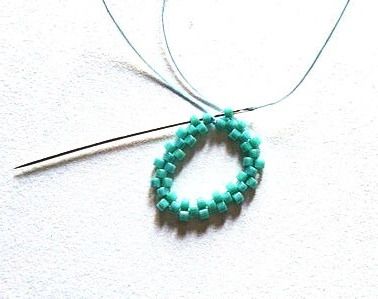
Work a second row in a zigzag pattern
Now work a second row of beads. This time, pass the needle through in a zigzag pattern, skipping every other bead. Once you've gone all the way around, pass the needle through two neighboring beads.
The beaded wrap around the piece
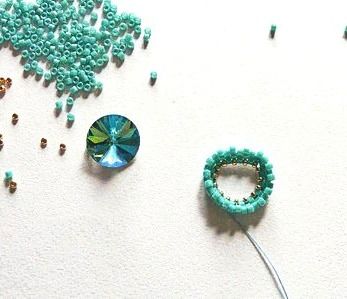
Work a third row and add a new bead color
Use the same method to form a third row. Then pass the needle down and work one more round row in a zigzag pattern, using beads in a different color.
Beads and crystals for the earrings
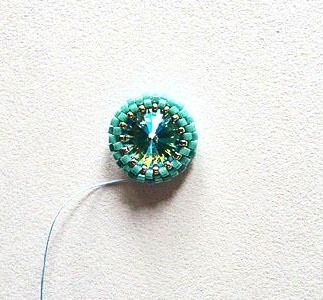
Shape the bezel and set the crystal
Now gently pull the circle in, bringing the needle up. This forms a beaded bezel for the rivoli. Set the crystal into it.
The beaded bezel element
Prepare the petal and the shibori ribbon
Cut the petals from felt and attach shibori ribbon to them.
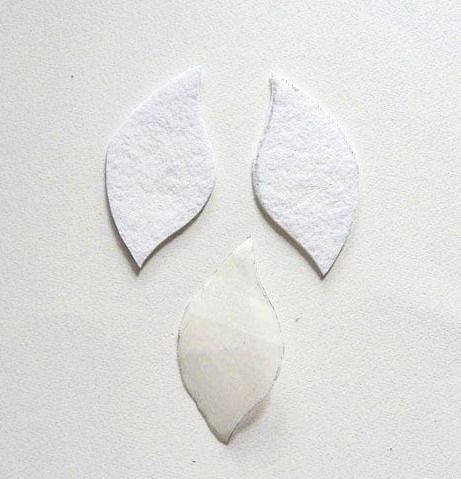
Cut mirror-image petals from felt
Make a template for the petals. Trace it onto the felt and cut it out. Don't forget that they need to be mirror images of each other.
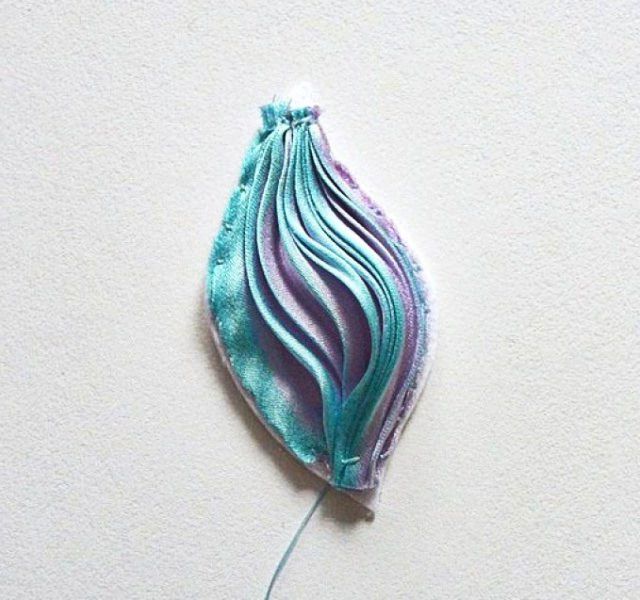
Attach the shibori ribbon to the felt
Now it's the ribbon's turn. Cut off pieces and attach them to the felt with small stitches around the edge.
Pieces of shibori ribbonAn earring element with bead trim
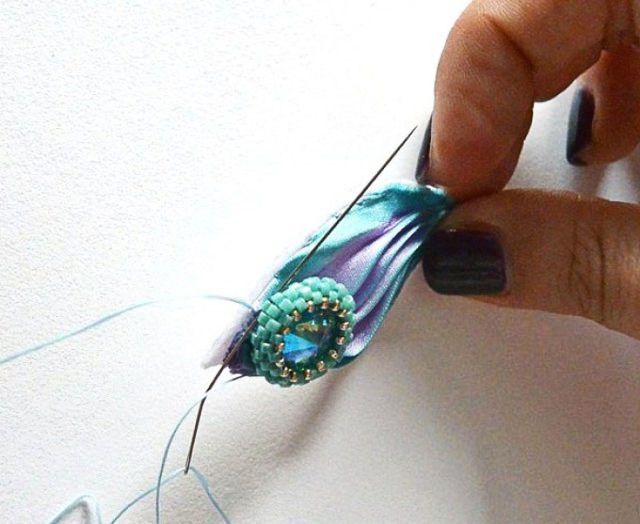
Sew on the beaded crystal
Sew on the crystal in its beaded bezel.
The earring with the bezel attached
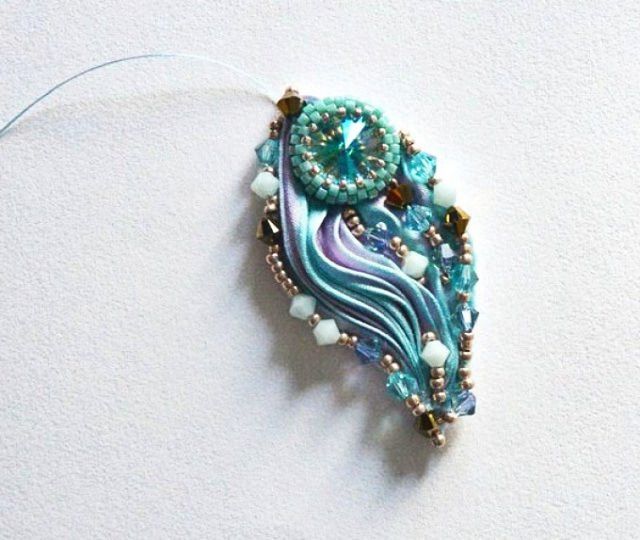
Embellish the petal with beads
Decorate the petal with beads and bicones however you like.
Cover the petal with beads and bicones
Next, move on to the embellishment — cover the petals with beads and bicones. There are no rules here, so let your imagination run free. You can stitch the little crystals around the edge, or between the folds, to form interesting waves.
The front with bead embellishment
Make the back of the earring
Prepare a backing piece from suede or leather and attach a ring for the ear wire.
Cut the backing piece and attach the ring
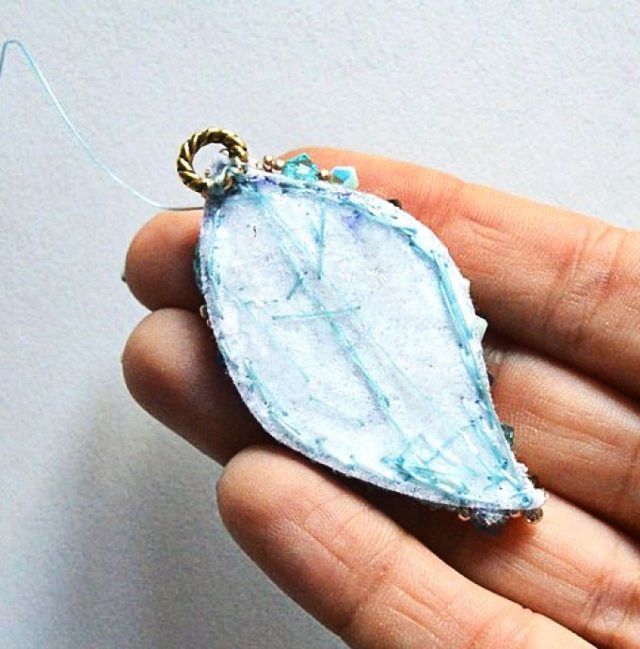
Next, take care of the back. Cut a piece with a seam allowance for it from suede or leather. Attach a ring to the top point — you'll fasten the ear wire onto it later.
The back of the earring blank
Glue on the backing and stitch beads around the edge
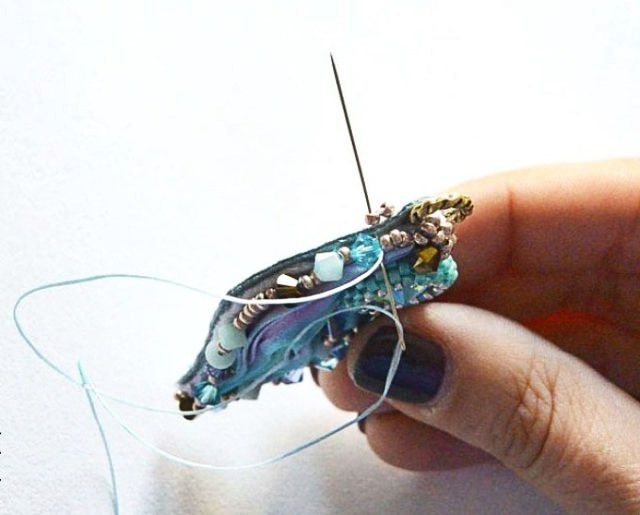
Now you can glue the backing onto the top piece. Stitch beads around the perimeter, over the seam allowance.
Stitching beads onto the edge
Attach the ear wire
Finish the earring by attaching the ear wire.
Attach the ear wire to the ring
Attach the ear wire to the ring — open it, then carefully close it back up. Your earrings are ready!
The finished shibori earrings
Finish and variations
Finish
Your shibori earrings are ready
Your earrings are ready! You've made an original piece of jewelry in the shibori technique, with a beaded bezel and shibori ribbon.
Variations
Use your own bead layout
There are no rules here, so let your imagination run free. You can stitch the little crystals around the edge, or between the folds, to form interesting waves.
Use shibori ribbon for other jewelry
Shibori ribbon like this is often used as a base for all kinds of jewelry, not just earrings.
The beaded bezel comes out too loose for the rivoli
Problem
After forming the third row and pulling the circle in, the bezel doesn't hold the rivoli crystal snugly.
Likely cause
The beads for the rows were too large for the crystal's size, or the rows weren't strung tightly enough.
How to fix it
Choose beads sized to match your specific rivoli crystal, and make sure each row is strung tightly before pulling the circle in.
The petals come out identical instead of mirrored
Problem
After cutting, both petals end up oriented the same way instead of forming a mirrored pair for the left and right earring.
Likely cause
The template was traced onto the felt the same side up for both petals.
How to fix it
Flip the template over for the second petal so you get a true mirror-image pair for a matching set of earrings.
Glue shows at the edge after attaching the backing
Problem
After gluing the backing onto the top piece, glue seeps through or shows along the earring's edge.
Likely cause
Too much glue was applied, or the backing's seam allowance wasn't trimmed evenly to match the top piece.
How to fix it
Apply glue in a thin layer, keeping it away from the very edge, and trim the backing's seam allowance exactly to the top piece's outline before stitching on the beads.
?FAQ
What is the shibori technique, and how did it originate?
Shibori appeared in Japan in the eighth century and involves a unique fabric-dyeing method: knots are tied at precisely chosen spots on the fabric, producing an original, one-of-a-kind pattern.
How much shibori ribbon do you need for a pair of earrings?
About 10 cm per earring.
What is moldable felt?
Felt treated with a special coating that gives it unusual shaping properties: if you wet it, shape it, and let it dry in that shape, the shape holds; the edges also don't fray, which matters a lot for beaded jewelry.
How many rows of beads does the rivoli bezel need?
Three rows, after which the circle is gently pulled in to form the beaded bezel for the crystal.
What is the back of the earring made from?
Faux leather or suede, cut with a seam allowance matching the outline of the top piece.
Your project
Log in to track your project, attach photos, and publish your result into the shared feed.
Such an unusual piece of jewelry came out! I'd call it festive — dressed-up occasion wear! Though I haven't actually seen photos of Japanese women wearing earrings like these, and Japan can probably surprise you with even more than that))) I think if you picked more neutral shades, it would look stylish even here at home)
Ooh, that's something special! Moldable felt is treated with a special substance. That's what gives it those unusual shaping properties! I know the German brand Rayher. It's sold in sheets, 30 by 45 cm. When dry, the felt looks almost like regular felt. But it's stiffer and holds its shape really well. And if you wet it, shape it the way you want, and let it dry like that, the shape stays. That's where the name comes from — moldable. You can twist it into pretty much anything you like )) Plus, the edges of this felt don't fray, which matters a lot for beaded jewelry.

 Beginner2 hrFree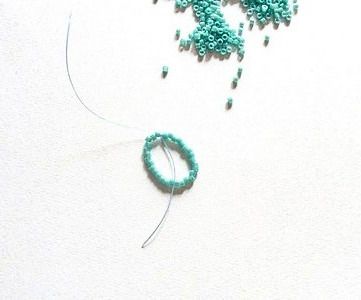


Such an unusual piece of jewelry came out! I'd call it festive — dressed-up occasion wear! Though I haven't actually seen photos of Japanese women wearing earrings like these, and Japan can probably surprise you with even more than that))) I think if you picked more neutral shades, it would look stylish even here at home)