A step-by-step tutorial for a leather-and-fur brooch: shape dimensional petals over a candle flame, assemble them into roses, make the fur base and leather leaves, twist and glue the bow, then bring all the pieces together into a finished brooch with a pin back.
AdvancedFree
Translated
Things you will learn
The brooch goes with any winter outfit — a dress, a sweater, a coat, or a hat — and isn't bothered by snow, since it's made from natural materials.
You'll need pieces of white leather 0.4-0.7 mm thick, white arctic fox fur, PVA glue, ready-made floral stamens, and a pin back about 3.5 cm wide.
The rose petals get their dimensional shape after warming the outer edge over a candle flame — it's important not to hold white leather near the flame too long, or it will smoke or even scorch.
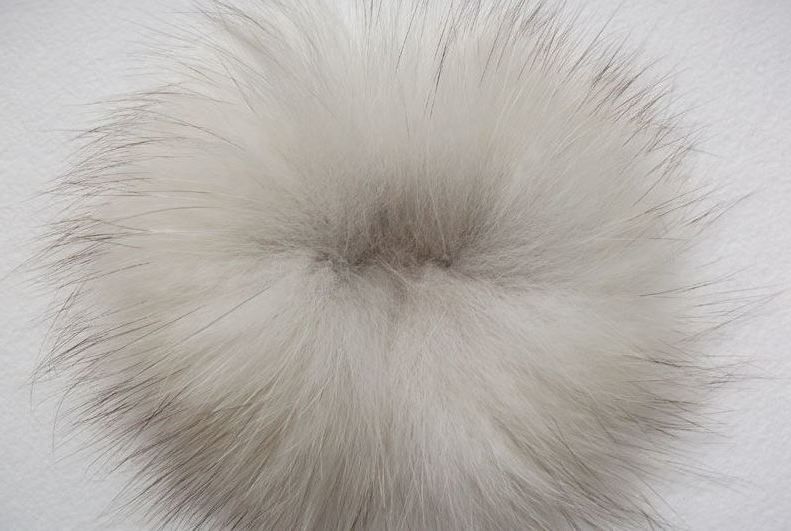
The fur base is made from a 4 cm cardboard circle with half-circles of fur glued on, each with its nap running from the center outward.
The final pin back attaches to a separate 5 cm leather circle with punched holes, glued onto the back of the brooch.
What you'll get
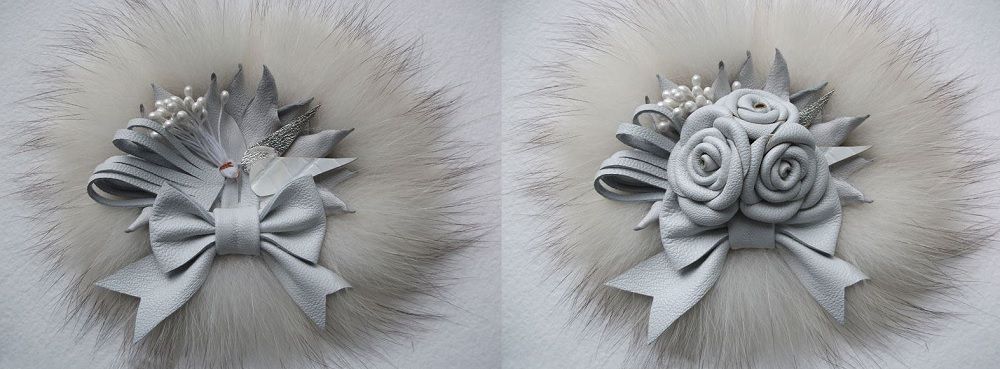
You'll get a winter brooch with a dimensional leather rose bouquet on a fur base, finished with leather leaves and a bow, ready to wear on a coat, hat, or dress.
Materials and tools
Materials
Pieces of white leather, 0.4-0.7 mm thick, used for the rose petals, leaves, bow, and the base for the pin back
White arctic fox fur, used for the brooch's fur base
PVA glue, used to assemble the petals, leaves, bow, and every part of the brooch
Ready-made floral stamens, used as a decorative element in the brooch's composition
A pin back for the brooch, about 3.5 cm wide; inserted into the leather circle at the back
Tools
Hole punch, needed to punch holes for attaching the pin back
Tweezers, needed to hold the petals while warming them over the candle
Candle, needed to warm the edges of the petals to give them a dimensional shape
Small brush, needed to comb out the fur on the brooch's base
Clip, needed to hold the bow and ties in place while the glue dries
Preparation
Gather your materials and tools
Gather pieces of white leather, white arctic fox fur, PVA glue, ready-made floral stamens, a pin back about 3.5 cm wide, a hole punch, tweezers, and a candle.
Make the petals for the rose bouquet
The petals are cut in two sizes and get their dimension after warming over a candle.
Cut petals in two sizes
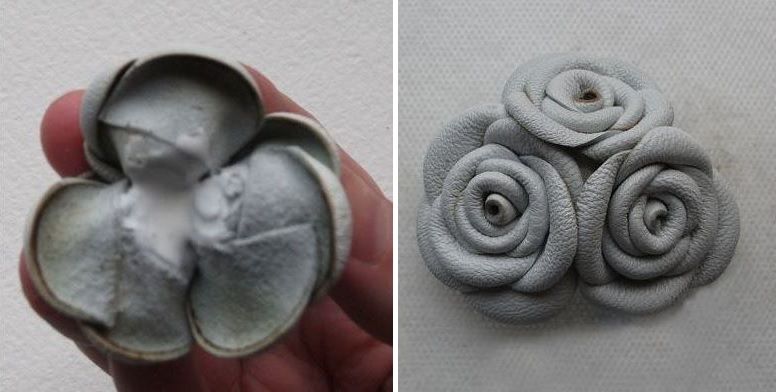
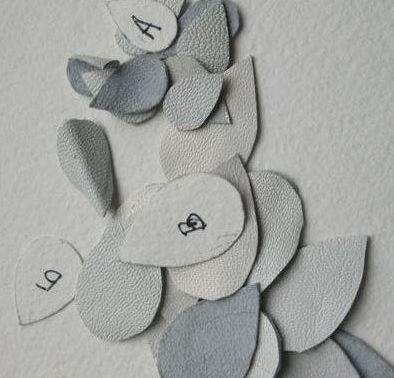
Cut petals in two sizes — see the shape in the photo. You'll need 4-5 petals for each little rose.
Warm the petals over the candle
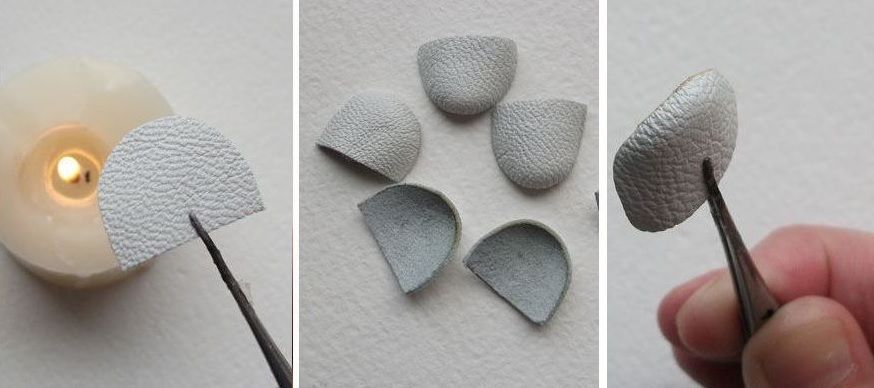
Warm the outer edge of the wrong side of each petal over the flame. This step calls for care — it's important not to hold the leather too close to the flame, or it can get smoky or even scorch. Timing is especially critical for white leather. Hold the petals with tweezers. As a result, the petals' edges curl, folding slightly inward.
Assemble the roses from the petals
The roses are built up layer by layer, starting with a bud at the center.
Make the rose's center
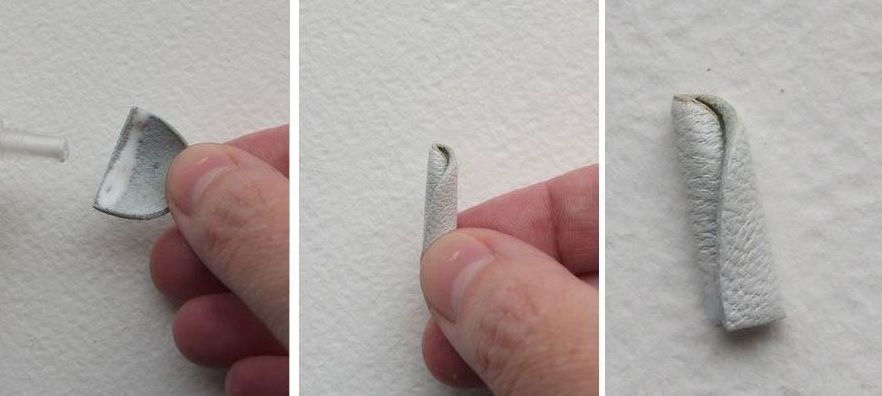
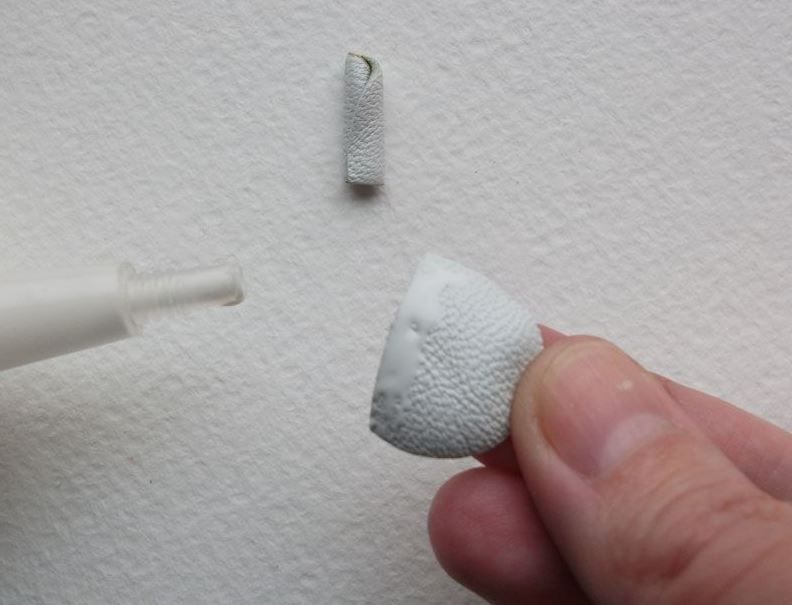
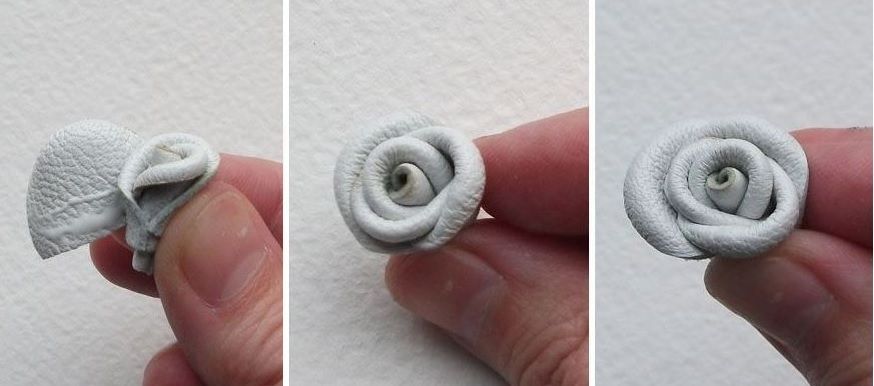
From your shaped petals, pick out the prettiest one (its edge is what matters here) — this will become the rose's center. Apply glue along the straight edge on the wrong side of the leather and roll the petal into a bud.
Wrap the bud with the remaining petals
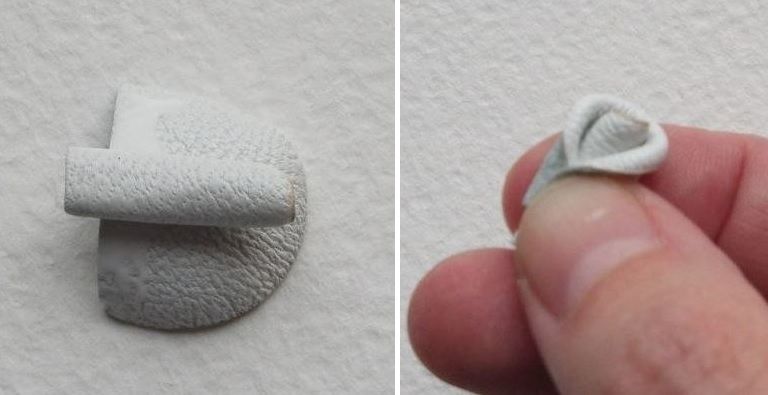
For the rest of the petals, apply the glue on the right side of the leather instead. Coat a petal and wrap it around the bud — the little bud should end up slightly "nestled" inside the petal.
Glue the petals on in a staggered pattern
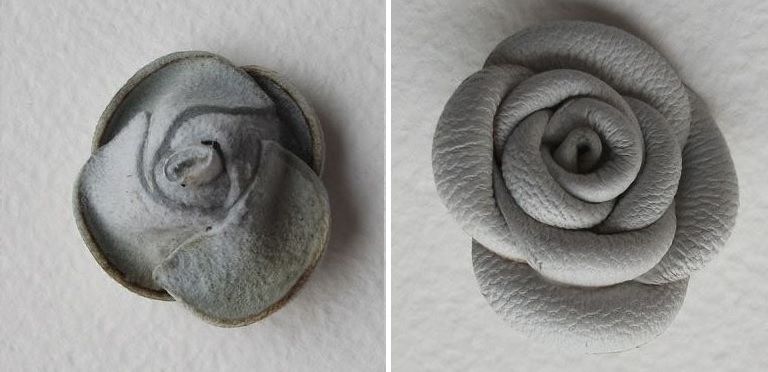
Glue the next petal on offset by half a petal's width, in other words, staggered like a checkerboard. Glue the smaller petals on first, then the larger ones — each new tier of the petal spiral should sit a little higher than the previous one.
Trim the back and make three flowers total
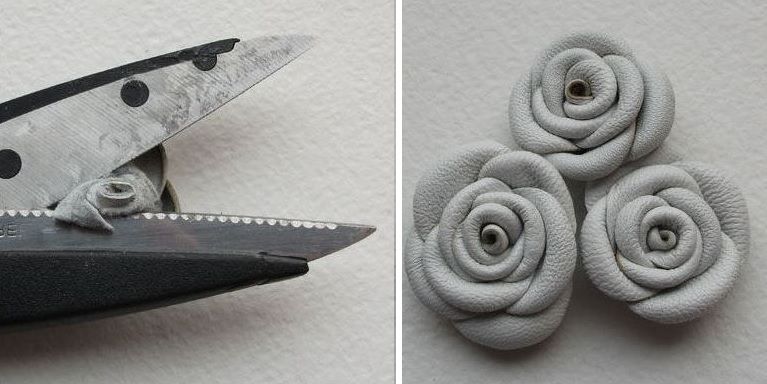
Once you've formed a complete flower, trim away the excess leather on the wrong side so you're left with a flat surface. Make three flowers this way.
Put together the flower cluster
Coat the petals where the flowers touch with glue to join them together — alternatively, you can glue the flowers onto a shared leather circle. Then fan out the petals into the shape you want and let them dry.
Make the fur base
The fur base is assembled from half-circles glued onto a cardboard circle.
Cut the cardboard base and mark the fur
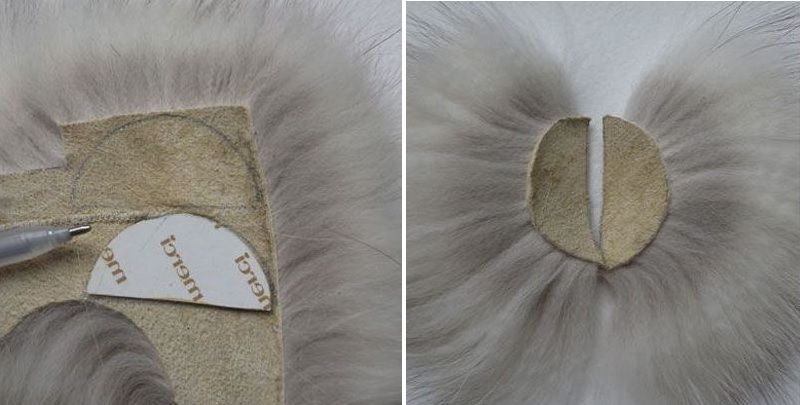
Cut a cardboard circle 4 cm across. Transfer half-circle templates onto the fur. Mark these half-circles on the hide side so that each one's nap runs from the center outward.
Glue on the half-circles and comb the fur
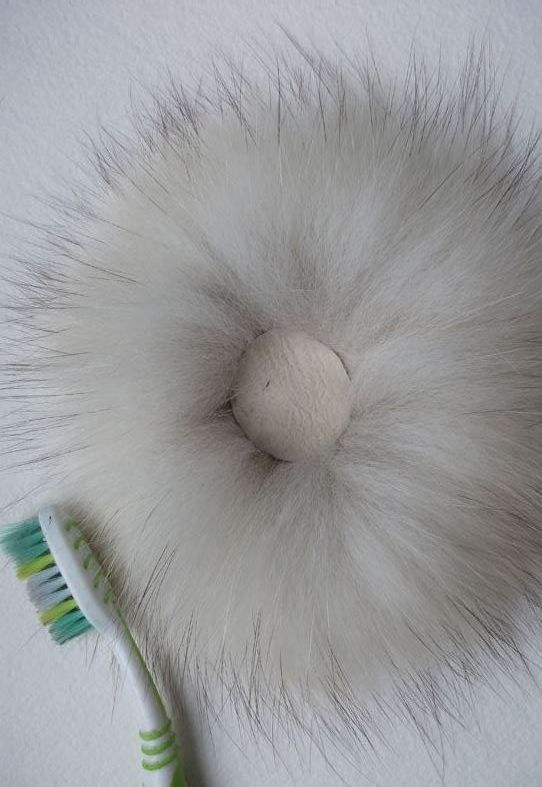
Glue the half-circles onto the round cardboard base. Comb the fur around the circle with the small brush.
Glue a leather circle in the center
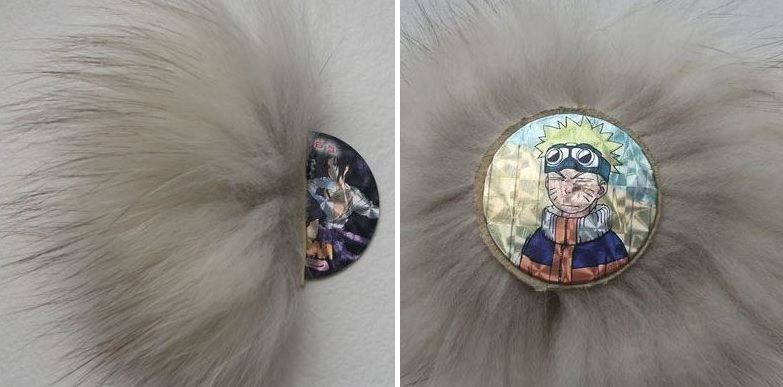
Cut a circle from leather and glue it into the center, on the right side.
Comb the fur outward
Use the brush to comb the fur strands outward from the center. They should lie evenly and smoothly.
Make the leaves
The leaves are twisted into rolls to give them a natural curl.
Cut leaves in different sizes
From leather scraps, cut teardrop-shaped leaves in different sizes — small, medium, and large.
Twist the leaves into rolls
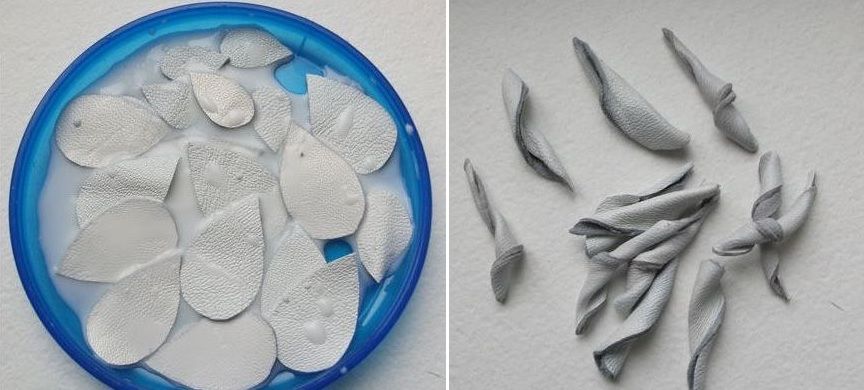
Dip the leaves in a watered-down PVA glue solution (or just brush it on the wrong side) and twist them into rolls. Let them dry slightly, unroll them (but don't flatten them out!), and leave them to finish drying.
Make the bow
The bow is assembled from two leather strips — for the bow itself and the connecting strap — plus a strip for the ties.
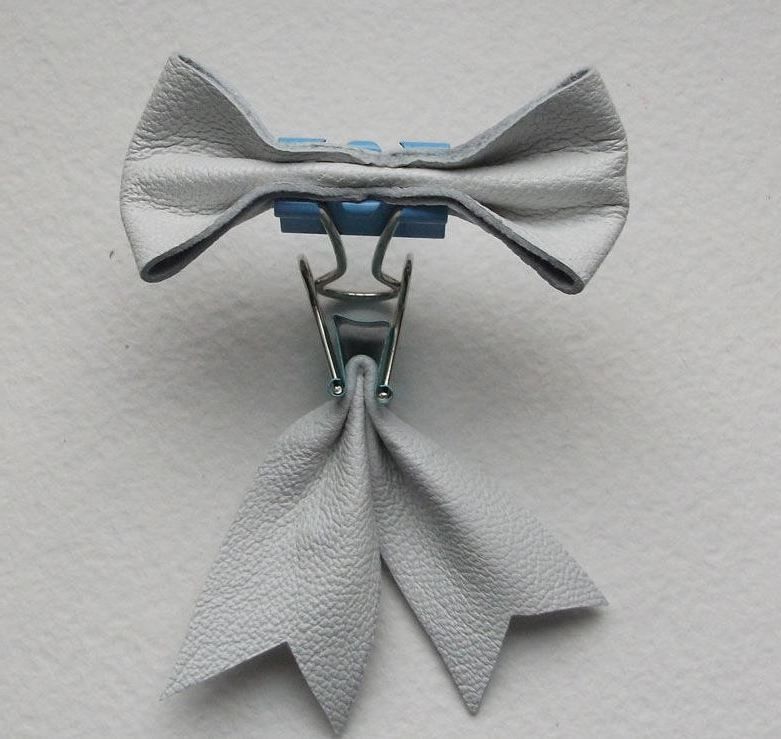
Cut the strips for the bow, strap, and ties
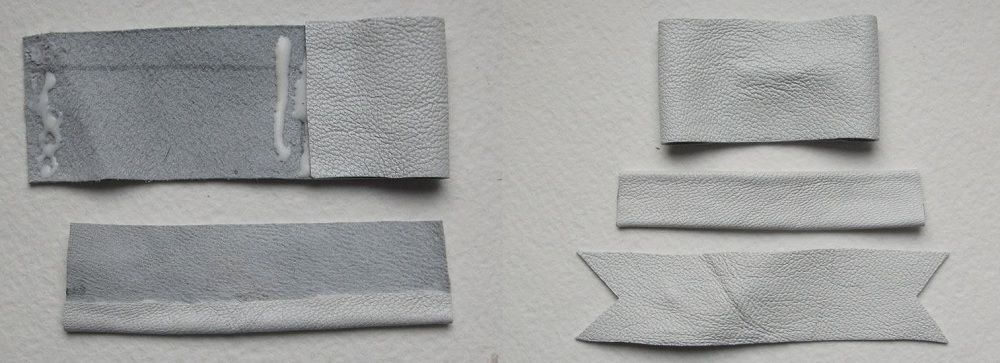
Cut two strips of leather — one for the bow and one for the connecting strap — plus a strip for the ties. Decide the width of the bow and strap based on the size of your bouquet; cut the pieces twice as wide as you want the finished parts to be.
Fold in and glue the pieces
On the bow piece, apply glue to the short sides and fold them toward the center. On the strap piece, apply glue to the long sides and fold them toward the center. Glue down the folded sides and blot the finished pieces with a soft cloth. On the strip for the ties, cut the corners on the short sides, as shown in the photo.
Shape the bow's pleat and the ties
Pinch the bow from both sides at the center to form a horizontal pleat — do this with the wrong side facing up. Drip glue into the pleat and hold the bow with a clip until it dries. Also dab a drop of glue on the center of the tie strip, fold it in half, hold it with a clip, and let it dry.
Glue the ties to the bow
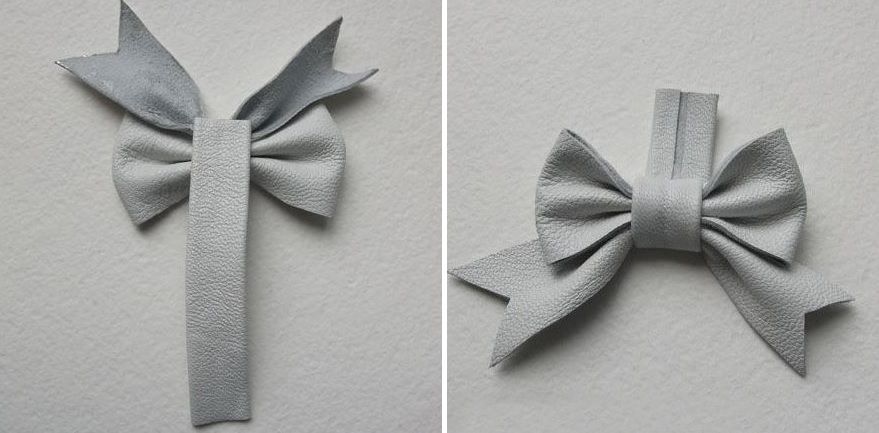
Lay the bow wrong side up on a flat surface, and lay the ties against it, also wrong side up.
Glue on the connecting strap
Glue one end of the strap to the center of the bow. Then wrap the strap around the bow and glue it down again on its wrong side. You'll end up with a bow that has a strap tail — you'll need this for the final assembly of the brooch.
Assemble the brooch
Final assembly brings together the fur base, leaves, bow, decorative accents, and flower bouquet.
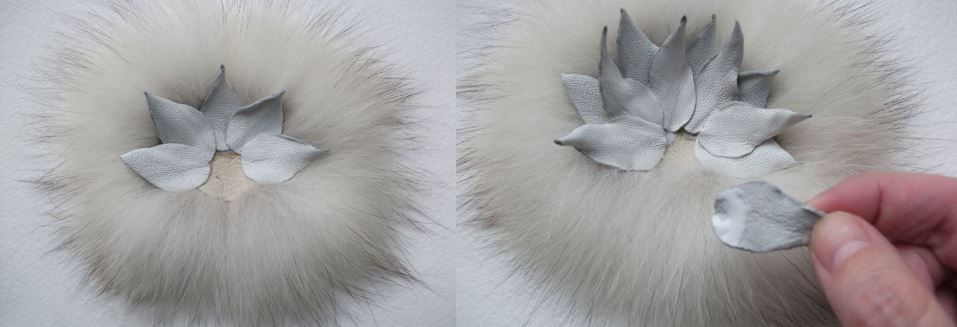
Glue the leaves onto the fur base
Glue two tiers of the largest leaves onto the brooch's fur base in a staggered pattern. Apply the glue only to the base of each leaf.
Glue on the bow
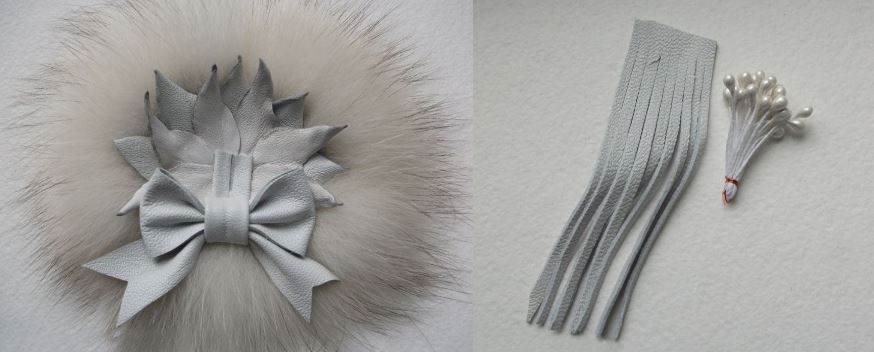
Glue the bow onto the lower part of the brooch, after marking where the flower cluster will go. The bow's strap tail should end up at the center of the brooch.
Add the stamen and strip accents
Fold the ready-made stamens in half and tie them into a small bundle. Cut leather strips for extra decoration. Work out your final composition for the brooch, then glue on the stamens and strips.
Glue on the rose bouquet
Apply glue to the center of the brooch and to the back of the flower cluster. Glue on the rose bouquet, pressing it down gently with your hand.
Check the look and let it dry fully
Take a look at the brooch's overall appearance, and add small leaves if needed. Let it dry completely.
Attach the pin back
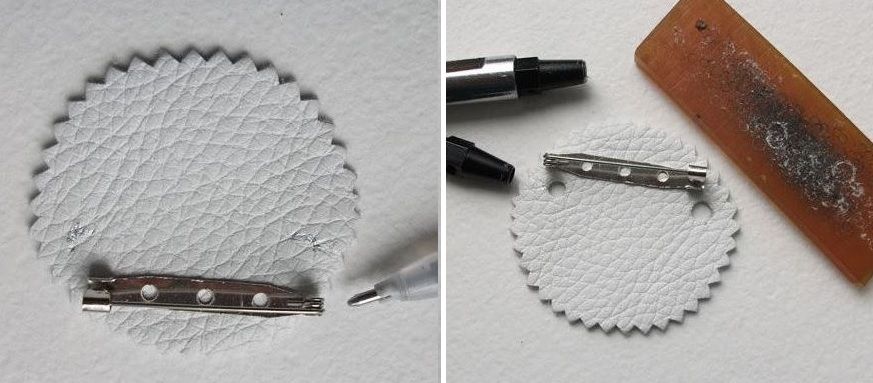
The pin back attaches to a separate leather circle glued onto the back of the brooch.
Punch the holes and insert the pin
Using pinking shears, cut a leather circle 5 cm across. Mark where the pin back will attach. Punch the holes and insert the pin.
Glue the circle onto the back of the brooch
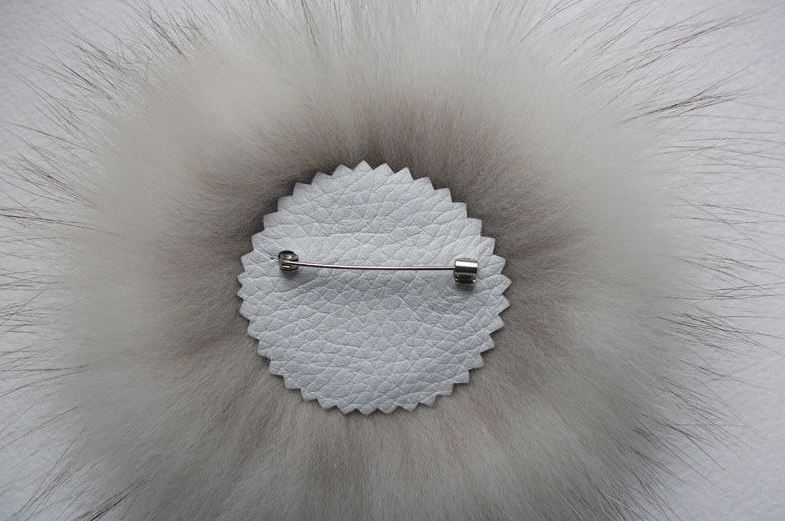
Coat the circle with glue and press it onto the wrong side of the brooch, using a soft cloth. Let it dry.
Comb the fur
Comb the fur with the small brush. Your brooch is ready!
Finish and variations
Finish
Wear your finished brooch
You can pin the finished brooch to a dress, a sweater, a coat, or a hat — it isn't bothered by snow and will keep its festive look for a long time.
Variations
Extra leaves
If the brooch looks unfinished once assembled, you can round out the composition with a few small extra leaves.
Flowers on a shared leather circle
Instead of joining the flowers to each other with glue at the touching petals, you can glue them onto a shared leather circle instead.
After warming a petal over the candle, it comes out smoky or even scorched.
Likely cause
The petal was held near the flame too long — this is especially critical for white leather.
How to fix it
Hold the petals with tweezers and warm them over the candle only very briefly, especially with white leather, since overheating shows up almost immediately on a light-colored material.
The fur's nap on the base lies unevenly
Problem
After combing, the fur on the brooch's base lies unevenly, pointing in different directions.
Likely cause
The fur half-circles were glued on without a consistent nap direction running from the center.
How to fix it
Mark and glue the fur half-circles so each one's nap runs from the center outward, then comb the fur from the center outward.
The twisted leaves unroll and lose their shape
Problem
After drying, the leaves lose their twisted shape and end up looking flat.
Likely cause
The leaves were smoothed out after twisting, instead of just being allowed to unroll slightly.
How to fix it
After twisting, let the leaves dry slightly, unroll them, but don't smooth them flat — this is exactly what preserves the natural curl once they're dry.
The bow's pleat comes out uneven
Problem
After pinching the bow, the pleat sits off-center, or the bow looks asymmetrical.
Likely cause
The bow wasn't pinched exactly at the center, or the wrong side wasn't facing up while shaping the pleat.
How to fix it
Pinch the bow from both sides exactly at the center, making sure the wrong side faces up — this gives you a symmetrical pleat.
?FAQ
What materials do you need for the brooch?
Pieces of white leather 0.4-0.7 mm thick, white arctic fox fur, PVA glue, ready-made floral stamens, and a pin back about 3.5 cm wide.
Why warm the petals over a candle?
To give the petals a dimensional shape — after warming, their edges curl and fold slightly inward.
How do you orient the fur's nap on the base?
The fur half-circles are marked and glued so each one's nap runs from the center outward, then the fur is combed from the center outward.
Why twist the leaves into rolls?
So they keep a natural curl once dry — you achieve this by unrolling them slightly after twisting, but not smoothing them flat.
How many roses do you need for the bouquet?
Three roses, each assembled from petals in two sizes — 4-5 petals per little rose.
Your project
Log in to track your project, attach photos, and publish your result into the shared feed.
Interesting idea. But won't the patent finish crack during the process? After all, the leather does need to be heated 😕
But I actually want to use the patent leather for the leaves, not the petals. And those don't need heating. You just soak them in PVA glue, twist them, and let them dry. Though I suppose cracks could show up from the moisture and twisting... Not sure, I'll have to think about it. And here's another idea — you could lightly tint the edges of individual petals and leaves with paint. I think it would look lovely — it would add some extra dimension.
And here's another idea — you could lightly tint the edges of individual petals and leaves with paint. I think it would look lovely — it would add some extra dimension.
I think that would turn out really original — at least, I haven't seen anything like that in a finished piece before.

 AdvancedFree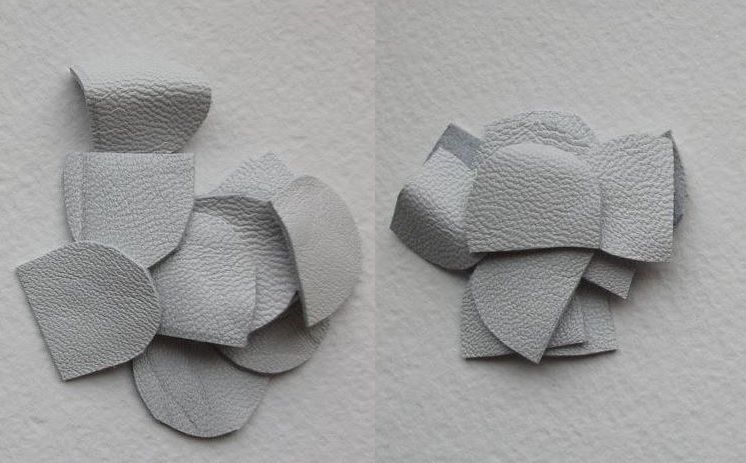


But I actually want to use the patent leather for the leaves, not the petals. And those don't need heating. You just soak them in PVA glue, twist them, and let them dry. Though I suppose cracks could show up from the moisture and twisting... Not sure, I'll have to think about it.
And here's another idea — you could lightly tint the edges of individual petals and leaves with paint. I think it would look lovely — it would add some extra dimension.