How to Crochet a Strong Bag Handle and Attach a Carabiner
This master class shows how to crochet a dense flat handle from T-shirt ribbon yarn and attach it to two carabiners without sewing it on by hand.
BeginnerFree
Translated
Things you will learn
T-shirt ribbon yarn in the same color as the bag works best for this handle.
Use a 5-7 mm crochet hook depending on the density you want: the smaller the hook, the firmer the handle.
The instructions are written for a 3 cm wide carabiner; adjust the number of loops for different hardware.
Leave a tail of about 15 cm so the first carabiner can be secured neatly.
The finished handle can be detached, washed at 40 degrees, and dried flat.
Finished Bag Handle
The result is a dense flat handle that looks like knitted webbing. It attaches to the bag with carabiners, does not need to be sewn on, and is practical for summer or light-colored bags because it can be detached and washed.
Materials and tools
Materials
T-shirt ribbon yarn, The author recommends BISKVIT yarn cut to show the knit right side: it is natural, does not stretch too much, and looks like the right side of knitted fabric.
Carabiners, 2 pcs., The master class uses a 3 cm wide carabiner. For a different width, change the number of loops.
Tools
5-7 mm crochet hook, The smaller the hook size, the denser the finished handle will be.
Scissors, Use them to cut the yarn and leave a long tail for fastening.
Preparation
Choose yarn to match the bag
T-shirt ribbon yarn in the same color as the bag works best. The same type of yarn can also be used for a bag, basket, or backpack.
Check the hardware
This model is calculated for a 3 cm wide carabiner. If your carabiner is wider or narrower, adjust the number of loops before you start.
Attach the First Carabiner
This stage creates the starting attachment point for the first carabiner.
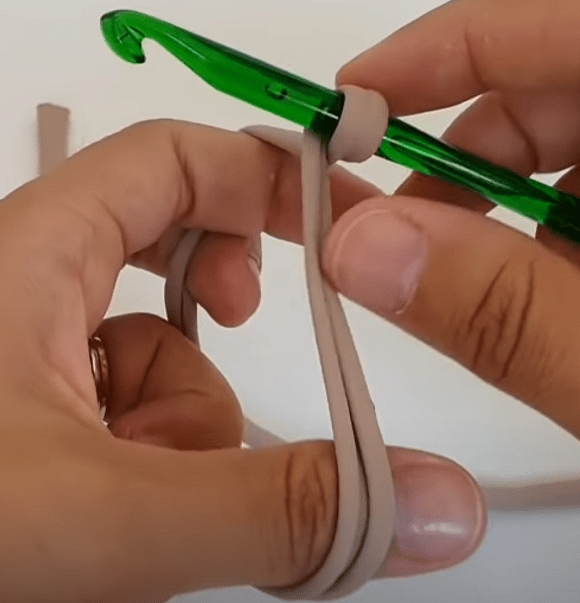
Place the first loop on the hook
Place a loop on the hook with a front-to-back motion. The loose yarn end should be in front and about 15 cm long.
Tail length
Do not make the loose end too short: you need it for a neat and secure fastening.
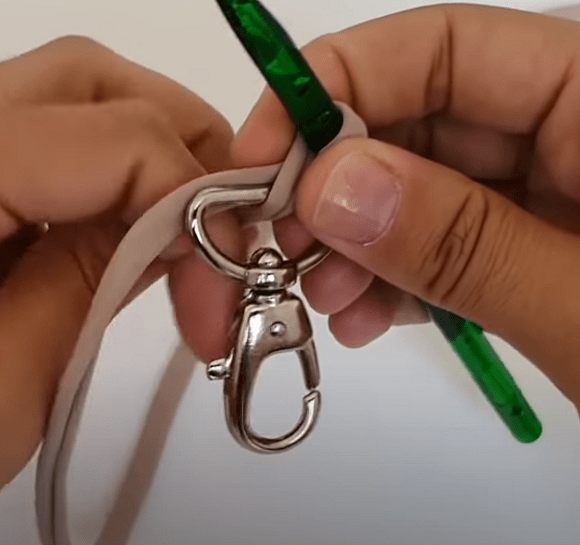
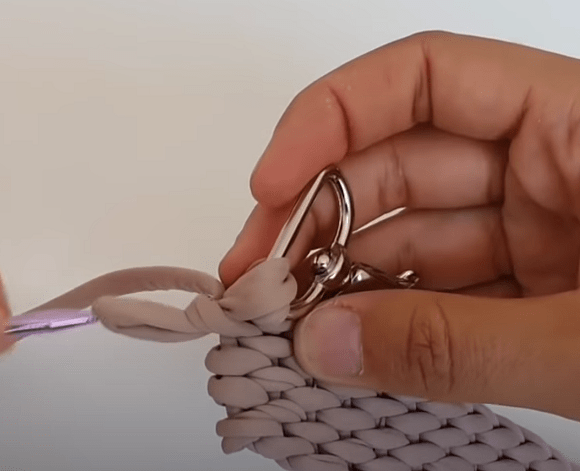
Pull the loose yarn through the carabiner
Pull the loose end of the yarn through the carabiner to start forming the attachment.
Place another loop on the hook
Place another loop on the hook while wrapping it around the working yarn.
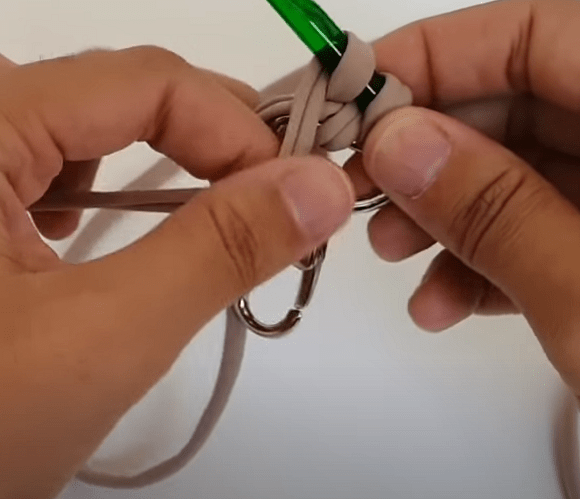
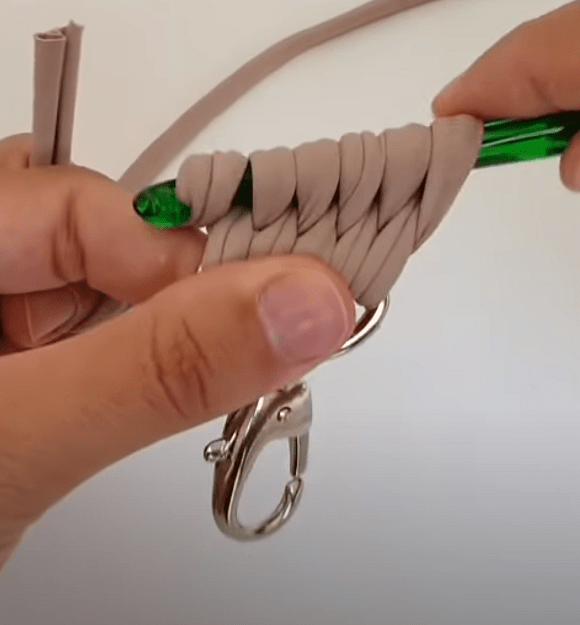
Pick up 5 loops
Pick up 5 loops on the hook. Twist the working yarn and the loose end together 2-3 times.
Loop count
For a 3 cm wide carabiner, the author uses 5 loops.
Pull the twisted yarn through the loops
Pull the twisted yarn strands through all 5 loops. The working yarn will now be on the right, and you can begin crocheting the handle.
Crochet the Flat Handle
The handle is worked with a simple repeated pattern until it reaches the length you need.
Draw up the last loop
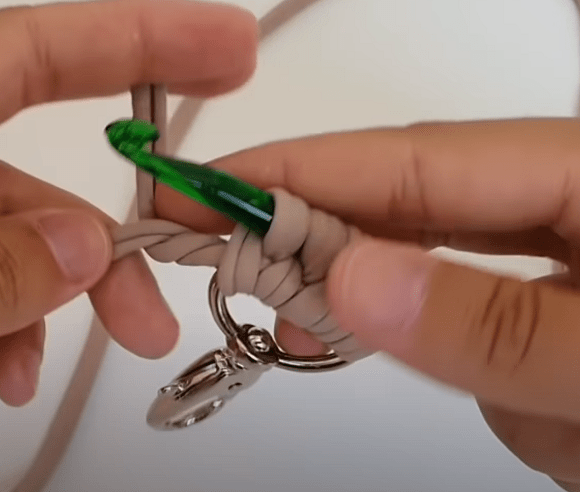
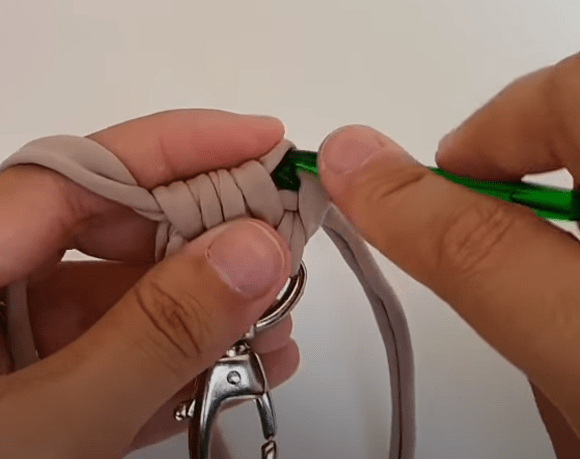
Draw up the last loop and place it on the hook. Pick up 5 more loops from the spaces between the loops on the hook.
Repeat the pattern to the desired length
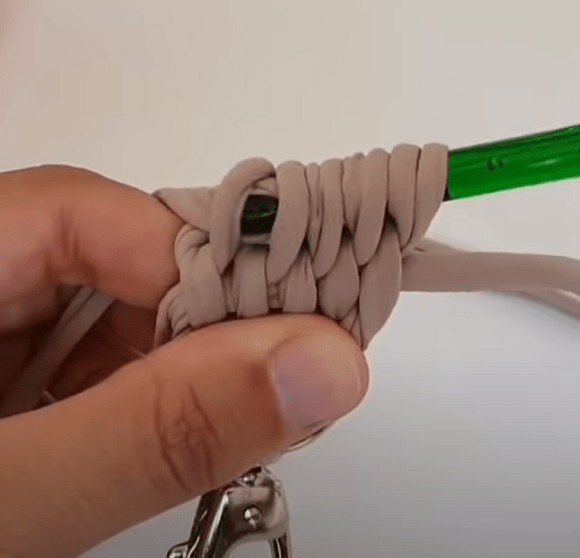
Pull the yarn through all 5 loops. The pattern repeat is complete. Continue repeating rows 1 and 2 until the handle reaches the required length.
Watch the density
A bag handle needs firm tension because it carries weight and should not stretch too much.
Attach the Second Carabiner
After crocheting the required length, secure the handle to the second carabiner in the same neat way.
Leave a long yarn end
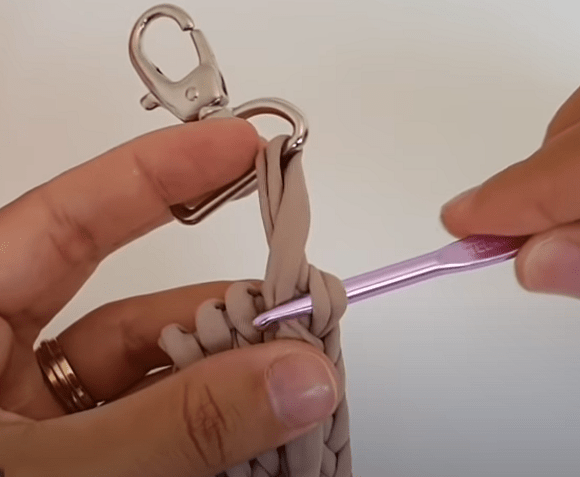
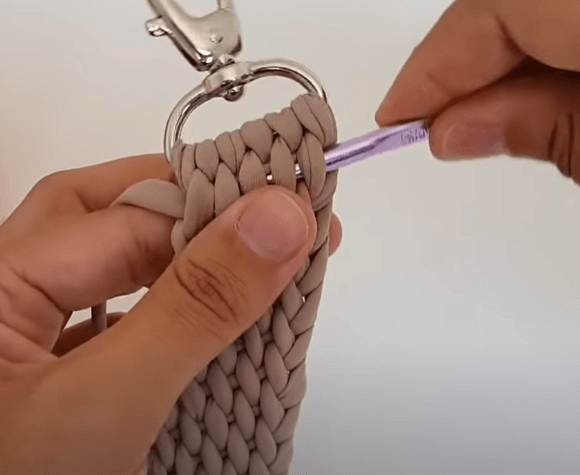
When the handle is long enough, cut the yarn and leave a long tail. Pass the yarn through the carabiner as shown in the photo to form a twisted loop.
Bring the yarn to the front
Insert the hook between the loops, catch the yarn, and pull it through to the right side.
Make the securing loops
Make 5 more securing loops. Pull the yarn end through the fabric of the handle and fasten it firmly.
Finished attachment
The attachment should look dense and neat, without loose stretched loops.
Finish and variations
Finish
Care for the finished handle
The finished handle can be detached and washed at 40 degrees. Dry it flat.
Variations
For a basket or backpack
You can crochet the same type of handle for a basket or backpack if you choose matching T-shirt ribbon yarn.
The hook is too large for the T-shirt yarn you are using.
How to fix it
Use a smaller hook size: the smaller the hook, the denser the handle will be.
The fastening does not fit the carabiner
Problem
The loops do not sit well on the hardware or the attachment looks untidy.
Likely cause
Your carabiner width differs from the one used in the master class.
How to fix it
For a carabiner with a different width, increase or decrease the number of loops.
?FAQ
What yarn works best for a bag handle?
The author recommends T-shirt ribbon yarn, for example BISKVIT cut to show the knit right side. It is natural, does not stretch too much, and looks good in the finished handle.
What crochet hook should I use?
For the yarn described, use a 5-7 mm hook. If you want a firmer handle, choose a smaller hook size.
What if my carabiner has a different width?
The master class is calculated for a 3 cm wide carabiner. For different hardware, adjust the number of loops up or down.
Can the finished handle be washed?
Yes. Detach the handle and wash it at 40 degrees, then dry it flat.
Your project
Log in to track your project, attach photos, and publish your result into the shared feed.

 BeginnerFree