A step-by-step frog hat tutorial: materials, taking measurements, crocheting the crown top-down, calculating the crown size by wedge or gauge, the plain lower section without increases, eyes, pupils, assembling the face, and a separate knitting pattern for the frog headband.
BeginnerFree
Translated
Things you will learn
For beginners, the source recommends a simple single crochet hat worked top-down.
Size is checked using two measurements: head circumference and hat depth; the finished hat is usually 2-4 cm smaller than the actual head circumference.
The crown starts with a magic ring and 6 single crochet stitches, then increases are spread across 6 sectors.
The crown size can be calculated either by wedge length or by gauge and stitch count.
The photo collection of different frog hats in the source is meant as style inspiration, not as separate step-by-step instructions.
What You'll Make
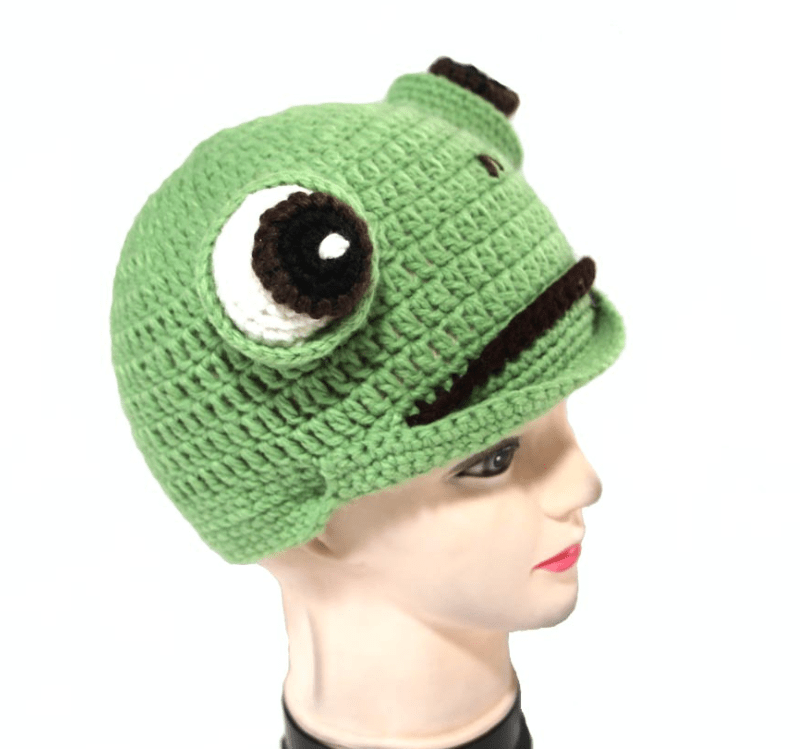
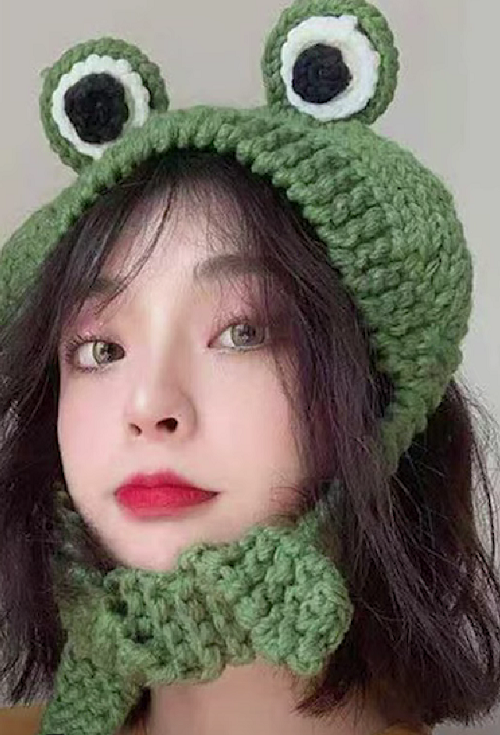
The main result is a green or muted-green crochet frog hat with no brim and no ear flaps. You can leave it with just the eyes or add blush spots, a tongue, and an embroidered mouth. The source also includes a frog headband and a few photos of other models from the internet as ideas for your own adaptation.
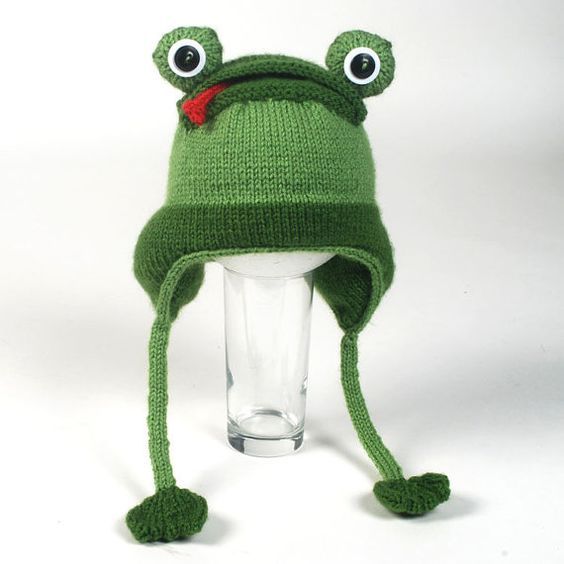
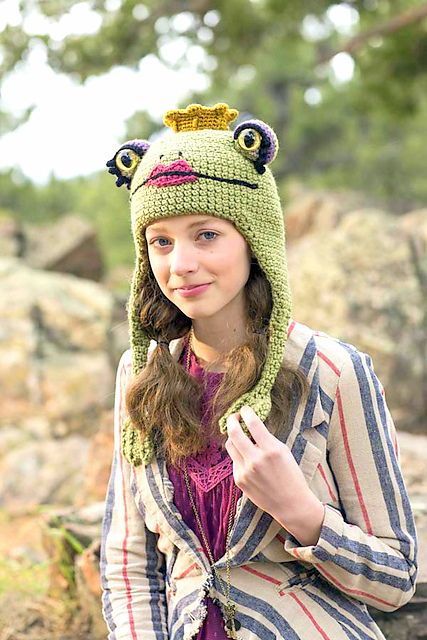
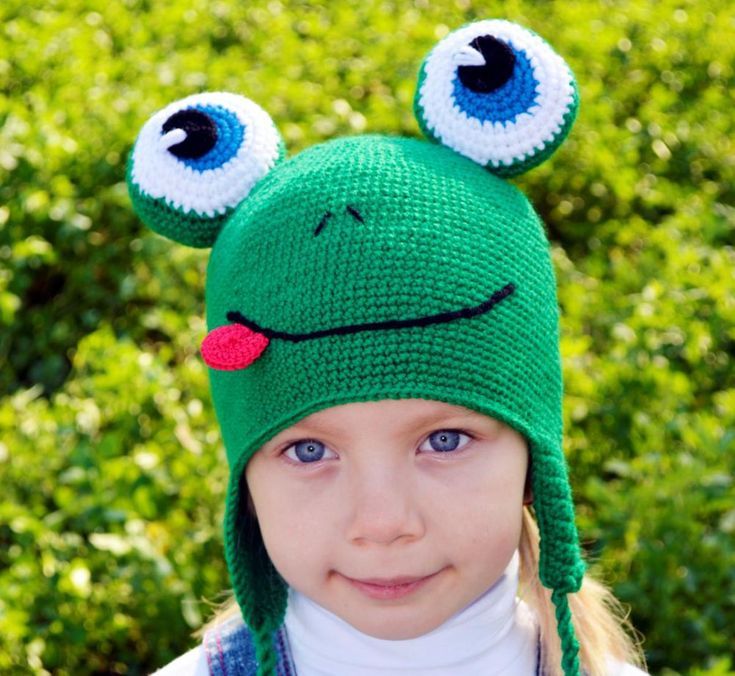
Color options for the hat and headband.Photo from the source's model collection.A children's model as an adaptation idea.A version with large dimensional eyes.A face version with a large mouth.
Materials and tools
Materials
Main color yarn, 1 skein 100 g, Green or another suitable shade: khaki, greenish-brown, or fallen-leaf color.
Thread for the eyes, pupils, and blush, scraps, You'll need green, white, black, red, or orange thread; small spools of darning thread or leftover yarn suited to your hook size will work.
Polyester stuffing for dimensional eyes, Only needed for the dimensional-eye version on the headband.
Tools
Crochet hook, Choose the size based on your thread thickness and the yarn label recommendations.
Large-eye needle, A blunt-tip yarn needle works best for sewing on the pieces.
Stitch markers, Needed for the last stitch of the round and for the 6 crown sectors.
Tape measure, For head circumference and hat depth measurements and for checking the crown calculation.
Knitting needles for the headband, Only needed for the frog headband version; the source doesn't specify a size, so choose one to suit your yarn.
Files and resources
Video tutorial: frog hat with earsThe source links a video for anyone who wants the frog-hat-with-ears version; the written tutorial below doesn't repeat the video row by row.Video tutorial: frog hat with ears
Preparation
Choose your format
If you're just learning to crochet, start with the simple single crochet hat. Treat the frog headband and the ear versions as options to try after the basic hat.
Take your head circumference and hat depth measurements
Measure head circumference with a tape measure across the forehead, through the middle of the ears, and around the back of the head. Hat depth is the distance from the crown to the bottom edge of the hat.
Account for stretch
Actual head circumference is 2-4 cm larger than the finished hat size. The exact difference depends on your gauge and the stretch of the fabric.
Measurements and the Hat Crown
The hat is worked top-down, which makes it easier to try on as you go and stop once the crown has reached the right size.
Start the crown with 6 stitches
Make a magic ring, work 6 single crochet stitches into it, and join them into a circle. Mark the last stitch with a marker.
Crown shape
The source aims for a slightly oval crown shape, which is why the increases are spread across sectors from here on.
Work the first rounds with increases
Round 2: work 2 single crochet stitches into each stitch. Round 3: increase every other stitch. Round 4: work the same as round 3. Round 5: increase in every 3rd stitch. Rounds 6-8: work the same as round 5.
Divide the crown into 6 sectors
After the first rounds, divide the stitch count by 6 and mark the sectors. From here, work further increases in each of the 6 sectors until you reach the stitch count or crown size you need.
What to check
Increases need to be spaced evenly across all sectors, or the crown may end up skewed.
Calculating the Crown Size
The source gives two ways to calculate this: by wedge size, and by stitch count using gauge.
Method 1: measure a wedge
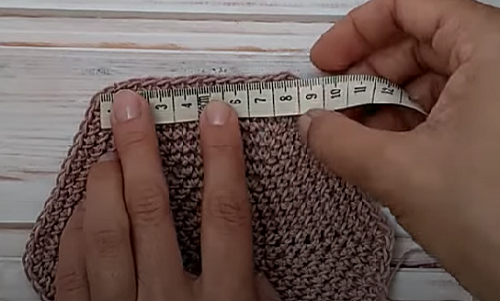
Measure the size of one wedge and multiply by 6. In the example, the wedge is 8 cm: 8 x 6 = 48 cm. Allowing for stretch, this hat would fit a head circumference of 48-52 cm.
Calculating the crown size from the size of one wedge.
Method 2: count stitches and gauge
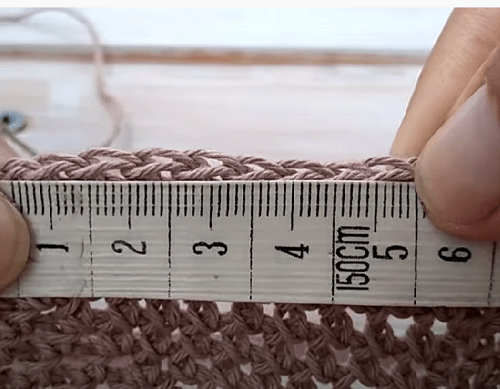
Measure the length of the wedge and calculate the gauge. In the example, 10 stitches fit into 5 cm, which is 2 stitches per cm.
Calculating using gauge.
Compare the calculation with your current stitch count
Multiply your gauge by head circumference: 2 x 52 = 104 stitches. If each of the 6 wedges has 16 stitches, that's 96 stitches total. That means you need to work 1-2 more rounds for the hat to fit better.
Don't treat this example as a universal size
The numbers 48-52 cm, 96, and 104 stitches are given in the source as a calculation example, not as a ready-made size chart.
Hat Body
Once the crown has reached the right size, the increases stop.
Work the main section without increases
Keep working in single crochet with no increases until you reach the height given by your hat depth measurement. Try the hat on as you go, since this pattern is worked top-down.
Fasten off
Once the height matches your hat depth measurement and you're happy with the fit, fasten off all stitches. Then move on to the eyes and face.
Eyes and Face
The eyes are made separately and sewn onto the finished hat. Extra face details can be added if you'd like.
Crochet two green eye bases
Using green thread, crochet 2 circles of 8 rounds with evenly spaced increases. Check by holding them against the hat whether the eyes are big enough, and add more rounds if needed.
Crochet the pupils
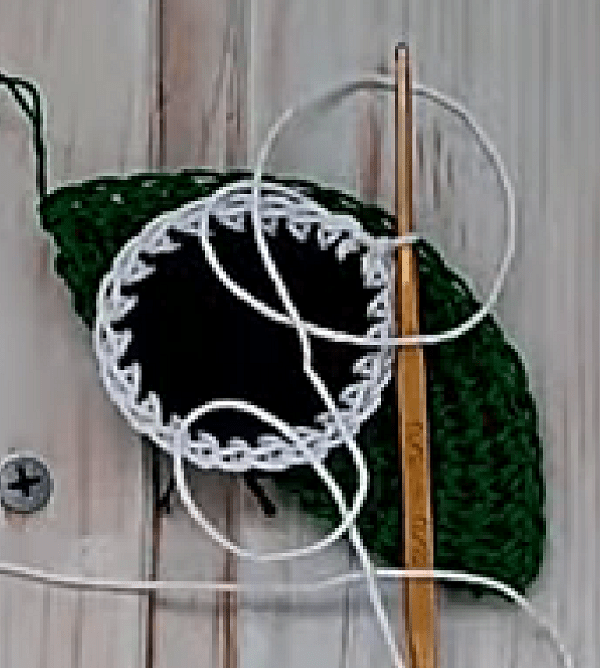
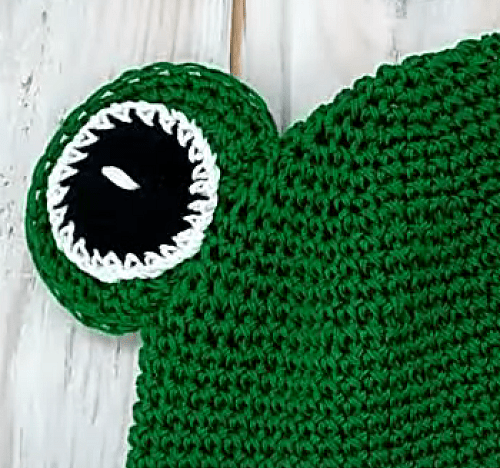
For each eye, crochet a smaller black circle and work 1 round around it in white thread.
The pupil is crocheted as a black circle edged with a round of white.
Fold and edge the green eye pieces
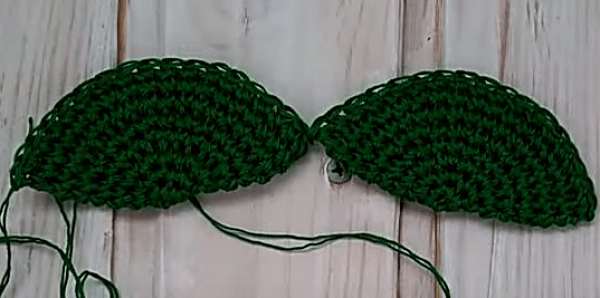
Fold each green piece in half and work single crochet along the bottom edge to give it a neater shape.
Green eye bases before shaping.
Sew the eyes onto the hat
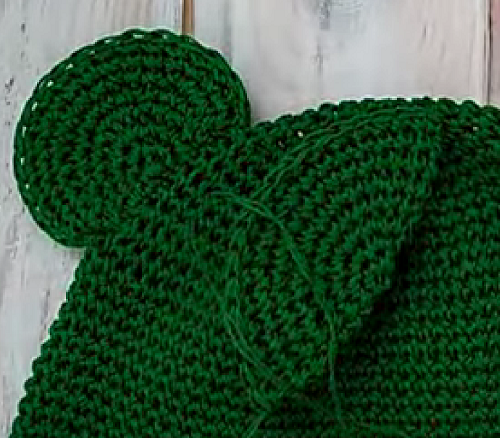
Measure 7 cm out from the center of the crown in each direction and sew the eyes onto the hat. Use a blunt-tip yarn needle so you don't split the yarn.
The eye is sewn on with a measured offset from the crown center.
Symmetry
Before sewing them on for good, pin both pieces in place and check the distance from the crown center to each eye.
Add the pupils and highlights
Sew a pupil onto each eye and embroider a highlight on it with white thread.
The white highlight brings the pupil to life.
Add blush, a tongue, and a mouth
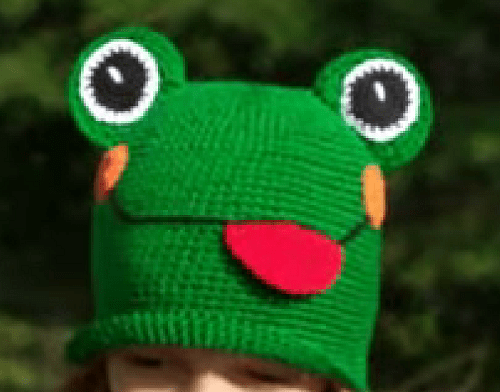
You can stop here, or crochet blush spots from two flat red circles and a tongue shaped like a half-circle. Sew the pieces onto the hat and embroider the mouth with black thread.
A face version with blush, a tongue, and an embroidered mouth.
Knitted Frog Headband
This is a separate style of headwear from the source. The headband is knitted sideways starting from the ties, and the eyes can be crocheted the same way as for the hat.
Start with a tie
Cast on 8 stitches and work in garter stitch for 20 cm.
A separate headwear option from the source.
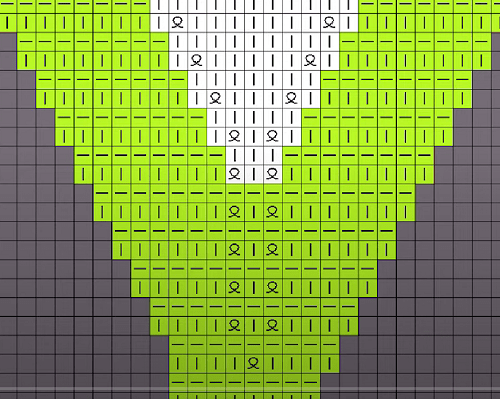
Widen the headband following the chart
From here, work increases: 4 stitches in garter stitch, 1 center knit stitch, 4 stitches in garter stitch. Increase following the chart; the source specifies 17 increases in total.
Chart for widening the center section of the headband.
Knit the middle section and work the decreases
After widening, knit straight while keeping the pattern: the edges stay in garter stitch, the center in stockinette stitch. Knit to the length you need, then work the decreases as a mirror image and finish with the second tie.
Make the eyes for the headband
You can crochet the eyes the same way as for the hat: a green base with a black-and-white pupil. For a dimensional version, crochet 2 green circles of the same size, work 3 rounds without increases around the perimeter of one circle, add stuffing, and sew on the second half.
Finish and variations
Finish
Check the fit
The hat should cover the depth given by your hat depth measurement, without being looser than the calculated size. For the headband, check that the ties tie comfortably and that the widened section covers the ears.
Secure the decorative pieces
The eyes, pupils, blush, and tongue need to be sewn on securely. If the accessory is for a child, check all the sewn-on pieces especially carefully.
Variations
Not just bright green
The source suggests using khaki, greenish-brown, or fallen-leaf color if you want a more subdued, teen-friendly version.
Frog hat with ears
For the ear version, the source provides a separate video tutorial. This text doesn't spell it out row by row, to avoid inventing details that aren't in the video.
Reference photos from the source
The last photos in this article are an internet collection of ideas: a hat with a brim, a children's hat with ties, large dimensional eyes, and different face variations. Treat these as visual references, not as ready-made instructions.
An alternative to cat ears
In the discussion, one commenter notes that frog hats feel like a fresh alternative to cat ears.
The finished hat won't stay on, or it presses too tightly.
Likely cause
Head circumference and hat depth were measured inaccurately, or the 2-4 cm difference between head circumference and finished hat size wasn't accounted for.
How to fix it
Remeasure head circumference across the forehead, through the middle of the ears, and around the back of the head, and hat depth from the crown to the bottom edge. When calculating the crown, factor in the gauge and stretch of your specific yarn.
The crown ended up skewed
Problem
The crown doesn't look even; increases are bunching up on one side.
Likely cause
Increases weren't spread across the 6 sectors, or the markers were moved inaccurately.
How to fix it
After the first rounds, divide the stitches into 6 sectors and work further increases in each sector. Use markers to mark the sectors, not just the start of the round.
The calculation shows you're short on stitches
Problem
The gauge calculation gives more stitches than the current crown has.
Likely cause
The crown hasn't yet reached the size needed for your chosen head circumference.
How to fix it
Compare your current stitch count with the calculation. As in the source's example: if you need 104 stitches and have 96, work 1-2 more rounds with increases.
The eyes are uneven
Problem
One eye sits higher or closer to the center than the other.
Likely cause
The pieces were sewn on without measuring out from the center of the crown first.
How to fix it
Mark the center of the crown and measure 7 cm out in each direction. Before sewing for good, pin or baste both eyes in place and check the symmetry.
The headband loses its shape against the chart
Problem
The edges and center section blend together, and the widening comes out uneven.
Likely cause
The garter-stitch edge stitches and the center knit-stitch section weren't separated with markers.
How to fix it
Keep the structure of 4 garter stitches - center knit-stitch section - 4 garter stitches. Count the increases from the chart, then mirror them for the decreases.
The design looks too childish
Problem
The finished accessory doesn't suit a teen or adult look.
Likely cause
The color is too bright, the face is too large, or there are too many decorative details.
How to fix it
Use khaki, greenish-brown, or another muted shade. You can leave just the eyes without the blush and tongue, or choose the headband instead of the full hat.
?FAQ
Is a frog hat suitable for a beginner?
Yes, if you go with the simple single crochet version. Save the more complex versions with ears or dimensional details for after you've made the basic hat.
What measurements do I need for the hat?
You need head circumference and hat depth. Measure head circumference across the forehead, through the middle of the ears, and around the back of the head; measure hat depth from the crown to the bottom edge.
Why is the hat size smaller than head circumference?
Crocheted fabric stretches. The source gives a difference of 2-4 cm between actual head circumference and the finished hat size; the exact amount depends on gauge and elasticity.
How do I calculate the crown size?
You can measure one wedge and multiply it by 6, or calculate using gauge: find how many stitches fit in 1 cm, then multiply that gauge by your target head circumference. If you're short on stitches, work 1-2 more rounds with increases.
How do I know if the eyes are big enough?
Crochet the green circles with evenly spaced increases and hold them up against the hat. The source suggests 8 rounds, but you can add more once you've tried the piece against the hat.
Can I make dimensional eyes?
Yes. For the headband, the source suggests crocheting two green circles, working 3 rounds without increases around the perimeter of one, adding stuffing, and sewing on the second half. The pupil is then sewn onto the finished eye.
How is the frog headband different from the hat?
The headband is knitted sideways starting from the ties: first 8 stitches and 20 cm of garter stitch, then widening following the chart, a straight section, mirrored decreases, and the second tie. The eyes can be crocheted the same way as for the hat.
Where's the pattern for the hat with ears?
The source links a separate YouTube tutorial for the frog hat with ears. Treat this version as a video resource rather than a written pattern to follow without watching it.
Your project
Log in to track your project, attach photos, and publish your result into the shared feed.

 BeginnerFree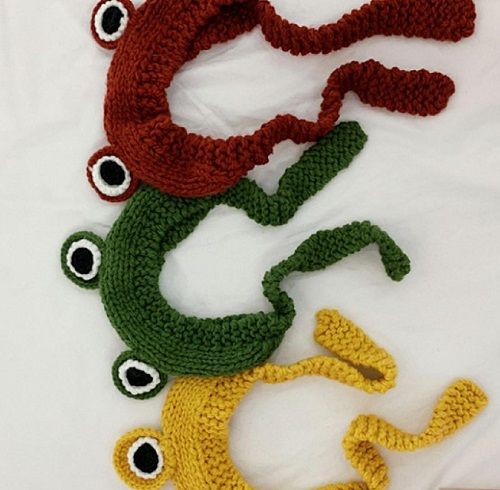


Fun hats :) cat ears were getting a little old anyway.