Candy Christmas tree on a bottle: DIY New Year bouquet
How to make a candy Christmas tree on a bottle: choose heavy 300 g/m² cardboard, shape the cone around the bottle, glue 2–3 rounds of tinsel, attach candy in rows, then add ornaments, small bows, beads, and a large bow.
Beginner2 hrFree
Translated
Things you will learn
The cardboard piece has no universal size: the cone is fitted around the chosen bottle.
The cone top should sit close to the neck, while the tree should still slide on and off freely.
The bottom is covered with 2–3 rounds of tinsel, then candy rows and tinsel rows alternate up to the top.
For each candy, one wrapper edge is glued to the candy itself, and the other wrapper edge attaches it to the tree.
The project takes up to 2 hours if you work slowly; with practice, the author made similar simple bouquets in 1–1.5 hours.
What you will make
The result is a removable candy tree: the bottle sits inside, and the outside shows tinsel, candy, small ornaments, beads, gold ribbon, and a large top bow.
Materials and tools
Materials
Bottle, 1 piece, Used to fit the cone; the source says almost any bottle can be placed inside this tree.
Heavy cardboard, 300 g/m², This exact density is stated in the source.
Candy, The amount depends on the cone size and row density.
Christmas tinsel, Covers the bottom and the gaps between candy rows.
Small Christmas ornaments, Attached over the tinsel.
Beads, Added all over the tree near the end.
Gold ribbon, For small bows and a garland effect.
Large bow, 1 piece, Final decoration at the top.
Tools
Scissors, For cutting the cardboard piece and ribbon.
Hot glue, The author chose it because it makes the work faster.
Tape or stapler, Used to temporarily fix the cone size on the bottle before gluing.
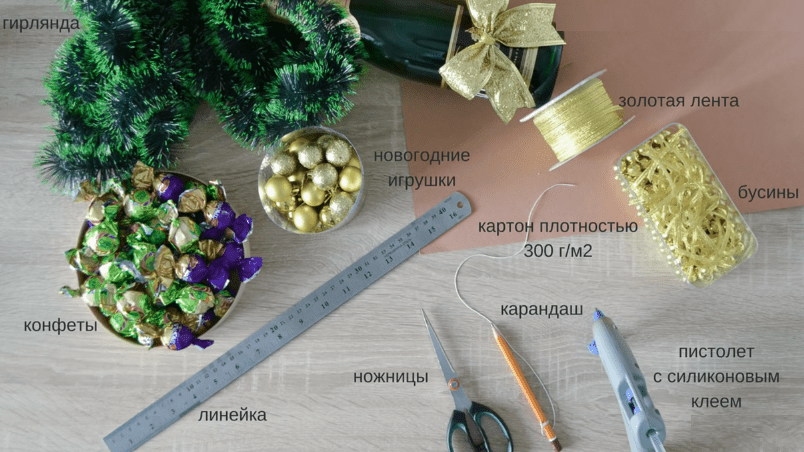
Ruler and pencil, Helpful for marking the cardboard piece; these tools are visible in the materials photo.
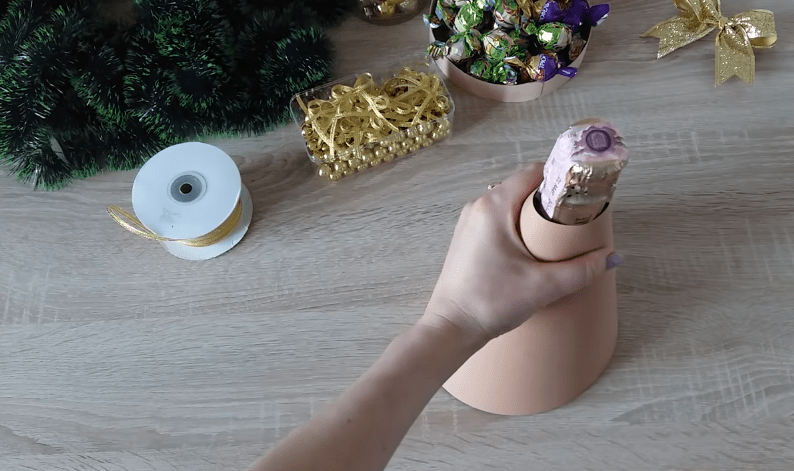
The cone is fitted directly on the bottle: the top should sit close to the neck, but the tree should still slide on and off freely.
Sort the candy by color
In the source, the author spaces the candy evenly and uses one color for each round. This is optional, but it makes the pattern easier to control.
Keep a small candy reserve
The discussion jokingly notes that some candy is easy to eat before assembly. If you are making the gift at home with family, a reserve can genuinely help.
Bottle cone base
First make the cardboard cone that will slip over the bottle.
Prepare the materials
Lay out heavy 300 g/m² cardboard, scissors, hot glue, candy, small Christmas ornaments, tinsel, beads, gold ribbon, and a large bow.
Cardboard, candy, tinsel, ornaments, ribbon, beads, and hot glue.
Cut the cardboard piece
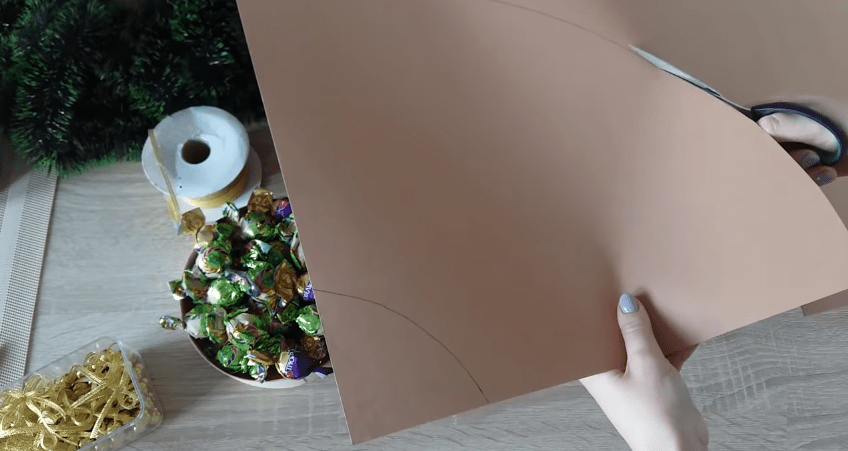
Cut a cardboard piece like the one shown in the photo. Choose the size yourself: the blank should fold into a cone.
Choose the piece size so it can be folded into a cone.
Fit the cone on the bottle
Wrap the cardboard around the bottle so the top sits close to the neck, but the cone still slides freely. Fix the size temporarily with tape or a stapler.
The top should sit close to the neck, while the cone still slides freely.
Glue the cone edges
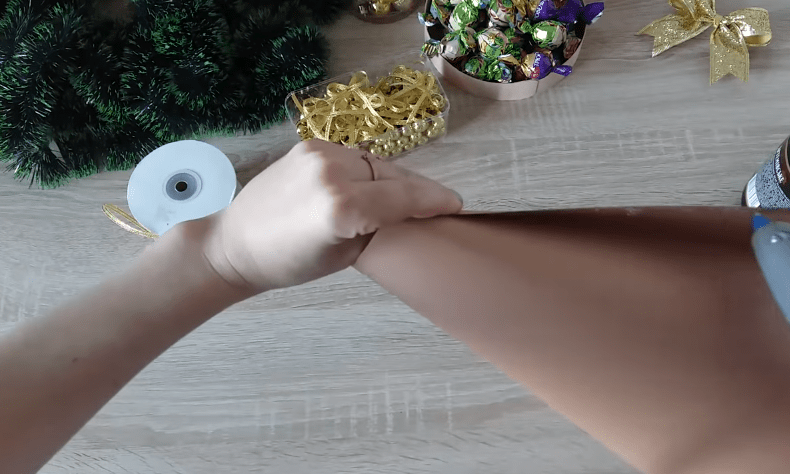
Glue the edges with hot glue. The source notes that another glue, stitching, or tying can also be used, but hot glue speeds up the work.
After fitting, glue the base edges together.
Tinsel and candy
After assembling the cone, cover the base with tinsel and start attaching candy in rounds.
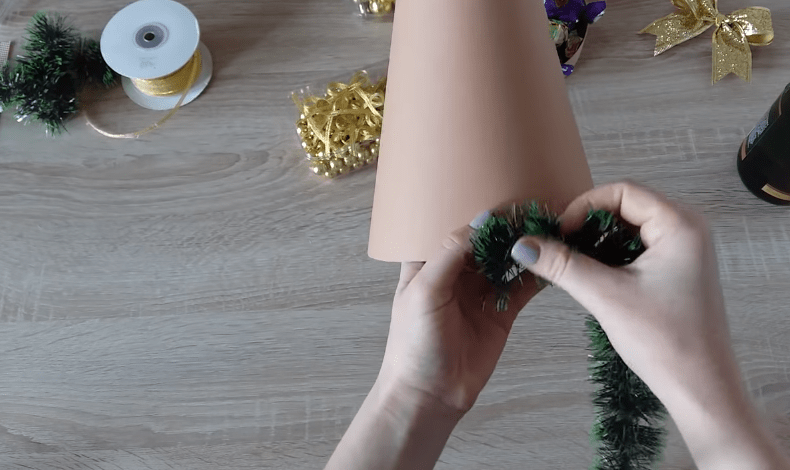
Glue tinsel around the bottom
Apply glue to the lower part of the cone and attach the tinsel. Make 2–3 rounds to cover the lower edge of the base.
Attach tinsel around the lower cone edge.Cover the bottom with two or three tinsel rounds.
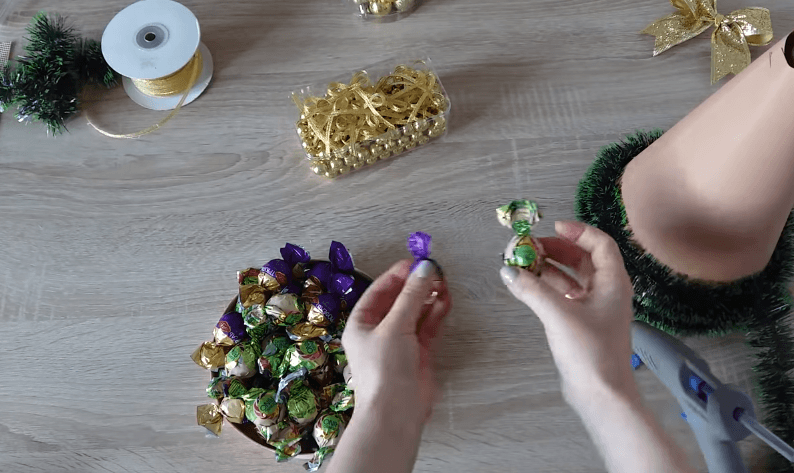
Prepare the candy for attaching
Glue one edge of the wrapper to the candy itself. The second wrapper edge will be used to attach the candy to the tree.
One wrapper edge is glued to the candy; the other is left for attaching.
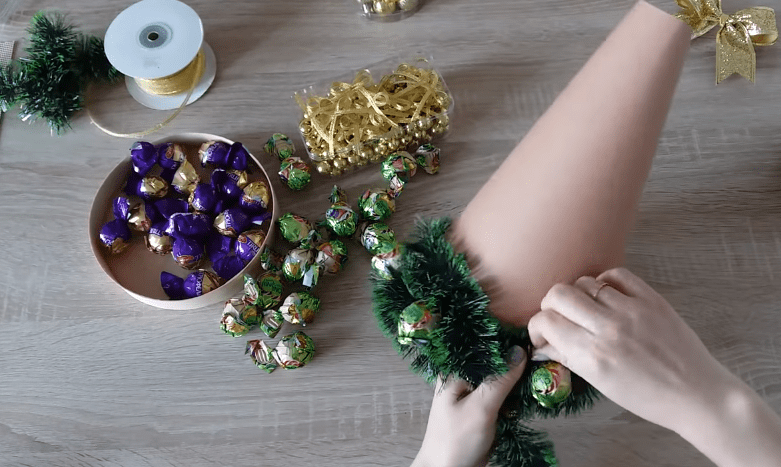
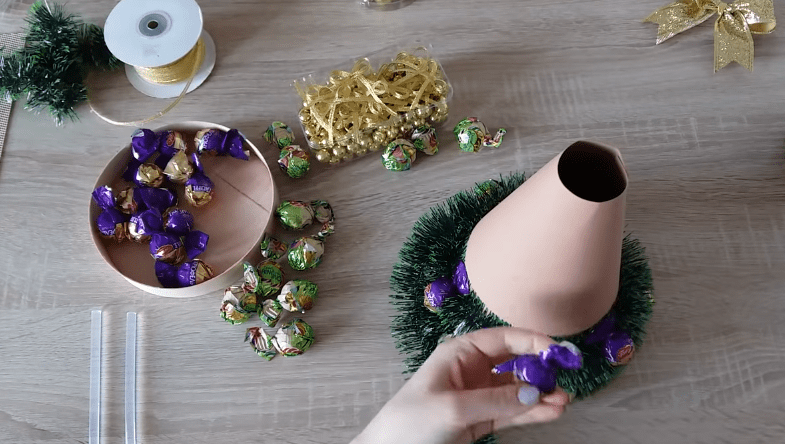
Glue the first candy round
Space the candy around the cone at roughly equal intervals. The author used one color for each round, but you can arrange the candy in your own pattern.
Space the candy around the cone at roughly equal intervals.
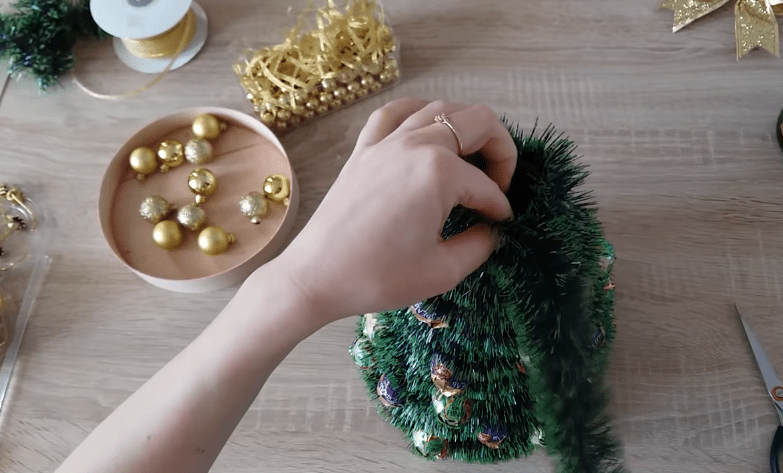
Alternate candy and tinsel to the top
Glue a candy row, then add a tinsel row above it along the wrapper edge. Repeat this up to the cone top.
After a candy row, glue tinsel above it.
Ornaments and final assembly
Once the cone is covered with tinsel and candy, add small festive decorations.
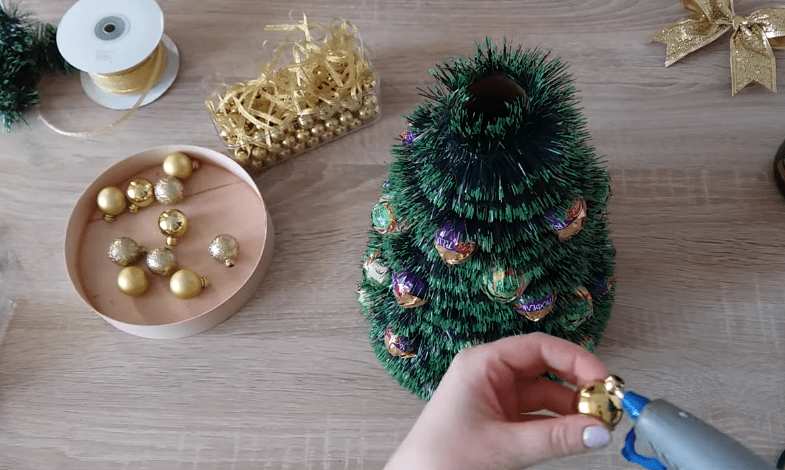
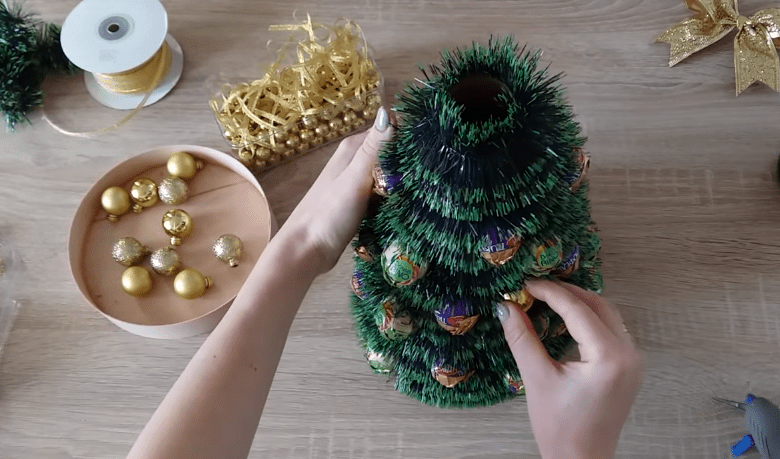
Glue on small ornaments
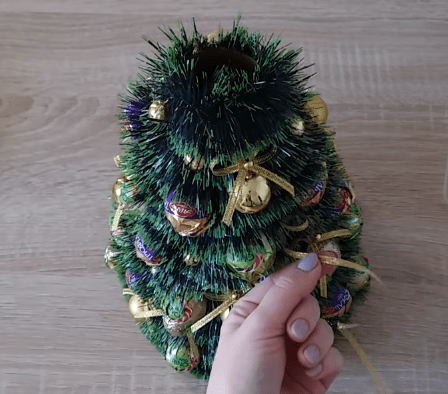
Glue small Christmas ornaments over the tinsel, distributing them across the visible side of the tree.
Ornaments are added over the tinsel.Small ornaments are distributed across the visible side of the tree.
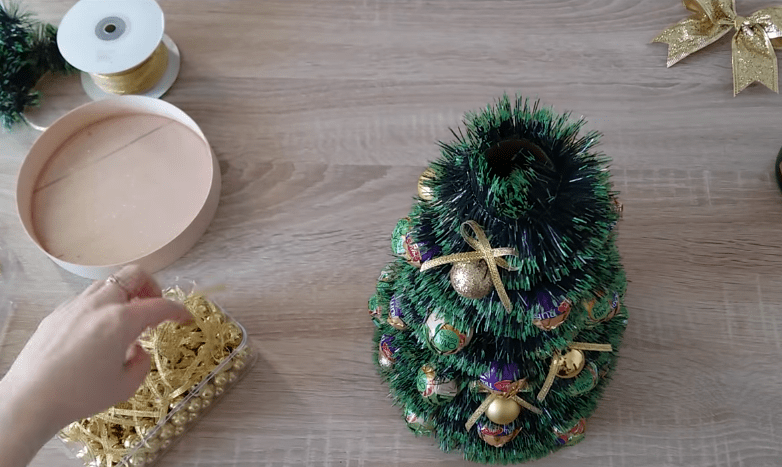
Add bows and ribbon garlands
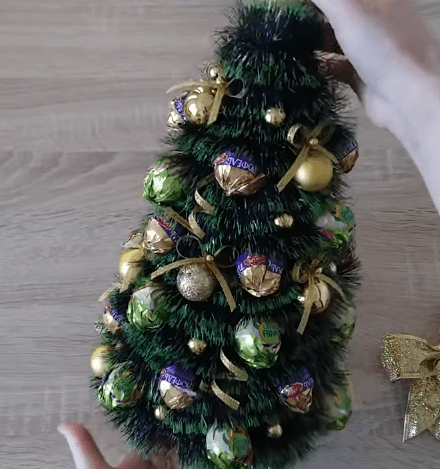
Make small bows from gold ribbon or use ready-made ones. Attach them to the ornaments, and use the same ribbon to imitate garlands.
Gold ribbon imitates a garland.Candy, ornaments, and ribbon decor are visible on the tree.
Glue on beads
Glue beads freely across the tree. You can add extra metallic garland if you like, though the author did not use it in this project.
Beads are attached freely across the tree.
Attach the large bow
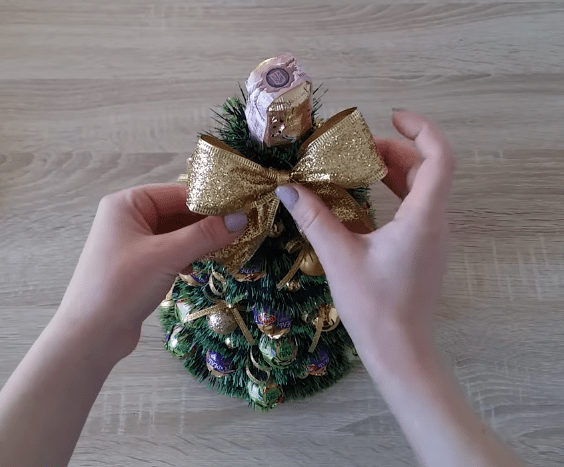
At the final stage, add the large bow and place the candy tree over the bottle.
The final decoration is a large bow at the top.
Finish and variations
Finish
Check the fit
The finished tree should slide onto the bottle without force and stand straight. If it tilts, check the lower tinsel edge and the distribution of the decoration.
Prepare it for gifting
The gift already looks finished after the large bow. If you need to hide the bottle completely, decorate the cork or neck separately.
Variations
Another bottle
The source explicitly says almost any bottle can be placed inside this tree. The key is to fit the cone on the exact bottle you plan to use.
Different candy pattern
You can repeat one color per round as the author did, or arrange the candy differently. This changes only the look, not the construction.
More sparkle
The author did not add extra metallic garland, but left it as an option. Use it lightly so it does not hide the candy and ornaments.
The cone catches on the bottle or does not pass the neck.
Likely cause
The size was fixed before fitting, or the cardboard was wrapped too tightly.
How to fix it
Before final gluing, wrap the cardboard around the bottle and check two things: the top sits close to the neck, and the cone slides freely.
The cone edge opens
Problem
The cardboard base opens along the seam.
Likely cause
The joint was not fixed well, or the glue does not hold heavy cardboard.
How to fix it
The source uses hot glue. If it does not suit your materials, use another glue, stitch, or tie the joint, but make sure the seam holds before decorating.
The candy rows look uneven
Problem
Candy gathers on one side, or the colors look chaotic.
Likely cause
The candy was not spaced at even intervals.
How to fix it
Attach the candy around the cone with roughly equal gaps. For a calmer pattern, repeat the author’s method: one color per round.
The bottle is too visible at the top
Problem
The neck or cork makes it obvious that there is a bottle inside.
Likely cause
The top decoration covers the tree but not the cork.
How to fix it
The large bow partly covers the top. The discussion also suggests decorating the cork separately so the tree looks more complete.
There is not enough candy for the top
Problem
Fewer candies remain for the upper rows than planned.
Likely cause
The amount depends on the cone size, and some candy can disappear before assembly.
How to fix it
The discussion gives a joking but practical tip: buy candy with a reserve, especially if the project is made at home with family.
?FAQ
How long does a candy Christmas tree take?
According to the source, the project takes no more than 2 hours if you work slowly and carefully. With practice, the author made similar simple bouquets in 1–1.5 hours.
What cardboard should I use for the base?
The source uses heavy 300 g/m² cardboard. It holds the cone shape and works as a base for tinsel and candy.
Do I need an exact cone template?
No exact size is given in the source. Cut the piece so it can fold into a cone, then fit it around the chosen bottle.
Can I replace hot glue?
Yes. The author says you can use another glue, stitch, or tie the joint. Hot glue was chosen because it makes the work faster.
How do I attach the candy securely?
Glue one wrapper edge to the candy itself, then use the other wrapper edge to attach the candy to the tree. After each candy row, add a tinsel row above it.
How can I make the bottle less visible?
Fit the cone so the top sits close to the neck, then add a large bow. The discussion also suggests decorating the cork.
Your project
Log in to track your project, attach photos, and publish your result into the shared feed.

 Beginner2 hrFree