Adult Knitted Helmet Hat: Balaclava With Neck Warmer
A step-by-step tutorial for an adult helmet hat: a 2x2-ribbed cuff, a contrast thread marking 62 stitches for the snood section, crown decreases, picking up stitches for the lower section, and a stretchy bind-off with a needle.
IntermediateFree
Translated
Things you will learn
The source's calculations are given for a 54-58 cm head circumference.
The main pattern is knit from 300 g of 100% merino Big Merino Drops on size 3.5 needles.
The lower section is worked from 62 stitches, marked ahead of time with a contrast thread.
For a closer-fitting balaclava, cast on 50-54 new stitches around the face opening instead of 58.
What you'll get
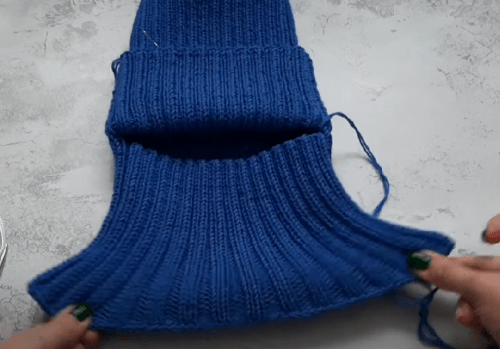
The finished helmet hat covers your head, your face along the opening, and your neck. The tall cuff blocks the wind, the top looks like a beanie, and the lower section works like a snood.
Materials and tools
Materials
Big Merino Drops yarn, 100% merino wool, 300 g, The original pattern uses a natural, soft, medium-twist wool: it's warm, stretchy, and gentle on sensitive skin.
Contrast-color thread, Needed to mark 62 stitches for knitting the lower snood section later.
Tools
Size 3.5 needles, The main needles for this pattern.
A needle half a size smaller, Used to pick up the 62 ribbing stitches for the lower section.
4 double-pointed needles, Handy once the stitch count drops during the crown decreases.
A marker for the start of the round, Placed in the first round.
A needle for binding off and securing the yarn, Needed for gathering the last 14 stitches and for the stretchy snood bind-off.
Files and resources
Video for the helmet hat patternThe original author's video; use it as a visual guide for knitting the balaclava.Video for the helmet hat pattern
Preparation
Check the size and fit
All the calculations in the source are for a 54-58 cm head circumference. If you want a shorter cuff, reduce the cuff's height rather than the stitch count, with no separate recalculation.
Knit the Cuff and Mark the Snood Stitches
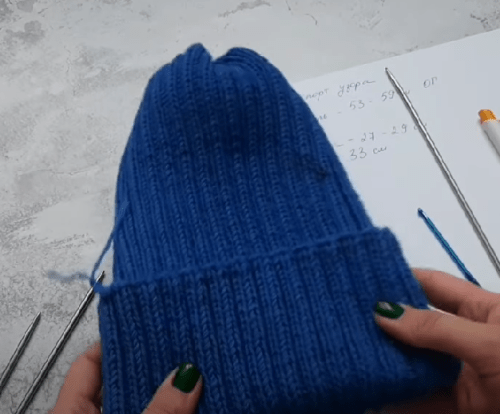
The work starts with a tall 2x2-ribbed cuff. A contrast thread immediately marks the section you'll later use to knit the lower part.
Get your yarn ready and cast on 120 stitches
For the original pattern, use 300 g of Big Merino Drops and size 3.5 needles. Cast on 120 stitches, knit the first round in 2x2 ribbing, and join the work into a round. Place a marker at the start of the round so you don't lose track.
The original pattern uses 300 g of 100% merino Big Merino Drops.
Check the round
Before continuing, make sure the cast-on round isn't twisted.
Knit 24 rounds with no increases
Knit 24 rounds of 2x2 ribbing with no increases or decreases. If you want a shorter cuff, you can reduce its height to your liking.
Thread the contrast thread through 62 stitches
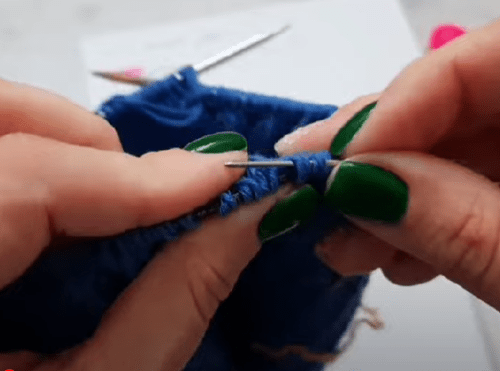
Without taking the stitches off the needle, thread a contrast-color thread through 62 stitches. This section will later become the base of the hat's lower snood section.
62 stitches are marked with a contrast thread so the lower section can be picked up later.
Don't take the stitches off
The contrast thread is just a marker and a temporary hold — not a bind-off for the round.
Knit the upper section up to 28 cm
Keep knitting with no increases or decreases up to the height you want. In the sample, the height before the crown starts is 28 cm.
Shape the Crown
The crown closes with decreases: first following the ribbing pattern, then in plain knit rounds, finishing with gathering the remaining stitches.
Work the first decrease round
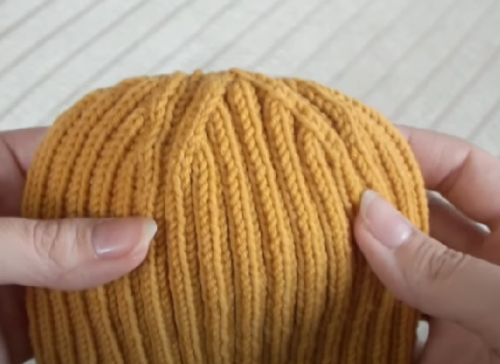
On the first decrease round, knit 1, then knit the 2nd knit stitch and 1 purl stitch together through the back loop. After that, knit 1 purl stitch and 1 knit stitch together through the front loop.
The first decrease round: some stitches are knit together through the back loop.The second decrease of the first round is worked knitwise through the front loop.
Keep the decrease direction
The source shows the back-loop and front-loop decreases separately, so that the top comes out looking neat.
Knit rounds 2-4 in knit stitch
Knit rounds two, three, and four entirely in knit stitch. This is a good point to switch to 4 double-pointed needles.
Close the crown on the last 14 stitches
On rounds 5 and 6, knit every stitch together in pairs through the front loop. When 14 stitches remain, cut the yarn, thread it onto a needle, pull it through all the stitches, and secure it on the wrong side.
After the decreases, the remaining stitches are gathered with yarn and secured on the wrong side.
Height of the finished top
The full height of the helmet hat's upper section in the source is 30-33 cm.
If you like, shape the crown in sections
For a different silhouette, you can split the top into 4, 5, or 6 sections with markers. After a marker, knit 1 and then knit 2 together with a left lean; before the next marker, knit 2 together with a right lean, then knit 1. If 2 purl stitches follow a marker, work them as given in the pattern, then knit them together as one knit stitch.
You can plan the crown in marked sections and change how often you decrease.
This is one crown option
For a tall, pointed shape, work the decreases every other round; for a rounder shape, work them every round.
Knit the Lower Snood Section
The lower section is picked up from the 62 stitches you marked earlier and closes around the face opening.
Pick up the 62 stitches with the smaller needle
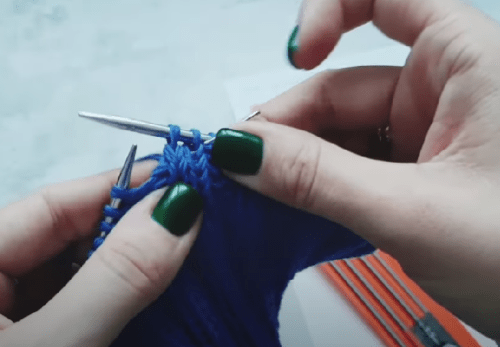
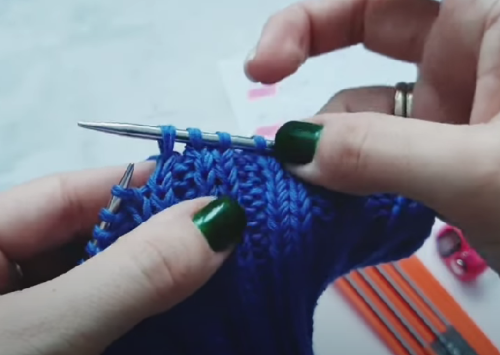
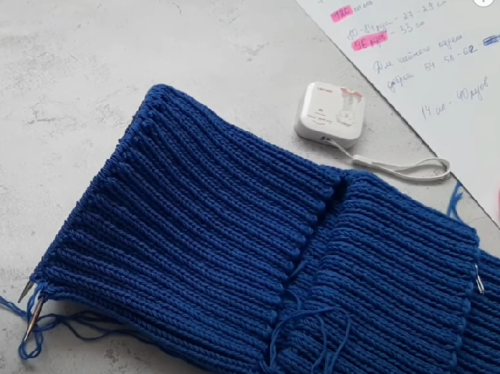
Using the needle a half size smaller, pick up the 62 ribbing stitches marked with the contrast thread. Once you've picked up the stitches, remove the contrast thread.
The stitches marked with the contrast thread are picked up to start the lower snood section.
Knit a round and cast on stitches around the face
Knit the first round following the 2x2 ribbing pattern. At the end of the round, cast on 58 new stitches. For a closer-fitting balaclava with a smaller face opening, cast on fewer stitches — 50-54 instead.
Fit around the face
The discussion noted that for city use and public transit, it's more practical to leave a wide-enough opening; a fully covered face suits an athletic version better.
Knit the snood to the length you want
Continue knitting in the round in the main pattern up to the length you want for the lower section. This part covers the neck and visually continues the helmet hat.
The lower section covers the neck and forms the opening around the face.
Bind off the stitches stretchily with a needle
So the edge doesn't pull tight against your face, cut a length of yarn about three times around the fabric's width and bind off all the stitches with a needle.
Don't bind off too tightly
A stiff edge stretches less and can press uncomfortably when you put the hat on.
Finish and variations
Finish
Final check
Check that the crown is secured on the wrong side, the snood's edge is bound off stretchily, the face opening doesn't pull too tight, and the tall cuff sits comfortably at its height.
Variations
1x1 ribbing
Instead of 2x2 ribbing, you can knit in 1x1 ribbing: that version fits closer to the head.
A pointed or a rounded crown
For a tall, pointed crown, work the decreases every other round. For a rounder shape, decrease every round.
A lower section in a different color
If you don't have enough yarn for the whole piece, you can knit the lower section in a different color yarn.
After 24 rounds, the cuff feels taller than you wanted.
Likely cause
The cuff height in the source is given as one version of the pattern, not a fixed requirement for everyone.
How to fix it
Reduce the number of cuff rounds to the height you want, while keeping the 2x2 ribbing worked in the round.
The face opening is too loose or too tight
Problem
The balaclava doesn't sit well around the face, or it's hard to wear a mask or spend time indoors in it.
Likely cause
The number of stitches cast on around the face doesn't match the fit you want.
How to fix it
For the basic version, cast on 58 stitches; for a closer-fitting one, use 50-54. If you want a more practical everyday fit, don't make the opening too narrow.
The crown is awkward to knit on circular needles
Problem
Once the stitch count drops after the decreases, circular needles get in the way.
Likely cause
The fabric is already narrowing toward the top.
How to fix it
After the decrease rounds, switch to 4 double-pointed needles, as the source suggests.
You want a different crown shape
Problem
The crown comes out less pointed or less round than you'd like.
Likely cause
How often you decrease affects the top's silhouette.
How to fix it
For a tall, pointed crown, decrease every other round; for a rounder one, decrease every round. You can also split the top into 4, 5, or 6 sections with markers.
There isn't enough yarn for the whole piece
Problem
You don't have enough main yarn for the lower section.
Likely cause
The original pattern uses 300 g, but the actual amount depends on the snood's length and the cuff's height.
How to fix it
Knit the lower section in a different color yarn: the source directly suggests this option if you run short on yarn.
?FAQ
What size is the helmet hat sized for?
The source's calculations are for a 54-58 cm head circumference. The full height of the upper section after closing the crown is 30-33 cm.
What yarn do I need, and how much?
The pattern uses 100% merino wool Big Merino Drops, with 300 g needed. The author notes the fabric's softness, warmth, and stretch, thanks to its medium twist.
How do I make the face opening smaller?
After picking up the 62 stitches, knit a round of 2x2 ribbing, and cast on 50-54 new stitches instead of 58. This makes the balaclava fit closer.
Should I make a balaclava with a fully covered face?
The discussion noted that a fully covered face suits athletes better — skiers and cyclists, for example. For public transit, shopping, or wearing a medical mask, it's more practical to leave a wider opening.
How do I bind off the bottom edge so it still stretches?
Cut a length of yarn about three times around the fabric's width and bind off the stitches with a needle. This kind of edge keeps its stretch better than a tight bind-off.
Your project
Log in to track your project, attach photos, and publish your result into the shared feed.
Balaclavas are at the peak of fashion right now! Your version is really nice — versatile. I wanted to knit one like the photo, with a slit.
But then I thought it wouldn't be all that comfortable — it gets hot on public transit or in a shop. And it's a hassle to fit a medical mask under it too. But yours is great!
Balaclavas are at the peak of fashion right now! Your version is really nice — versatile. I wanted to knit one like the photo, with a slit.
But then I thought it wouldn't be all that comfortable — it gets hot on public transit or in a shop. And it's a hassle to fit a medical mask under it too. But yours is great!
A balaclava with a fully closed face is more for athletes — skiers, cyclists. Though you could make the slit a bit wider in this style too, to make it more practical.

 IntermediateFree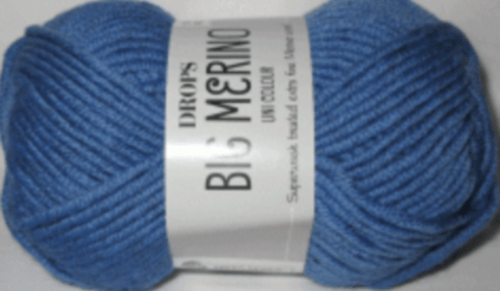


Balaclavas are at the peak of fashion right now! Your version is really nice — versatile. I wanted to knit one like the photo, with a slit.
But then I thought it wouldn't be all that comfortable — it gets hot on public transit or in a shop. And it's a hassle to fit a medical mask under it too. But yours is great!